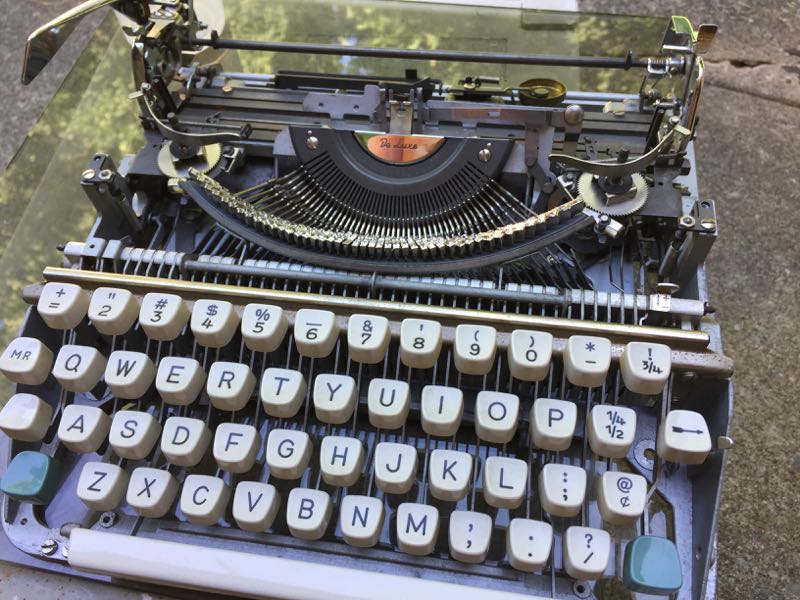
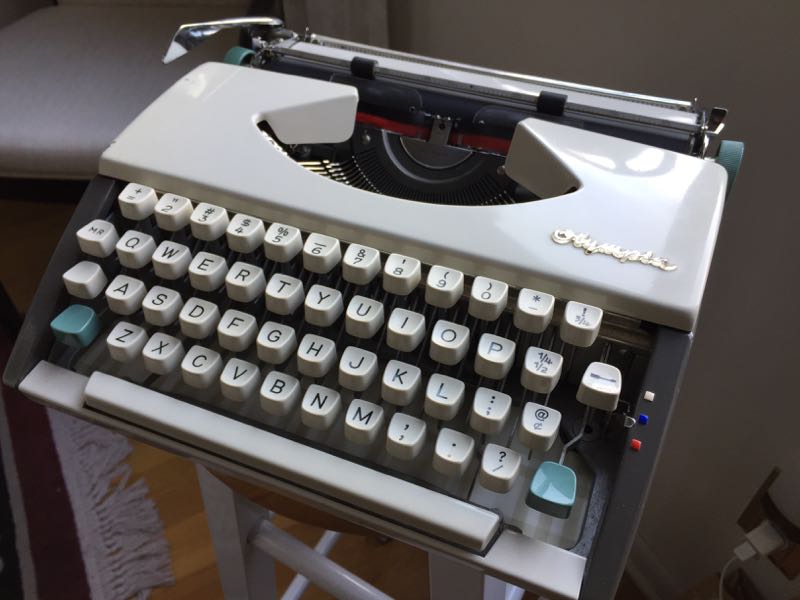
Okay, so I made another mistake. I got this “Mint Condition” Olympia off of Ebay in It was from Florida and I’m almost positive whoever owned it liked to type at the beach. I also think it was kept in a humid location. The body had rust and pitting. Note that the Splendid version is basically the same machine.
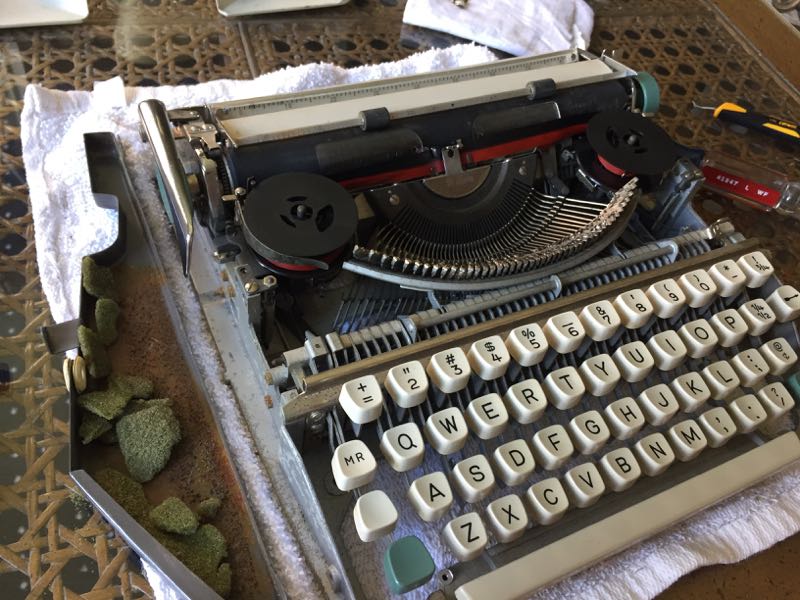
It typed poorly when I got it, it was out of adjustment and was a mess. I think there was sand in it too. Above you can see the rotted foam and the surface rust. The foam disintegrated when I touched it.
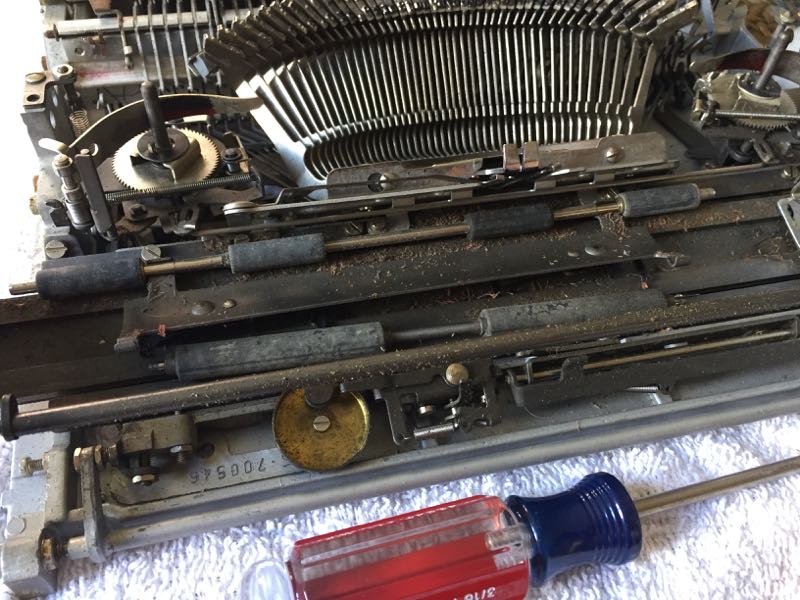
Lots of eraser shavings and oxidized feed rollers
The feed rollers and platen were also a mess. I cleaned them with Bar Keepers Friend and water. Soft scrub also works.
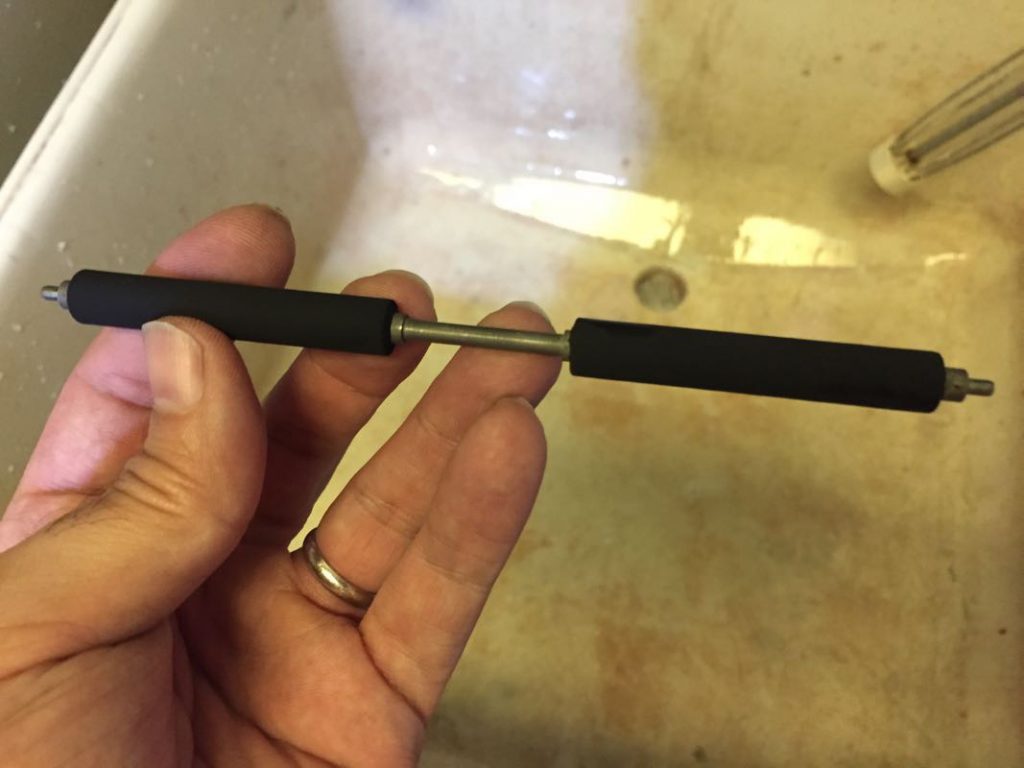
Here is the feed roller after cleaning, it was still soft.
Here it’s outside being cleaned with Mineral Spirits, and carb and choke cleaner. I took one trip to the eye doctor when the carb and choke cleaner bounced and sprayed into both my eyes. I was fine, but wear eye protection.
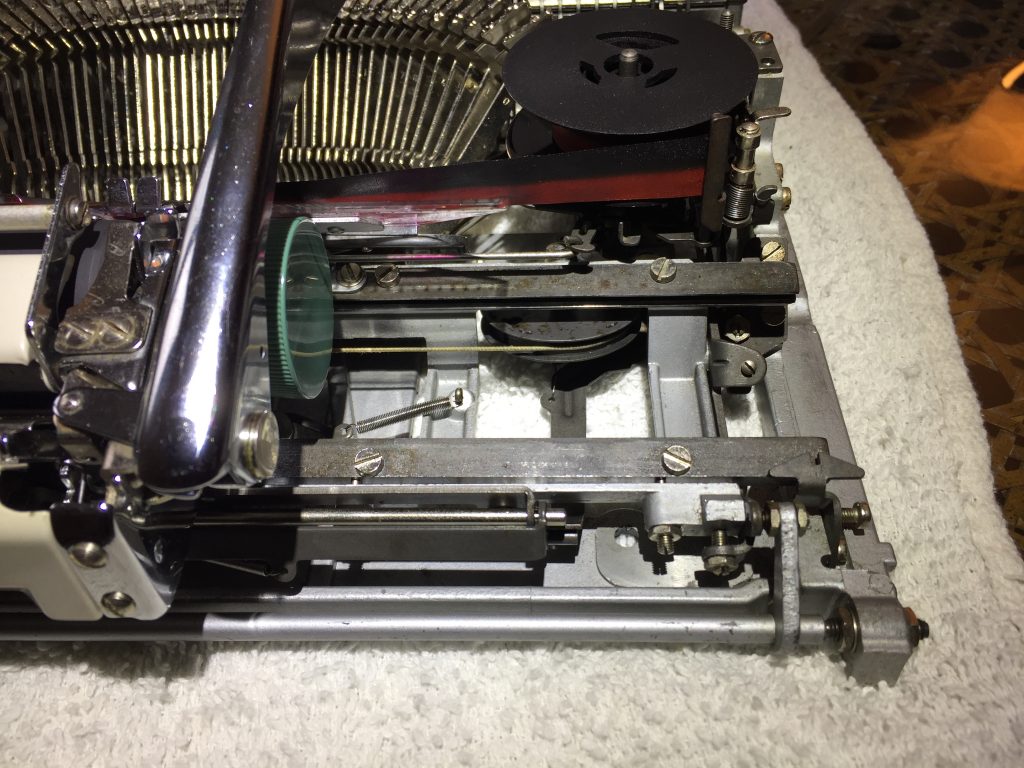
One of the issue was when returning the carriage at the end of a line. It felt kinda sticky, not smooth. It moved in fits and spurts instead of smoothly. Here is a link to a video that shows what it was doing. I didn’t want to, but I had to remove the carriage to get access to the main gear. (see above). I’ve heard horror stories of spurs and bearings falling all over the place when people have removed carriages. The bearings on this are neatly captured in these brass bars. Technically, I didn’t need to remove the carriage, some oil in the right place would have fixed it. But I had to take it apart more than I would have liked in order to learn how it worked.
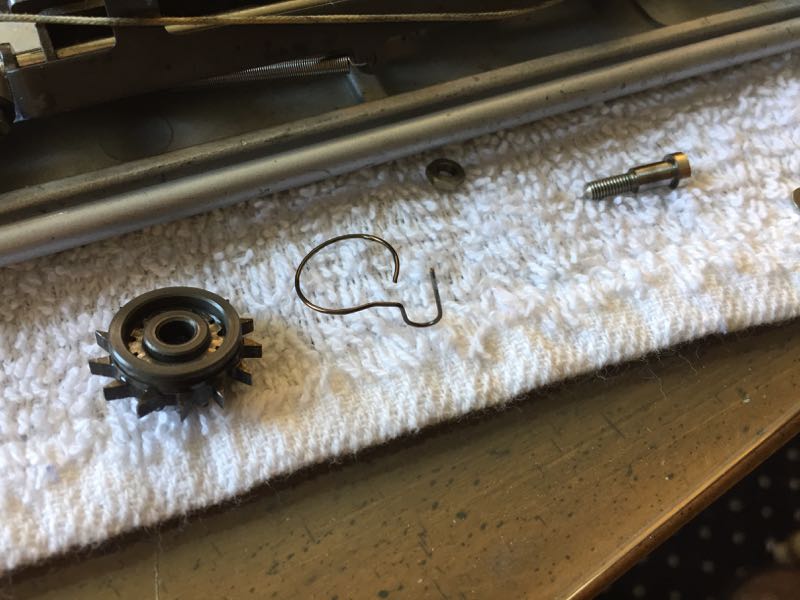
Here is the gear and the culprit, the wire that goes around the gear. I had failed to lubricate it.
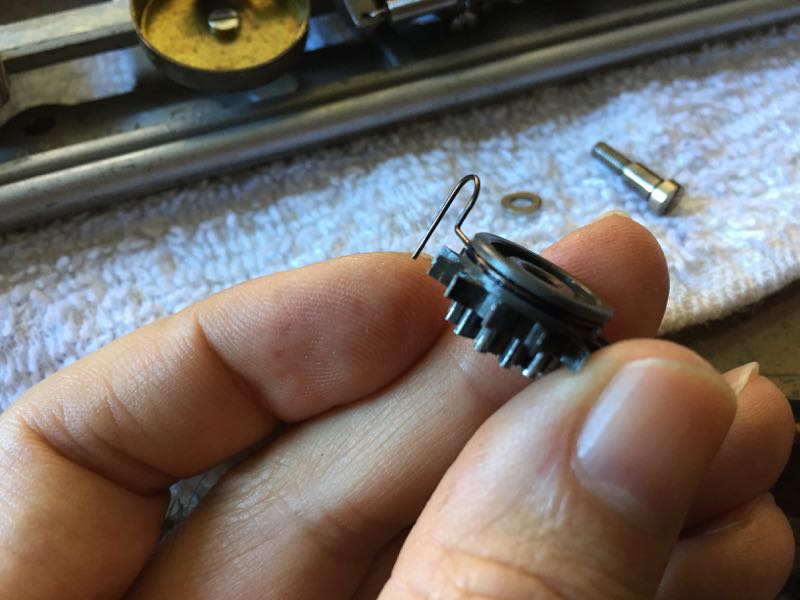
Here you can see how the wire attaches to the gear. I put a combo of grease and light oil in the groove. I actually think it made the mechanism too smooth. Because it relies on a certain amount of friction to engage the carriage release lever.
In this video you can see how the friction of the wire around the gear pushes the release. I think it’s a brilliant design.
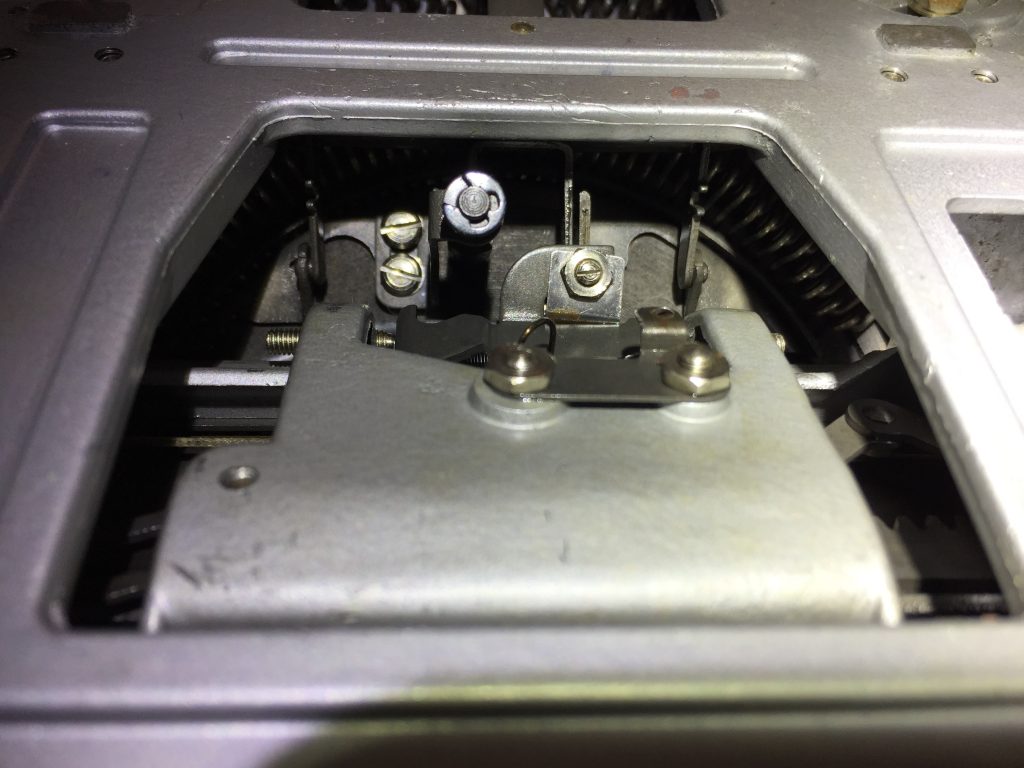
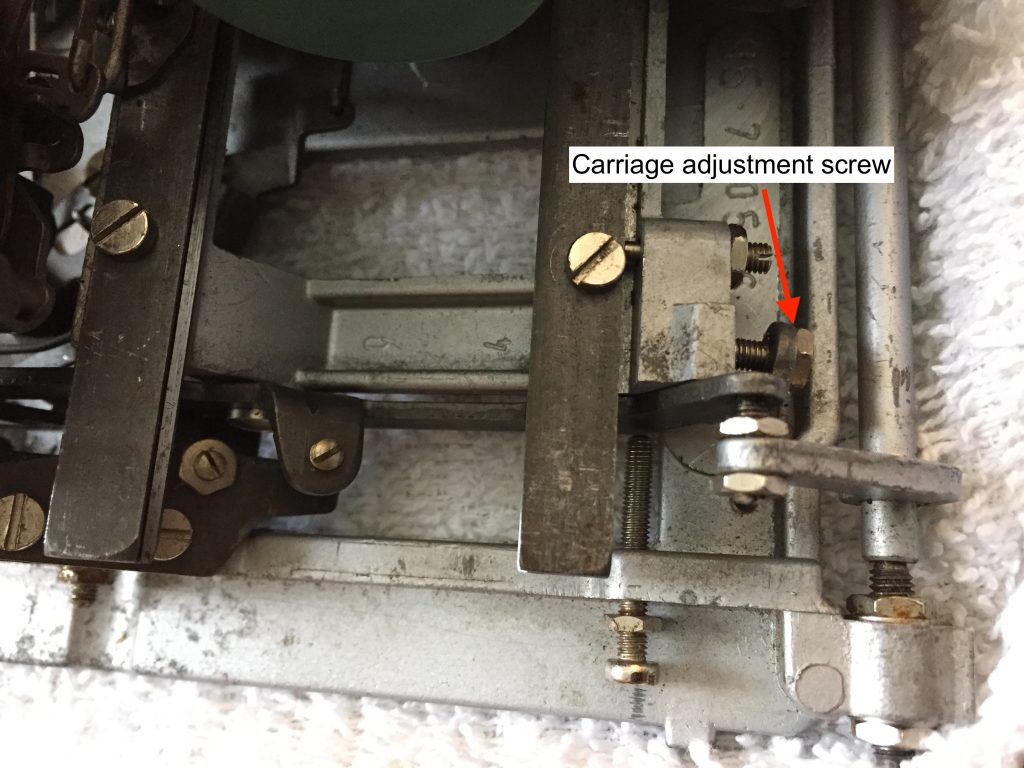
Another issue I didn’t discover until late was the escapement trigger. It adjusts the distance the typebar is from the platen before it triggers escapement. Escapement is just the carriage moving to the next character. It’s the slotted screw in the photo with the hex nut around it. The escapement was too far, it triggered maybe a .5 inch before the typebar hit the platen. I forget the proper distance, but I needed it to trigger closer to the platen. Maybe an 1/4″ to 1/8″. The problem was, when it was too far, the keys didn’t want to make contact with the platen. I had to hit some keys very hard. This photo is the typewriter upside down.
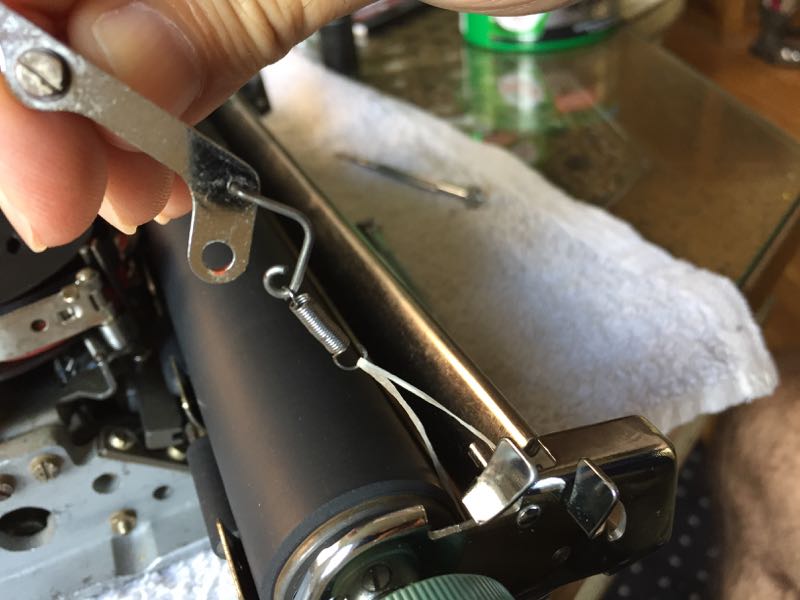
Re-attaching the paper bail spring was a huge pain, until I figured out a trick. I tied a piece of dental floss to the end of the spring. Threaded the floss through the machine and pulled on the floss, stretched the spring and hooked it over the thing.
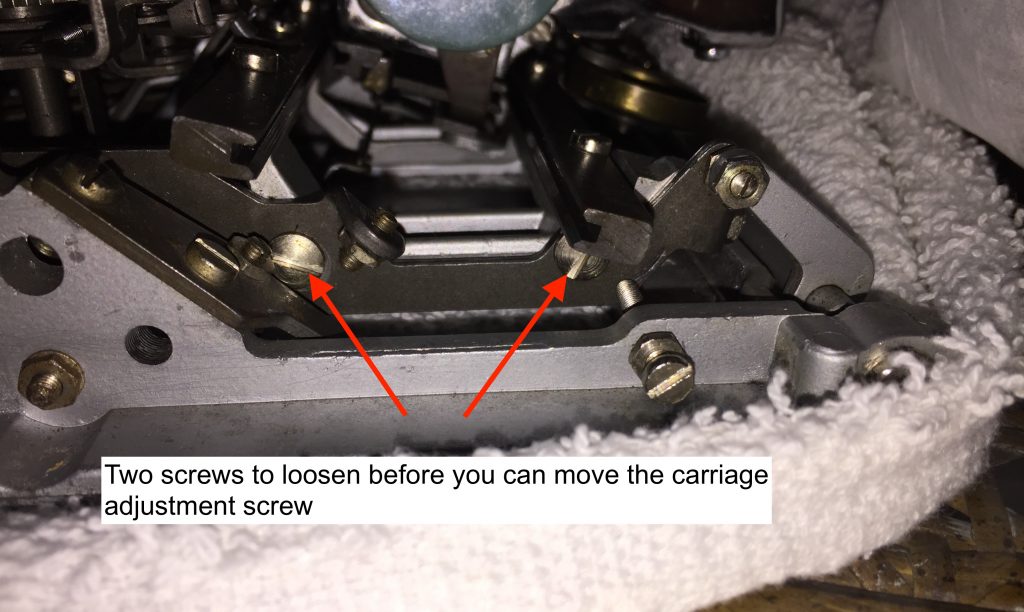
The last adjustment I needed to make is sometimes called ring and cylinder. It moves the platen closer or further from the typebars. I think the rubber on the platen over time dried and shrunk a bit. I used this adjustment to move the platen closer in order to get a better type imprint. (note: you have to loosen two screws on each side of the carriage [4 screws] in the next photo before making this adjustment.)
Loosen these two screws on each side of the carriage before adjusting the ring and cylinder adjustment in the previous photo. The screw on the bottom right maybe aligns the carriage left to right. Mine was too tight and it wouldn’t allow the carriage to completely drop back down after pressing shift.
I was soo careful to not loose the tension on the main spring, even when I took the carriage off. I didn’t want to have to rewind it and guess the correct tension. But when trying to re-attach the carriage I lost the tension on the main spring. Uggg… but it was a learning experience and now I know how to rewind a main spring and determine the proper tension. It’s a huge pain and easier if you have three or four hands.
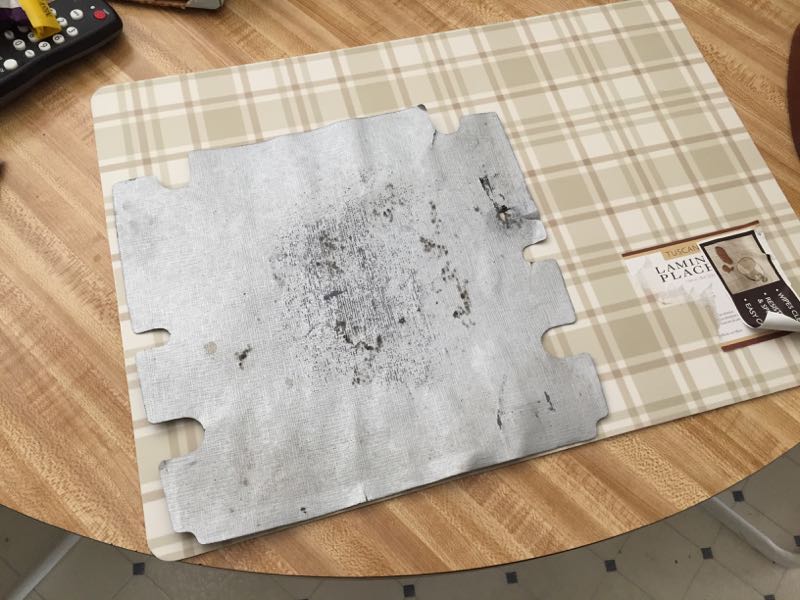
The weird shaped silver thing is mat that’s on the inside bottom of the typewriter. Mine was a mess, I found a placemat at Bed Bath, I traced around the old one to make a template
Here’s the new mat. I cleaned up the glue you see around the holes.
Here it is under the keys.
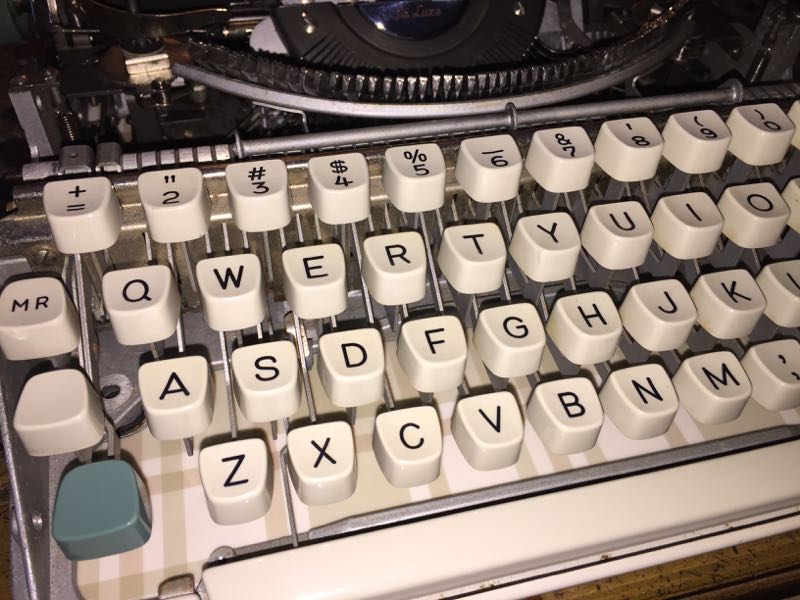
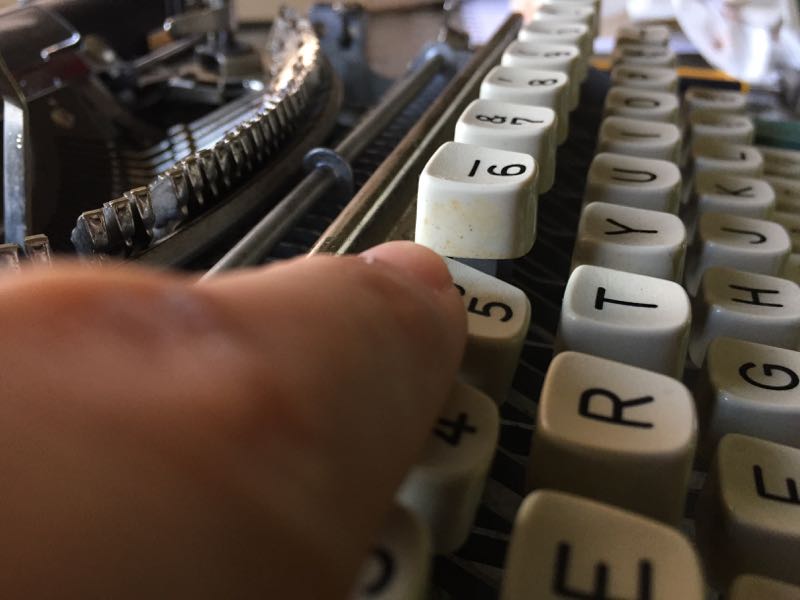
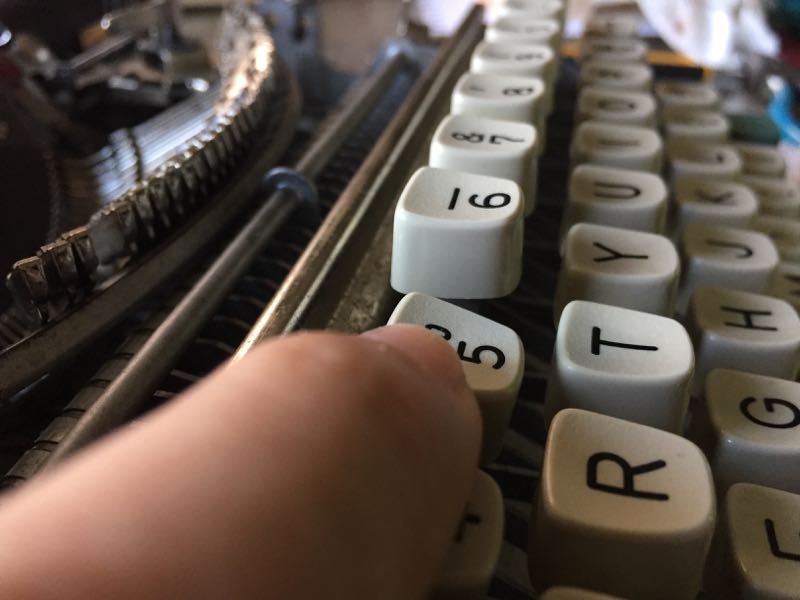
Speaking of the keys, they had crap all around them. I used a slightly damp towel and Turtle wax rubbing compound. A light rubbing removed the dirt.
Here is the key after cleaning.
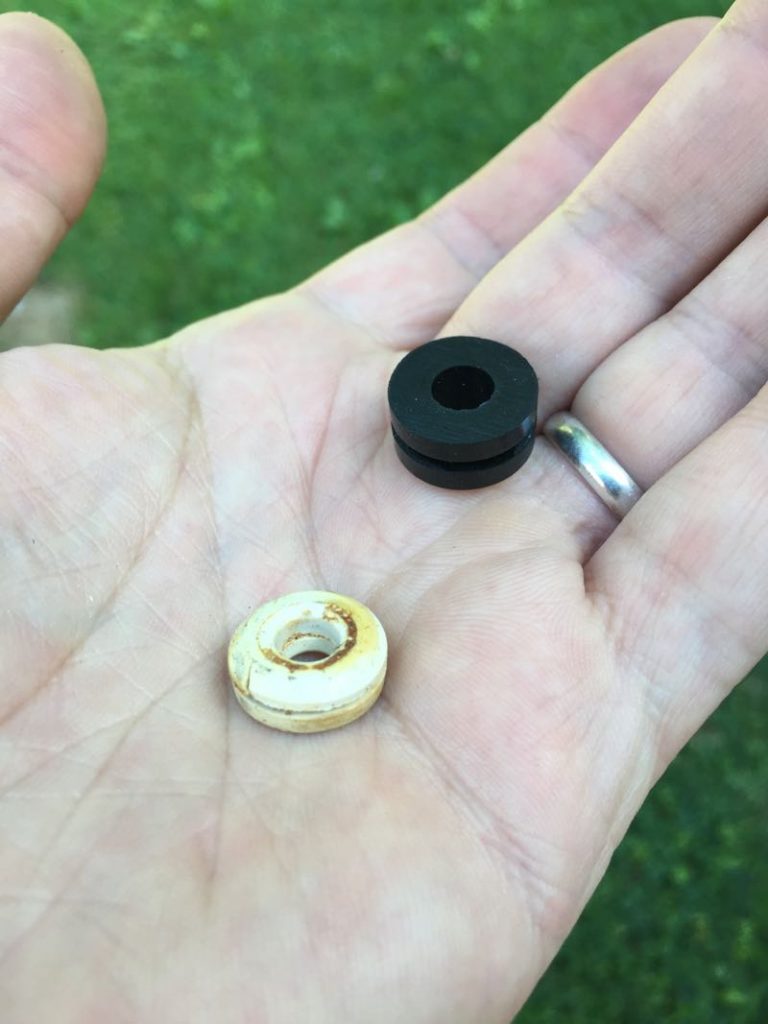
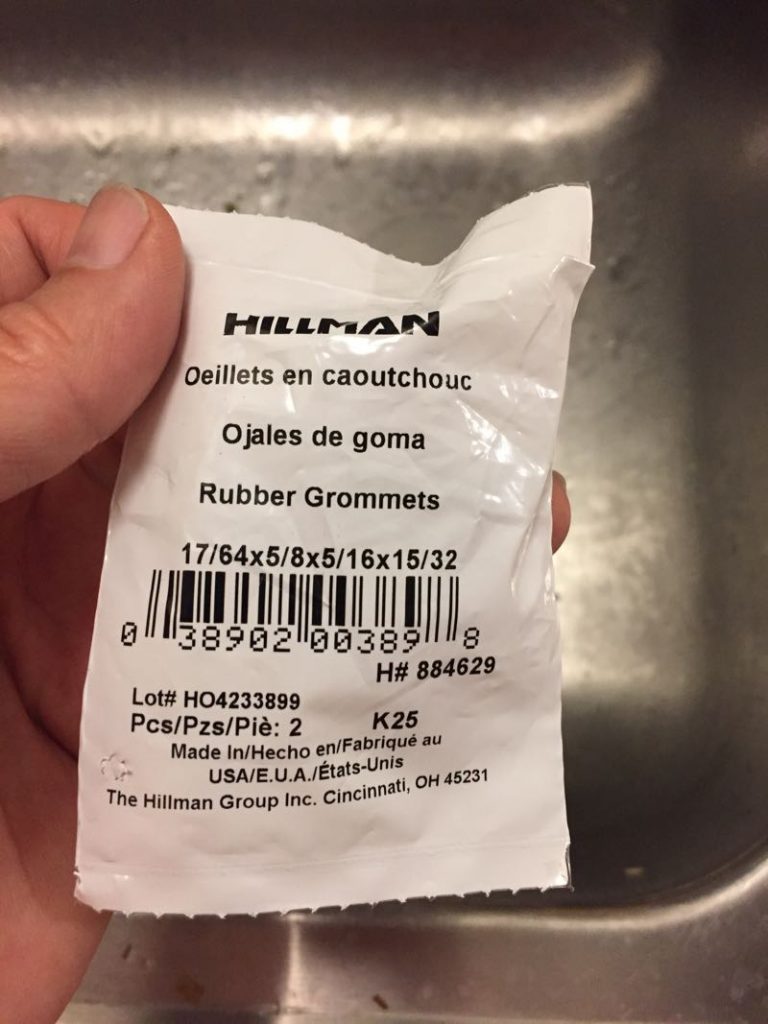
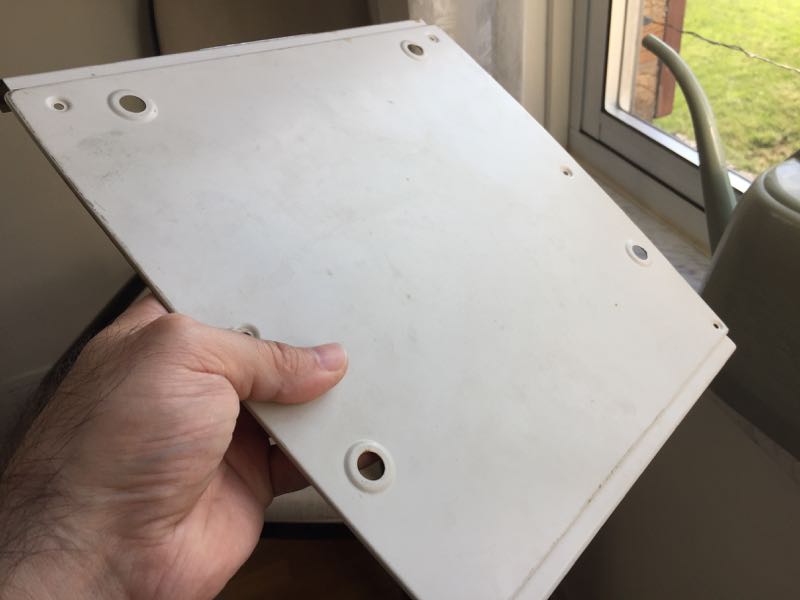
The same white grommets are used to hold the top cover on and act as the feet for the machine. I replaced them with the black ones from Hillman I found at Lowe’s.
This is the package for the grommets that fit this machine. They fit the top cover and the feet.
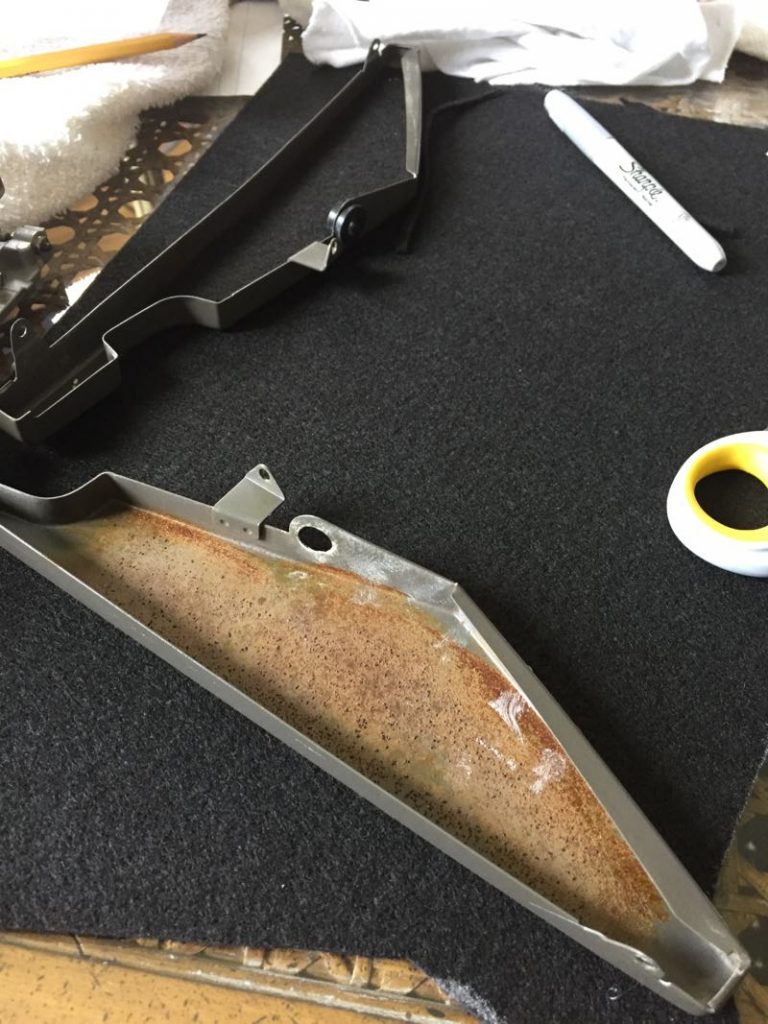
I put new felt inside the body. You can see the top side panel has the felt inside.
Bottom panel before cleaning. The entire body looked like this.
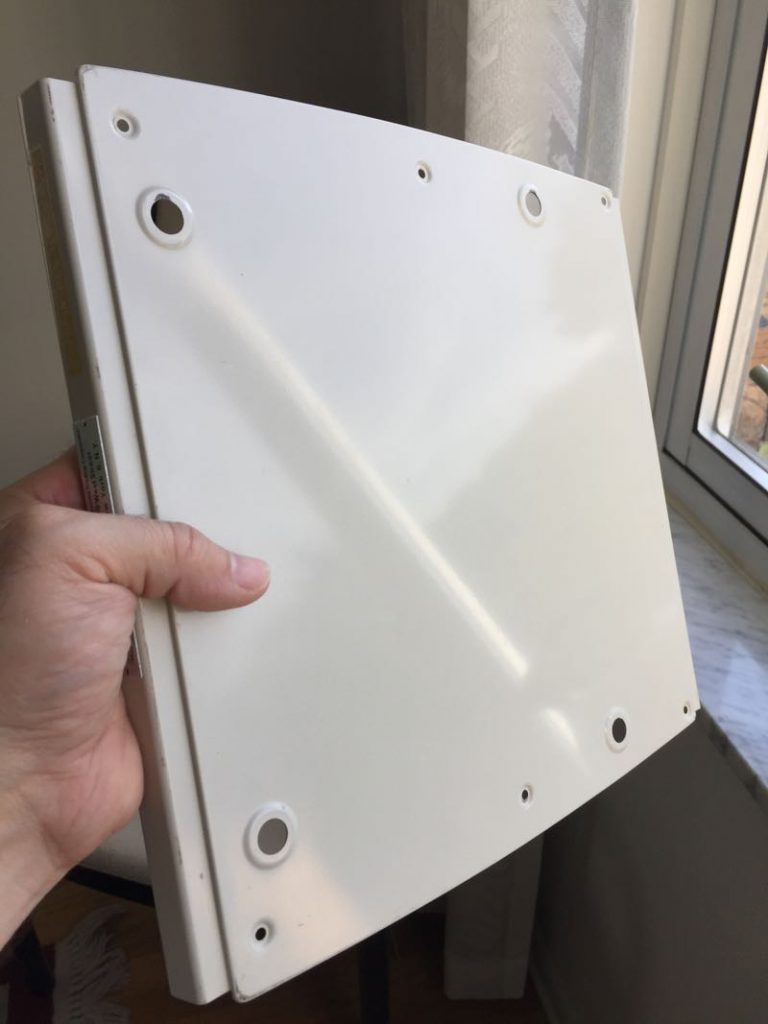
After cleaning
The paint on the body was a mess. I used automotive liquid rubbing compound, then use the polish to finish. I can’t describe how bad the paint looked before cleaning.
Review
Overall the Olympia SF is a great machine. SF stands for Super Flat. It’s very small and easily portable. It’s definitely a great typer. The line spacing adjustments are excellent. On some of my other machines (Underwood & Remington) the distance between the lines of text is larger. You can fit much more type on a page with the Olympia. I think the larger machines have a better typing feel. There is more space inside of them to leverage the key presses for optimal feel.
This is an ultra portable typewriter. Fingers and hands bump into the body when turning knobs, and returning the carriage. This however is easy to get use to, but coming from a bigger machine it’s immediately noticeable. For some reason this machine feeds the paper very well and very straight. It has a very convenient spring loaded pop up paper rest. For it’s size I’d still say this is a heavy duty, serious typing machine. The engineering is superb. Even after all the years of abuse (I’m pretty sure it was dropped once) and neglect it still types great.



Thanks for such a thorough account! I got a 1966 SF last week, and the indexing is malfunctioning. Otherwise it’s in super shape. I’m familiar with removing the platen from an SM3. Is the process similar for this machine?
I’m not sure, but I can help when it comes to the SF. Let me know if you still need some help getting the platen out.
My SF makes a ratchety noise with the carriage turn – which is what got my attention with this post. It’s not bad but doesn’t sound normal. I’m looking for an adjustment screw for this if there is one because I doubt that it is a lubrication thing- and I also don’t want to attempt removing g the carriage.
I think It’s your escapement. My SM-4 sounded ratchet and I had to move it up or down a little and then righting down that saw tooth bar the Sawtooth rail. I think there was an ed munk article about adjusting the escapement
Hello, nice job!
I have an Olympia splendid 33, pretty the same as yours. I’ve made a repair of the scapement and when putting all together I’m totally lost about the main drum and the cord. I’m not able to figure out how it works (lost the tension when removing the carriage accidentally). Could you please let me know how you did? Thanks a lot
Hey! Thank you. Post your question on the typewriters subreddit. It will be easier to help you there. https://www.reddit.com/r/typewriters/
Excellent step by step and showing us some great cleaning ideas. I have the olympia SF as well and have posted on reddit r/typewriters a question about removing the carriage side covers to get the machine ready for a good cleaning. Can not remove the platen without forcing it around the side covers. The right cover is in the way of the platen popping out. The platen shaft is pulled, but can’t seem to figure out how to pull it out. Can you answer my question on r/typewriters
Very cool read. I’m having a similar issue with the carriage advance spring the bent paperclip kind. I’m not sure how the mechanism goes exactly. Any idea on sourcing a new one?
Do you mean the bent piece of metal around the main gear, and not the one that’s in the cylinder holding the draw string that pulls the carriage? If it’s the one on the main gear I suggest watching the video in this post. It shows how it works to allow the carriage to advance one space at a time. If this wire is not broken you can bend it back into place. That’s called forming in typewriter lingo. You won’t be able to source a new one short of buying a second machine and using it for parts. There are also typewriter shops around the country and world. Here is a link to the list. https://site.xavier.edu/polt/typewriters/tw-repair.html
Let me know how to take of this platen roller ?
I tried to take of the core rod of this platen in my SF, but it could not pull out.
To get the platen out you’ll need to loosen the screws in the collar that’s part of the knob that turns the platen. There are two screws in each collar and flat spots on the rod they hold. Don’t remove the screws, just loosen them enough to get the rod loose. There is a rod that goes through the entire platen. So keep the knob attached to one side so you can pull the knob out with the rod attached. If you can avoid taking off the spring loaded cover thing that rests against the platen try, because it’s really hard to get it back on. This is the piece of metal that’s 1/2″ and goes the length of the platen. I think it’s the piece that keeps the paper from wrapping around the platen twice.
Thanks for your post. My Splendid 33’s pawl-pushing spring had come off the starwheel when I got it. Mine needed a bit of trial-and-error (emphasis on error) to re-form because once reinstalled it would sometimes lock up the escapement. But at this point all is well and your video and photos were very helpful.
Thank you!!! I’m in the process of cleaning up what I think is a 61. The feet were gone. Your solution looks great. The turtle wax idea is great too.
Glad that fix helped you out!
I just bought a Olympia Diplomat (similar to a splendid). I’m having some trouble adjusting the type because one of the nuts was replaced? Do you know what type of nut (size and thread) I need?
I don’t, but you could take another nut from the typewriter and see if it fits. If you do find one that fits, take the nut to the hardware store and use that to get a replacement.
Thanks for this page, it’s been huge help with my SF.
Any tips of how to tension the mainspring? I thought I had mine set correctly, but it stops advancing the further you get across the page.
I have a Reddit thread here:
https://www.reddit.com/r/typewriters/comments/d3gbc1/any_tips_on_winding_the_mainspring_of_an_olympia/?sort=new
Again, thanks for this page.
-Wm
I accidentally lost the tension on mine and had to rewind the wheel with the main spring. I’ll mention a couple things. First check the carriage. Press the carriage release and make sure the carriage moves smoothly and easily all the way from one side to the other. If it’s binding, you have other issues. If not then you just need to wind you main spring tighter. It’s not easy to do with just two hands. You maybe could use a small vice grips to hold the tension after you wind it and fish the wire that attaches the carriage. Good luck, and check out Reddit r/typewriters. People are helpful there. https://www.reddit.com/r/typewriters/
Hello,
I discover this website and was very pleased to read this report.
I’ve got four Olympia Splendid 66 (here in France, you can very easily find one of those, much easier than an SF) and this little but solid and efficient writer is one of my favourites.
The one I have just bought needs the platen to be removed because a sticker prevents the paper from feeding. I’ve taken off the knobs and the screw on the platen left collar, but the rod won’t come out. Is there something I don’t see down there ?
Thanks again for the review and…happy new year !
Stéphane
I just wanted to say thank you for publishing your experience about repairing your SF. I just purchased a 1958SF from e-bay that arrived in less than advertised condition. I had to remove the carriage and the escapement mechanism to find the piece of debris that was jamming the whole escapement. Your pics and the video on how the little spring wire works in the escapement really helped. I still have more work to do, but this blog post got me through the difficult stuff.
Thanks for the note. I’m glad this was helpful!
Great writeup, thank you for all the detailed photos. My SF has a bell that goes ‘dink’ instead of ‘ding’. I’ve been playing with the bell striker arm but can’t find our what is wrong. Have you dealt with thus before? Any advice would be appreciated.
If something in wedged against a bell it will dink, instead of ding. Find the bell, make sure nothing is touching it. Tap the bell with something and try to figure out why. It could also be the way it’s attached. Good luck
We have an Olympia Splendid 33 and one f the strikers is partially broken off (the 3). Are these available separately somewhere?
Not really. To get parts your best bet is to buy a broken machine, same model and use it for parts.
Thanks for posting this project. Really appreciate your project on this typewriter, looks great! Never thought about the bottom mat.
I just acquired a 1963 model that my Mom used almost in mint condition with the case. It’s a light blue color and needs a general cleaning and fresh ribbon.
I just found your blog as I’m trying to replace the hardened grommets on the feet and the two under the top cover. So, I’ve searched my Lowes/Home Depot, Ace and even Tractor Supply and can’t find these specific ones. I even called Hillman but they steered me back to the hardware stores.
The top ones look like to OD should be 9/16 with the ID about 3/16. I can find the smaller ID but not with the associated 9/16 OD. Would appreciate any more resources I might have missed.
Love this post and actually helped me repair the loose ribbon covers on my SF. A couple questions though… How exactly do you change the feet on the Olympia? If I were to remove the base plate would I remove the entire body? Thanks so much!
The bottom panel of the typewriter comes off with screws that are on the bottom. The feet are just doughnut shaped rubber pieces. You have to squeeze and work them into place. The rubber pieces are slotted, and the larger holes in the base of the typewriter plate fits in the slot. Half the rubber gromet is sticking out on one side of the bottom plate (the inside) and half is sticking out on the other side (the outside). No, if you remove the bottom plate that’s all that will come off. You can turn the machine upside down, remove the screws, it won’t remove the entire body. Good luck!
Thank you very much for posting. I recently helped a lady fix her machine. Her carriage wasn’t advancing because the gear you showed was seized. A disassemble, lubrication and adjustment did the trick. Would not have been possible without your photos. The owner is over the moon as this was a gift from her later father when she started secretarial work.
Thanks for this post and all the great detail. I’ve worked on a Splendid 33 thanks to your details, and now I have cool Splendid 66. Everything is working pretty well, excepting the bell. Haven’t figured out what’s keeping it from sounding yet, but I imagine if I play around with it long enough I’ll sort something. Any bell tips (where it should strike, how much it should contact the bell at rest, etc.) most appreciated. Thanks again for your info!