Category Archives: Typewriters

Repairing a 1961 Olympia SF

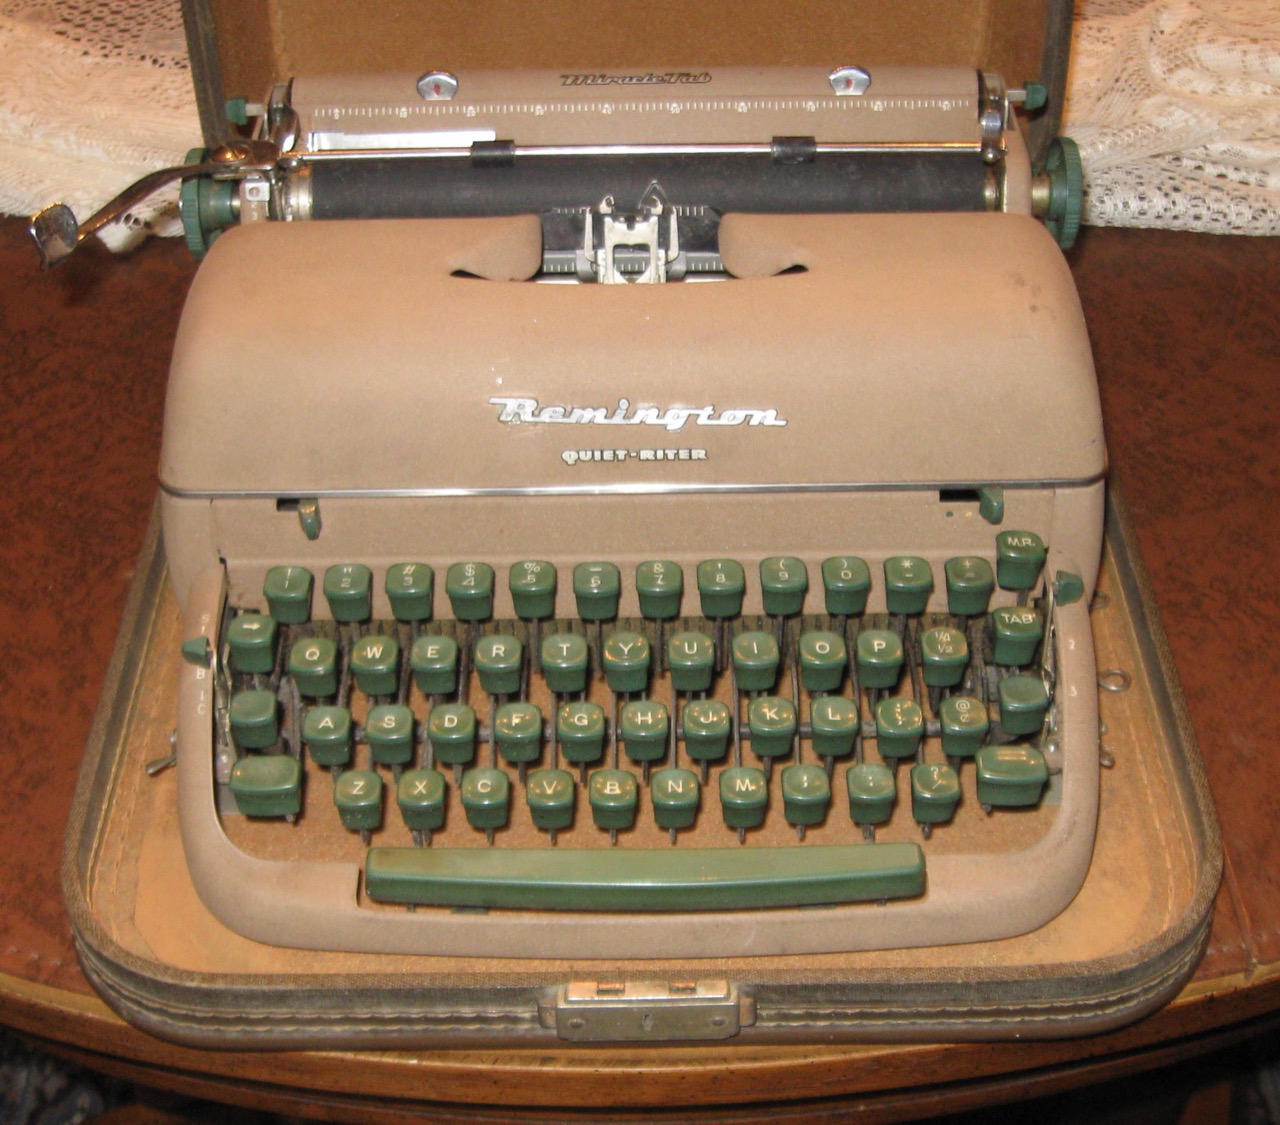
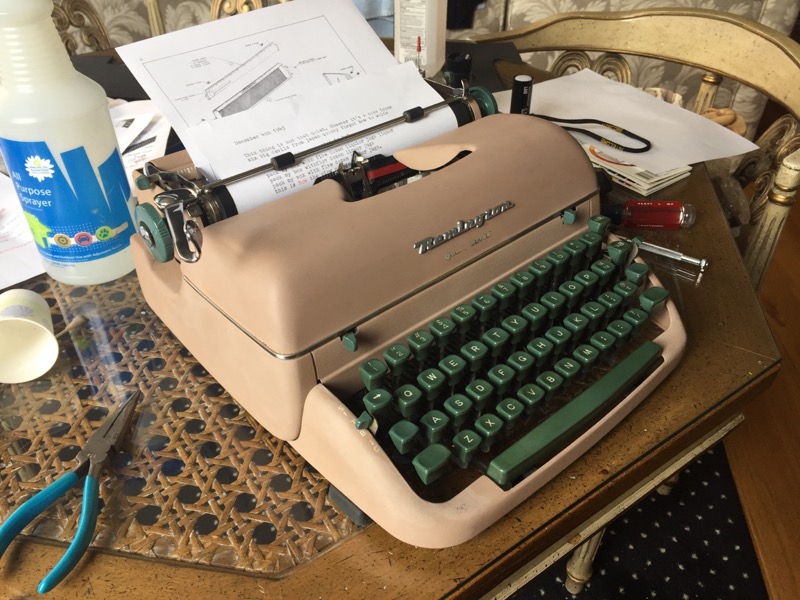
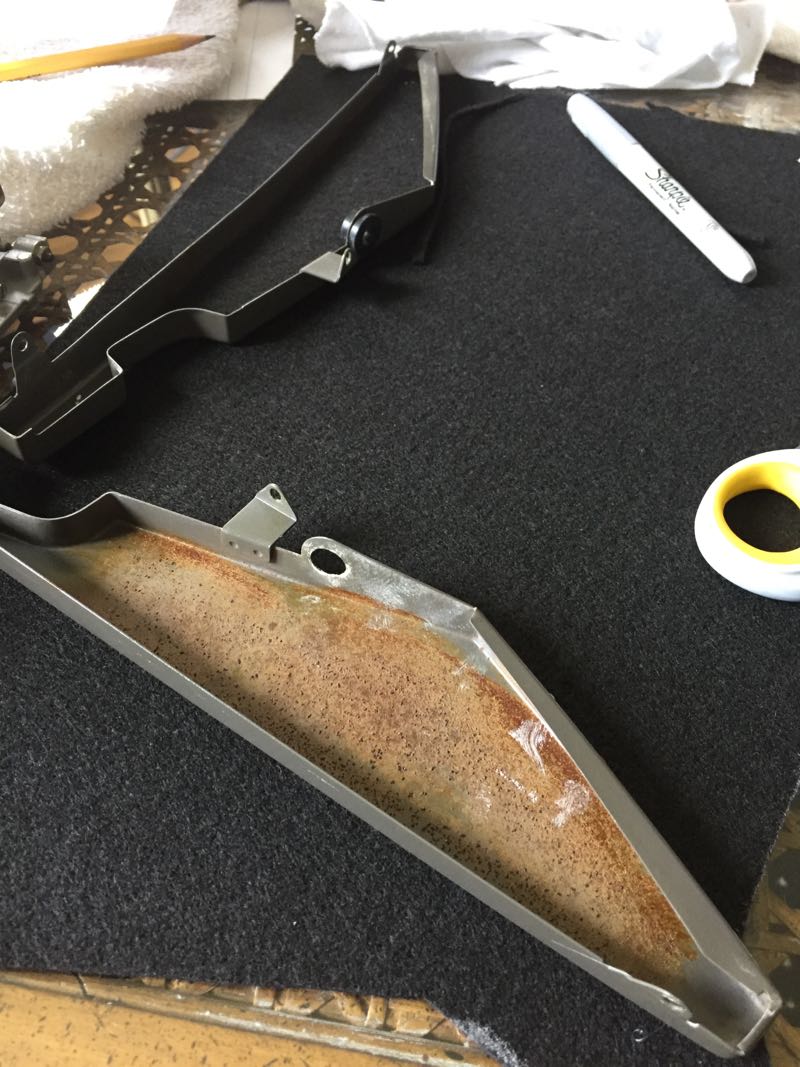
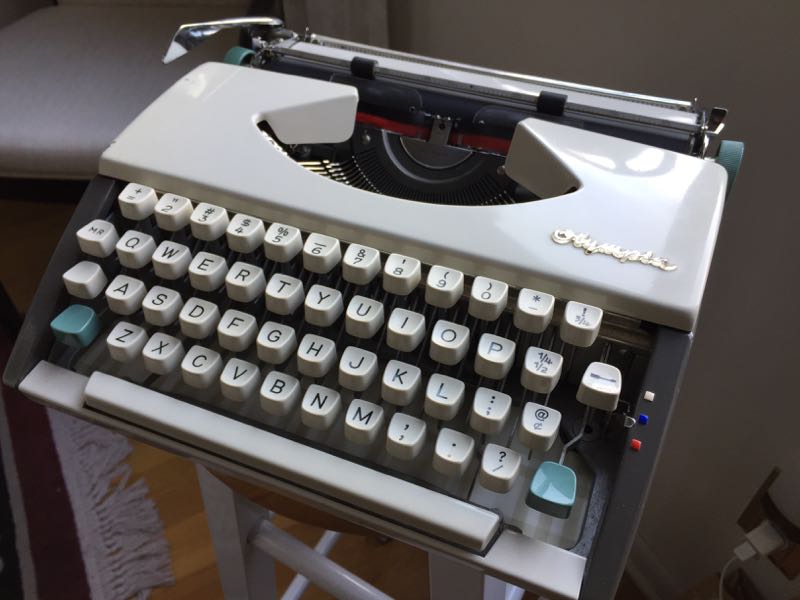
Okay, so I made another mistake. I got this “Mint Condition” Olympia off of Ebay in It was from Florida and I’m almost positive whoever owned it liked to type at the beach. I also think it was kept in a humid location. The body had rust and pitting. Note that the Splendid version is basically the same machine.

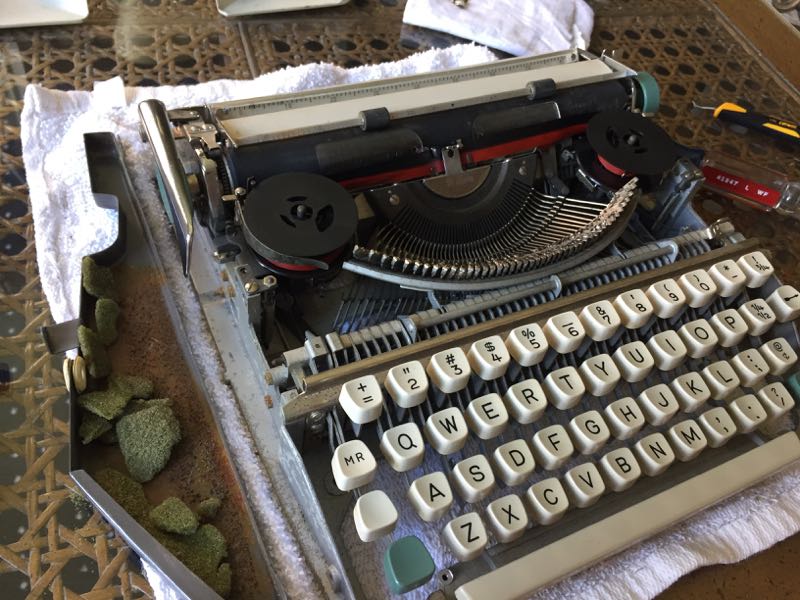
It typed poorly when I got it, it was out of adjustment and was a mess. I think there was sand in it too. Above you can see the rotted foam and the surface rust. The foam disintegrated when I touched it.

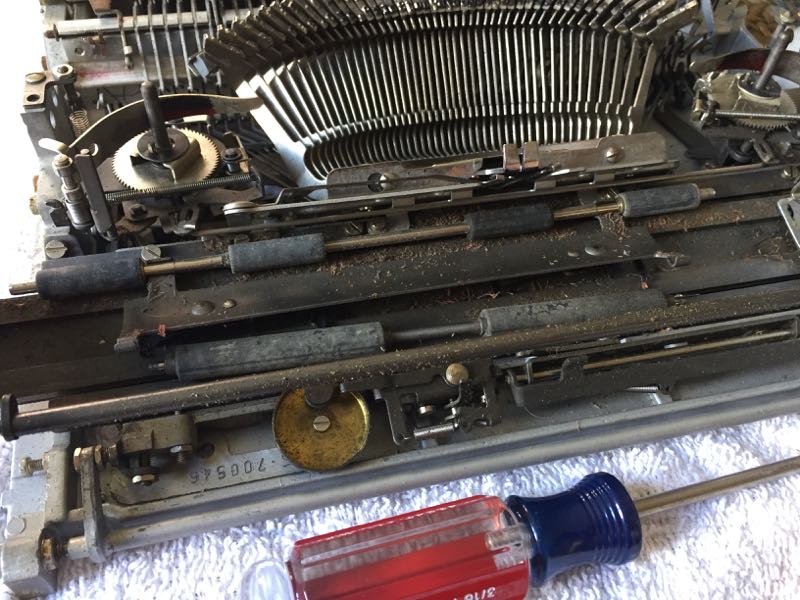
Lots of eraser shavings and oxidized feed rollers

The feed rollers and platen were also a mess. I cleaned them with Bar Keepers Friend and water. Soft scrub also works.

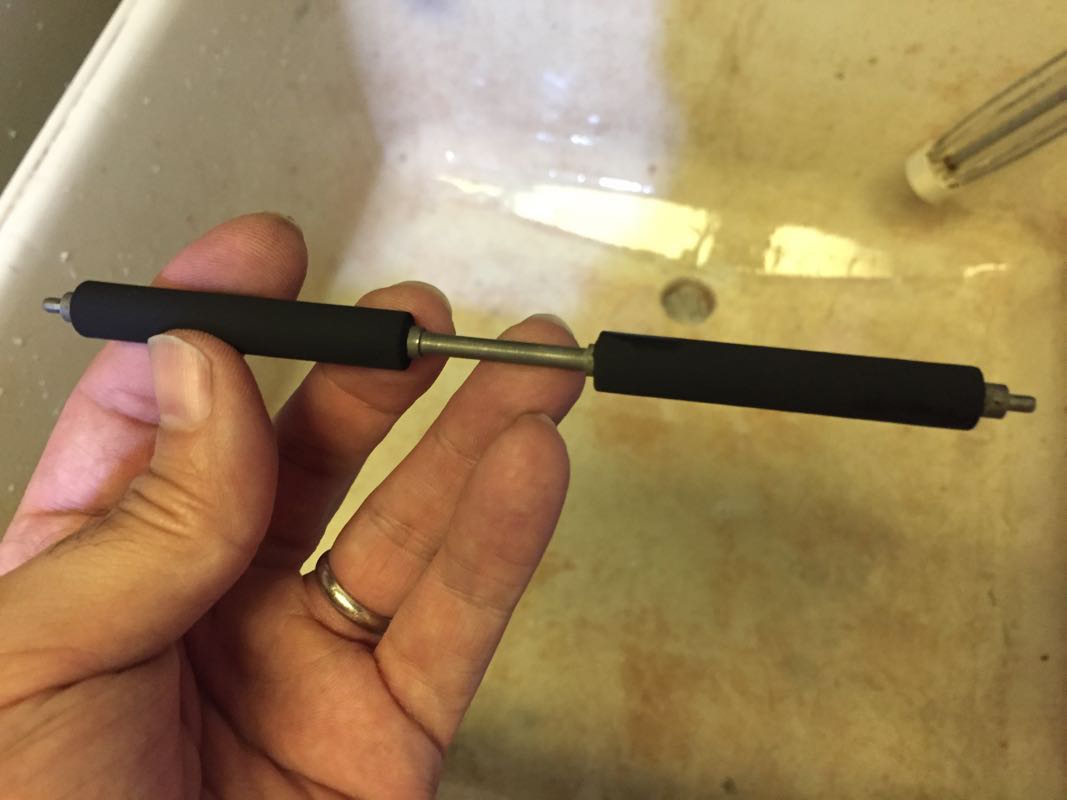
Here is the feed roller after cleaning, it was still soft.

Here it’s outside being cleaned with Mineral Spirits, and carb and choke cleaner. I took one trip to the eye doctor when the carb and choke cleaner bounced and sprayed into both my eyes. I was fine, but wear eye protection.

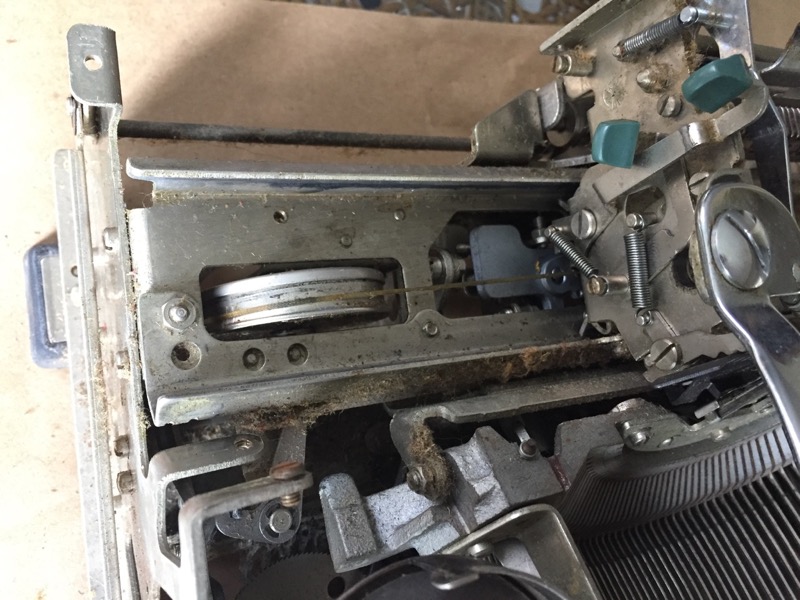
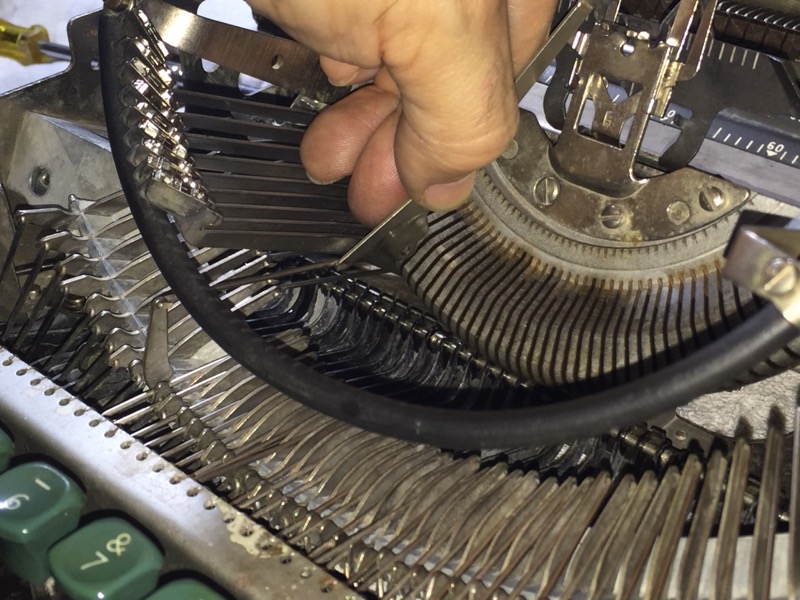
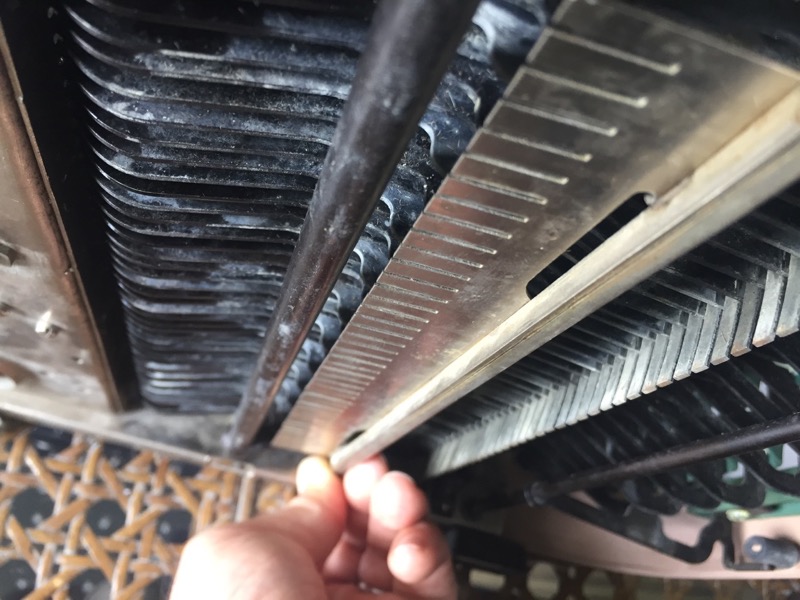
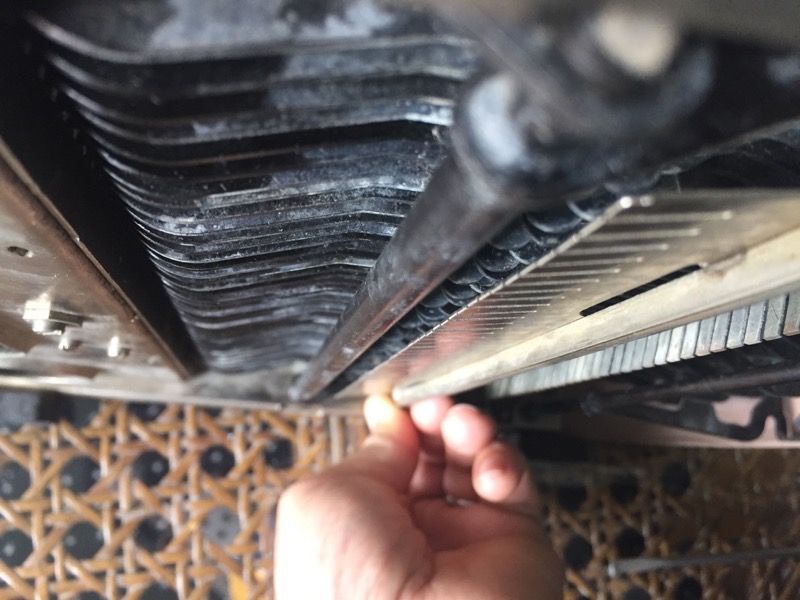
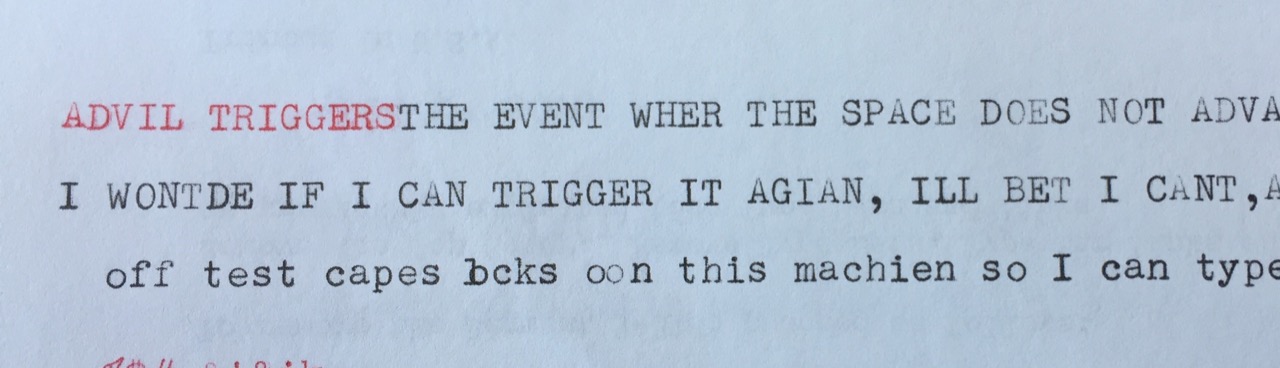
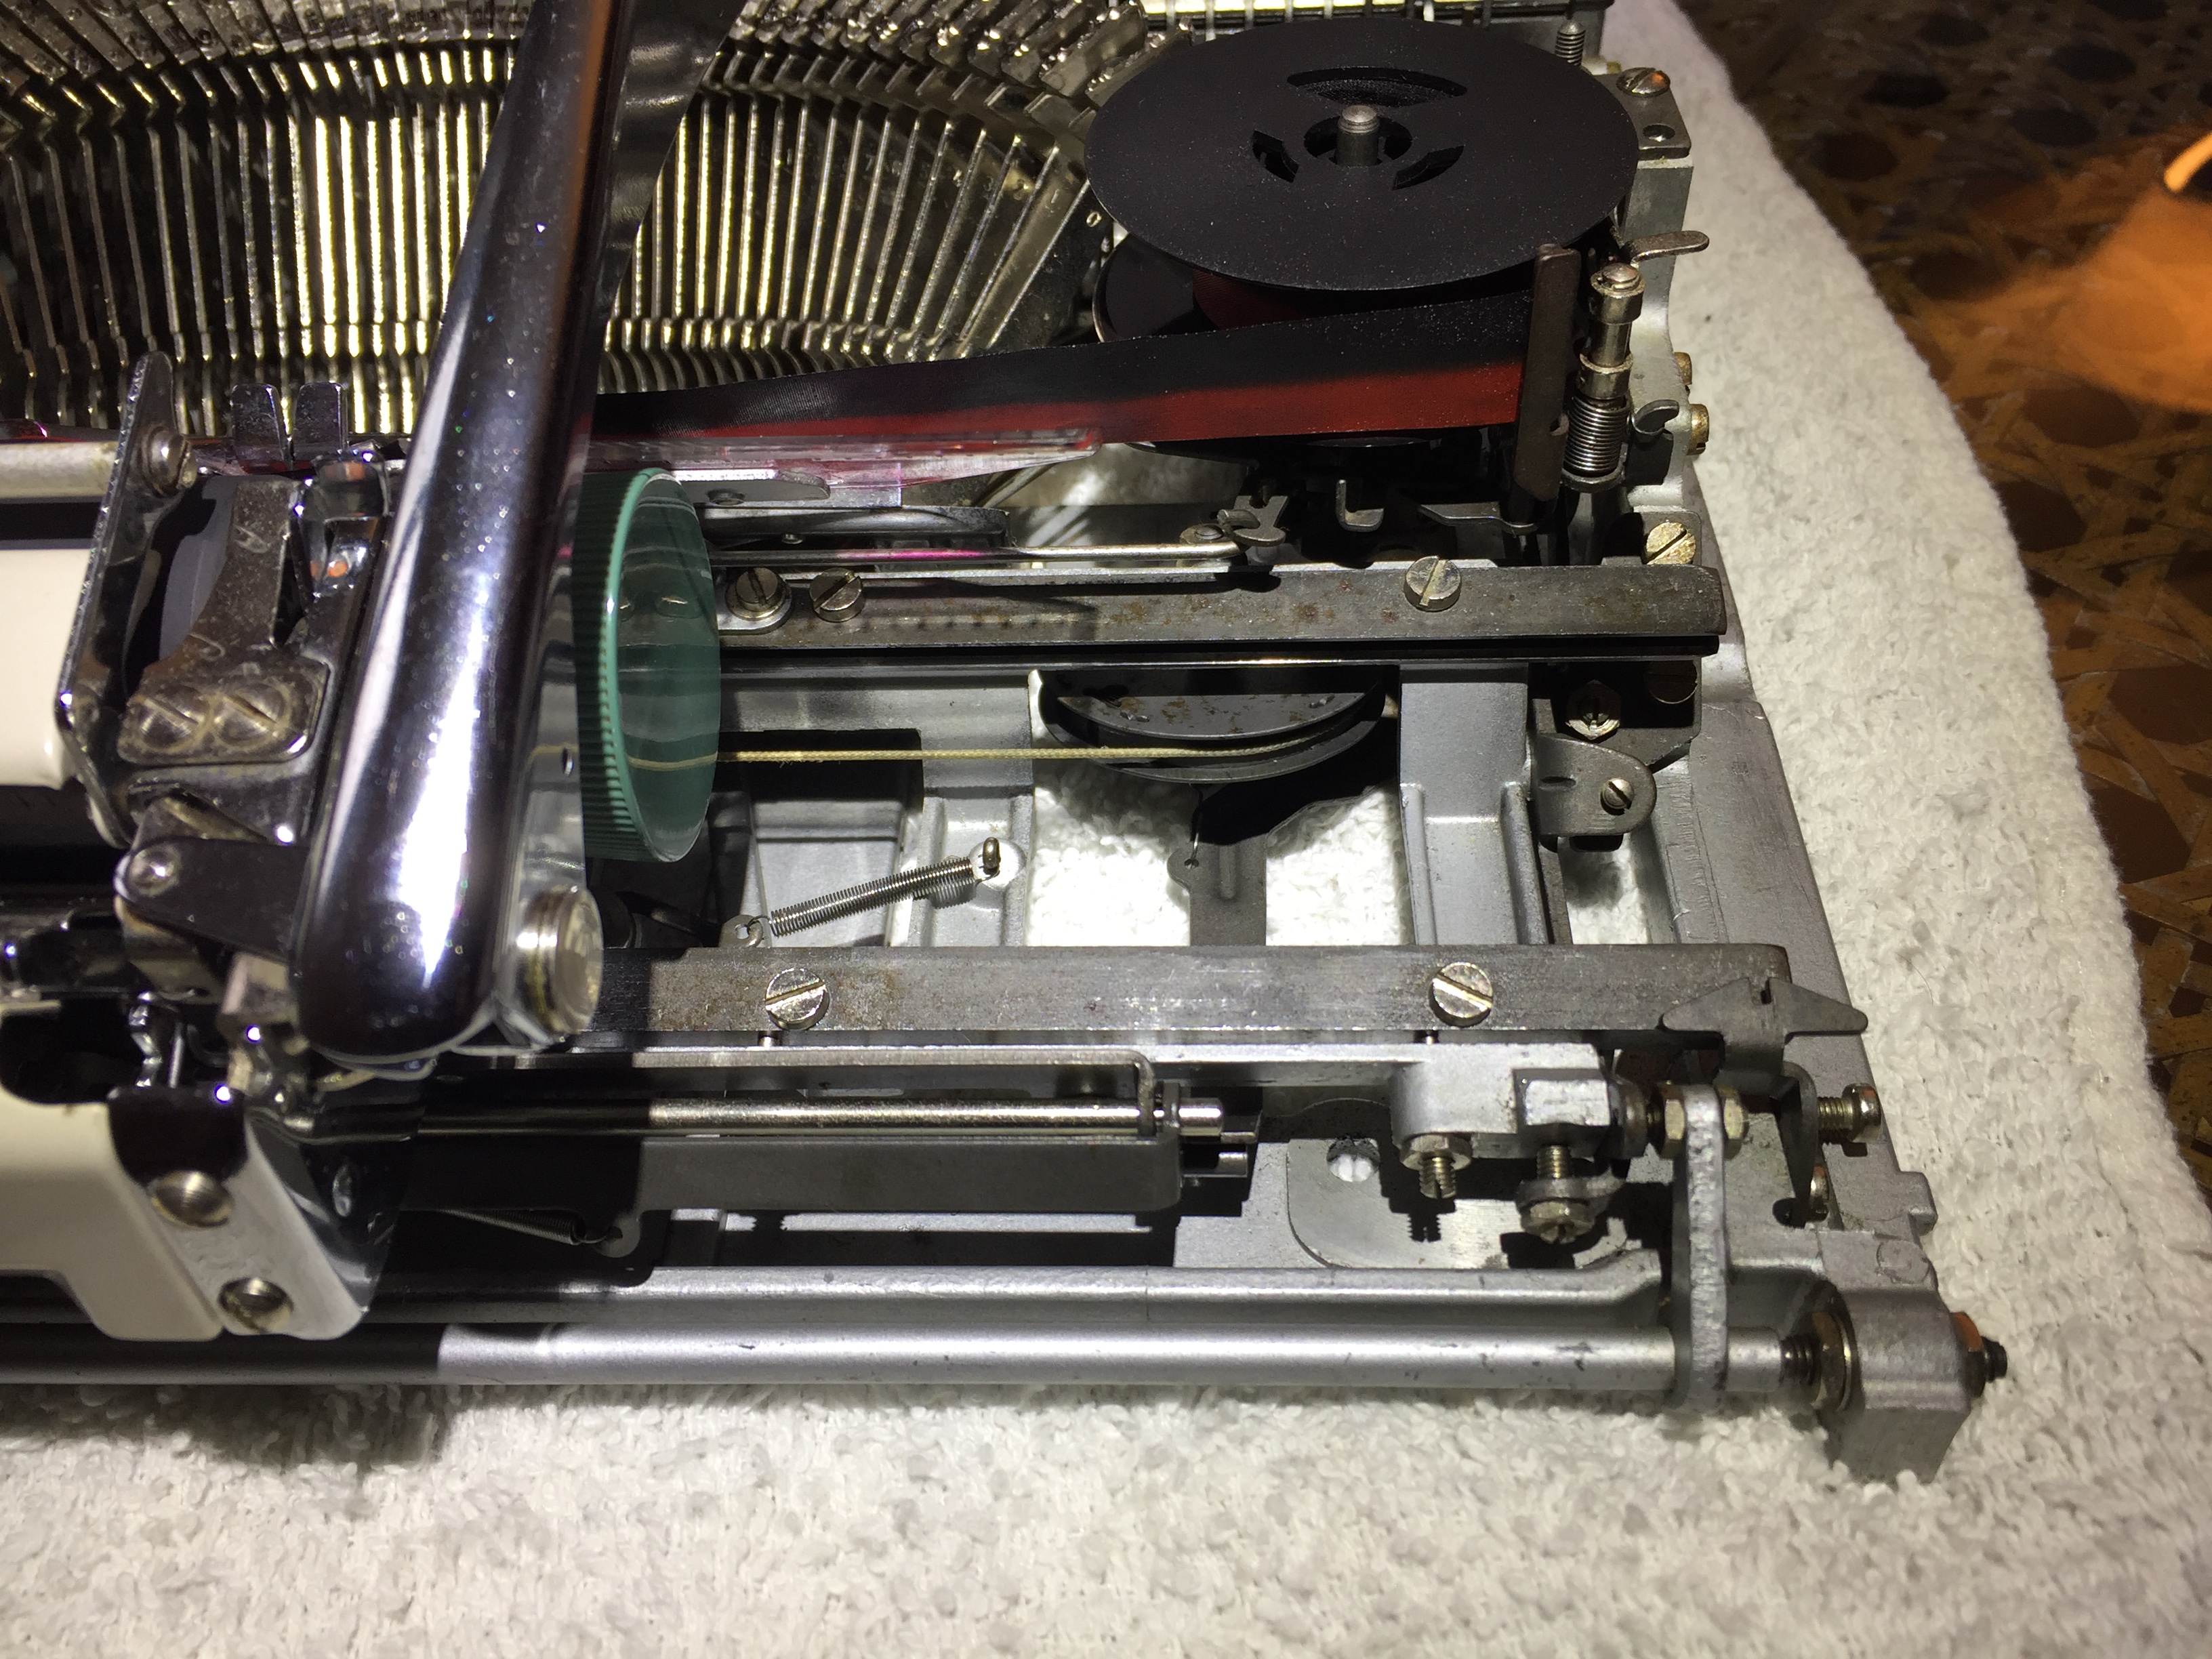
One of the issue was when returning the carriage at the end of a line. It felt kinda sticky, not smooth. It moved in fits and spurts instead of smoothly. Here is a link to a video that shows what it was doing. I didn’t want to, but I had to remove the carriage to get access to the main gear. (see above). I’ve heard horror stories of spurs and bearings falling all over the place when people have removed carriages. The bearings on this are neatly captured in these brass bars. Technically, I didn’t need to remove the carriage, some oil in the right place would have fixed it. But I had to take it apart more than I would have liked in order to learn how it worked.

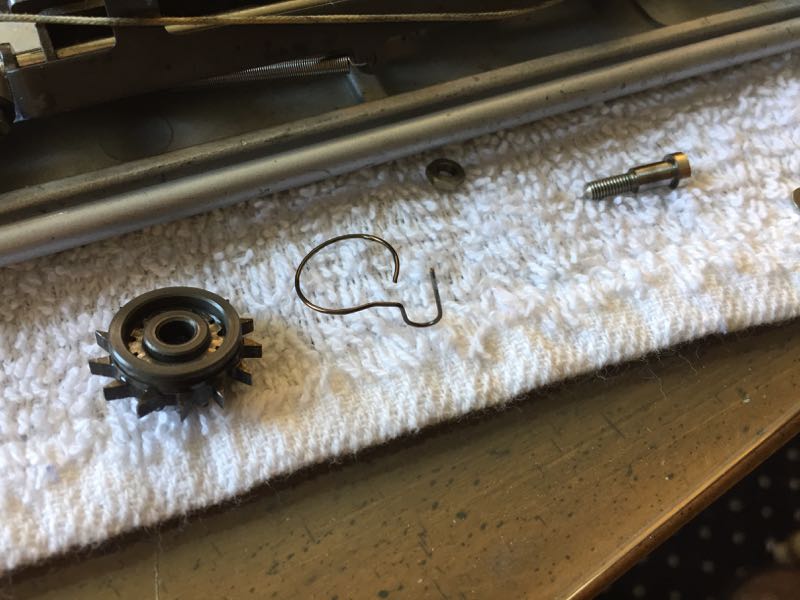
Here is the gear and the culprit, the wire that goes around the gear. I had failed to lubricate it.

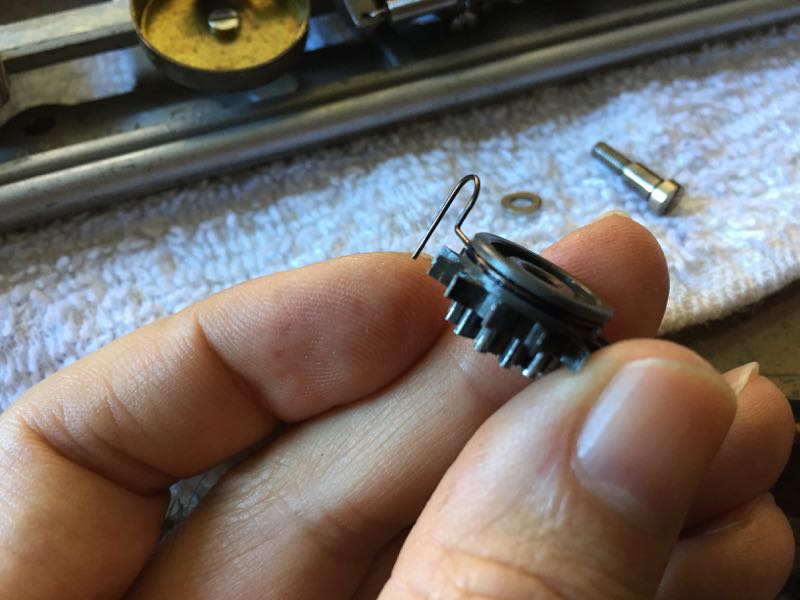
Here you can see how the wire attaches to the gear. I put a combo of grease and light oil in the groove. I actually think it made the mechanism too smooth. Because it relies on a certain amount of friction to engage the carriage release lever.

In this video you can see how the friction of the wire around the gear pushes the release. I think it’s a brilliant design.

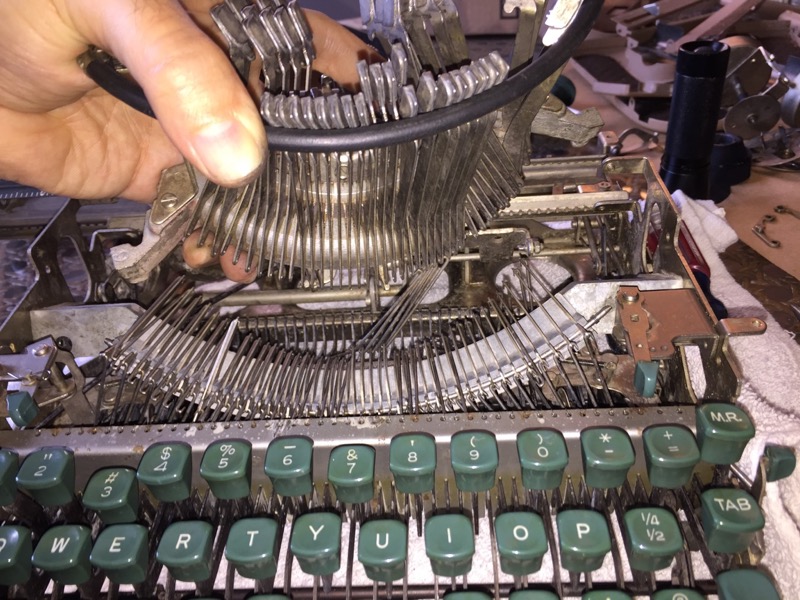
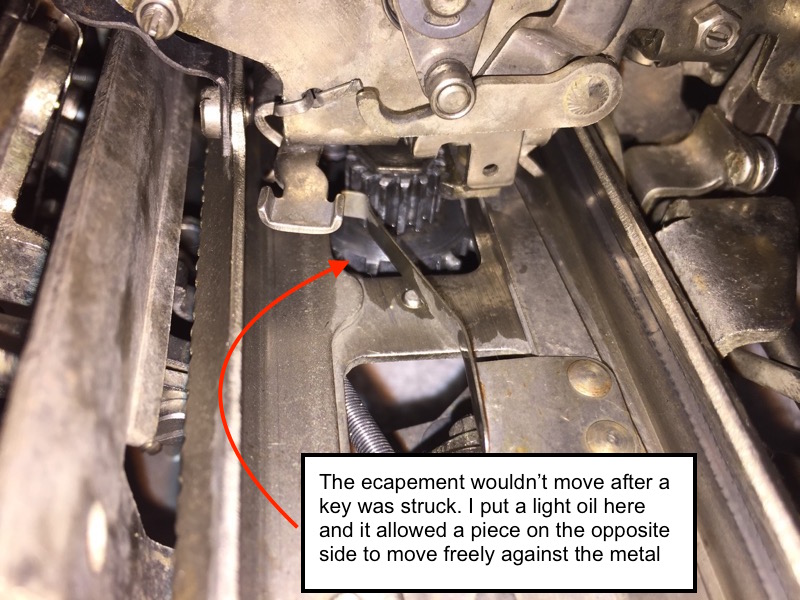
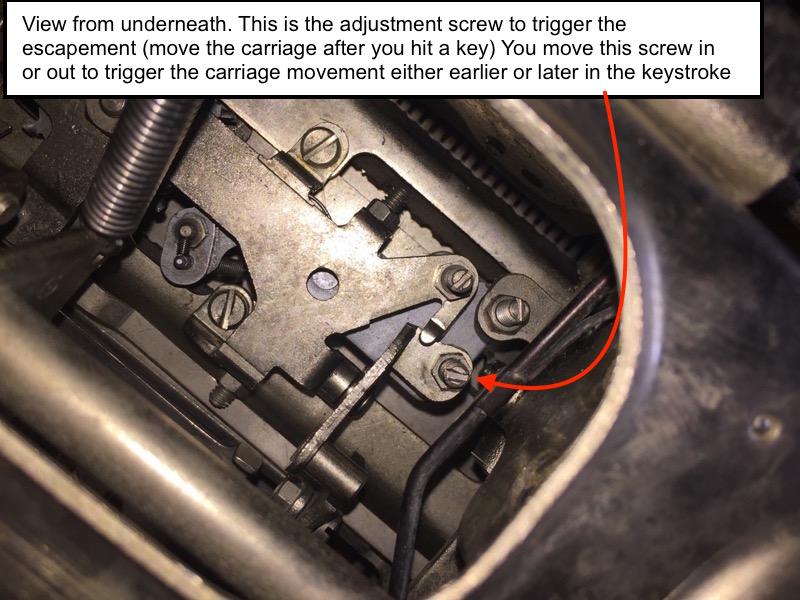
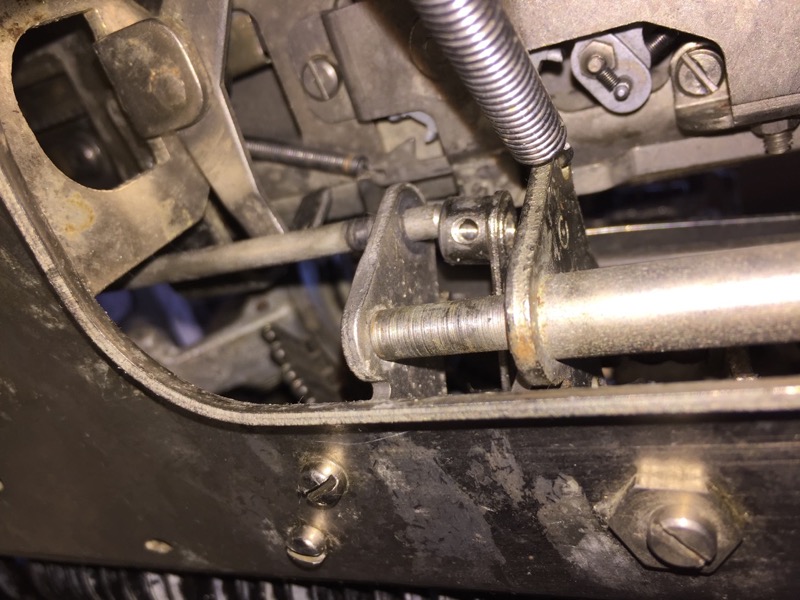
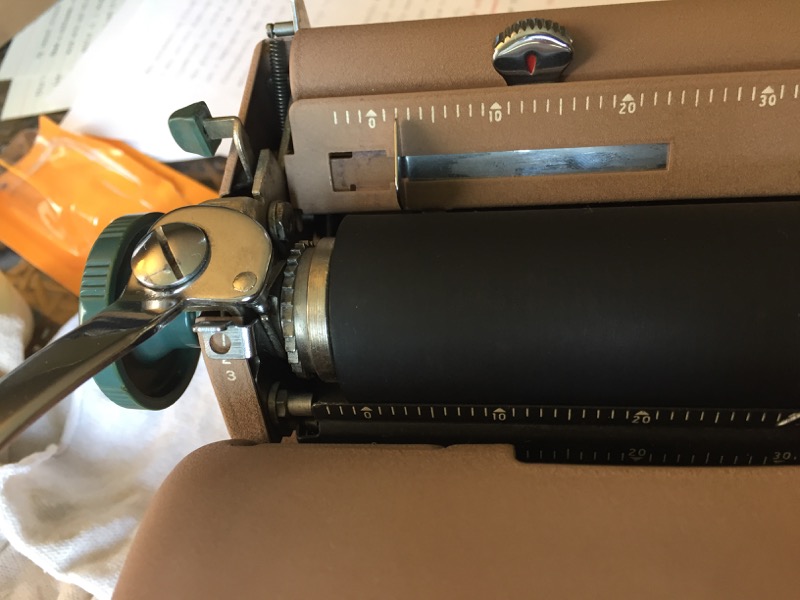
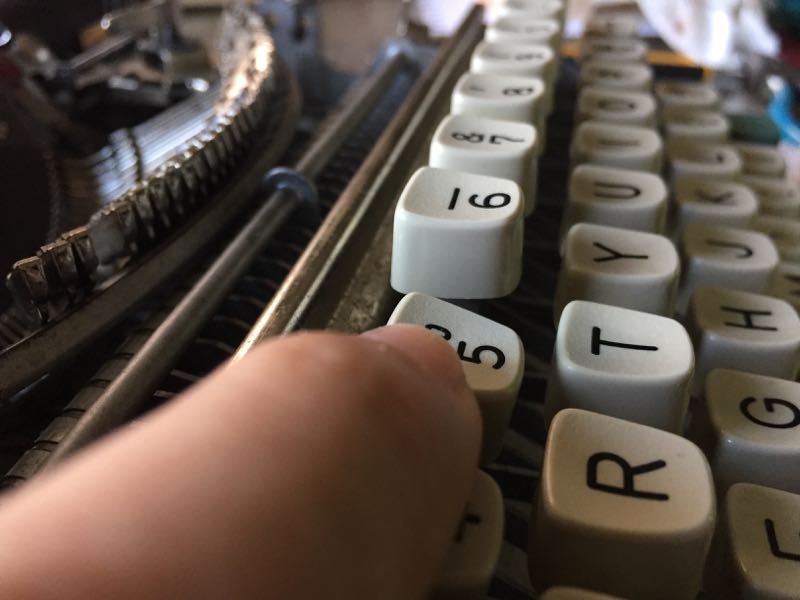
Another issue I didn’t discover until late was the escapement trigger. It adjusts the distance the typebar is from the platen before it triggers escapement. Escapement is just the carriage moving to the next character. It’s the slotted screw in the photo with the hex nut around it. The escapement was too far, it triggered maybe a .5 inch before the typebar hit the platen. I forget the proper distance, but I needed it to trigger closer to the platen. Maybe an 1/4″ to 1/8″. The problem was, when it was too far, the keys didn’t want to make contact with the platen. I had to hit some keys very hard. This photo is the typewriter upside down.

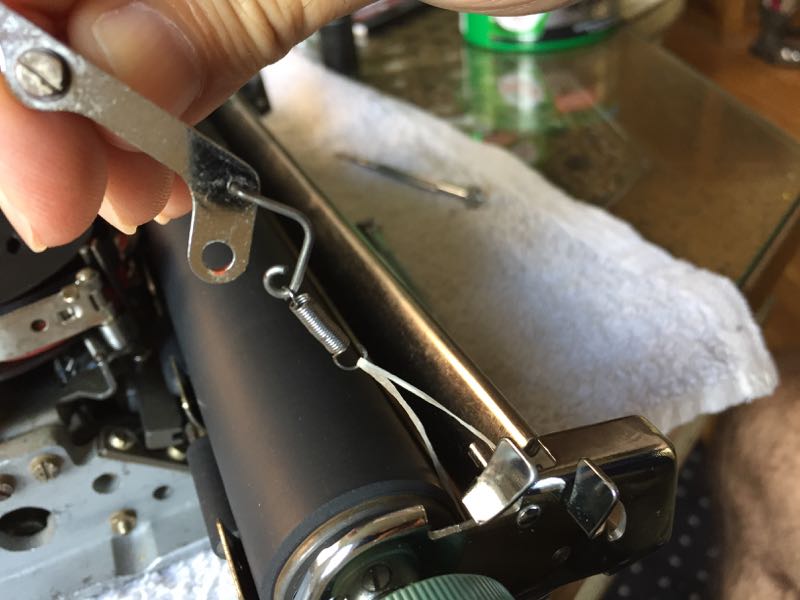
Re-attaching the paper bail spring was a huge pain, until I figured out a trick. I tied a piece of dental floss to the end of the spring. Threaded the floss through the machine and pulled on the floss, stretched the spring and hooked it over the thing.

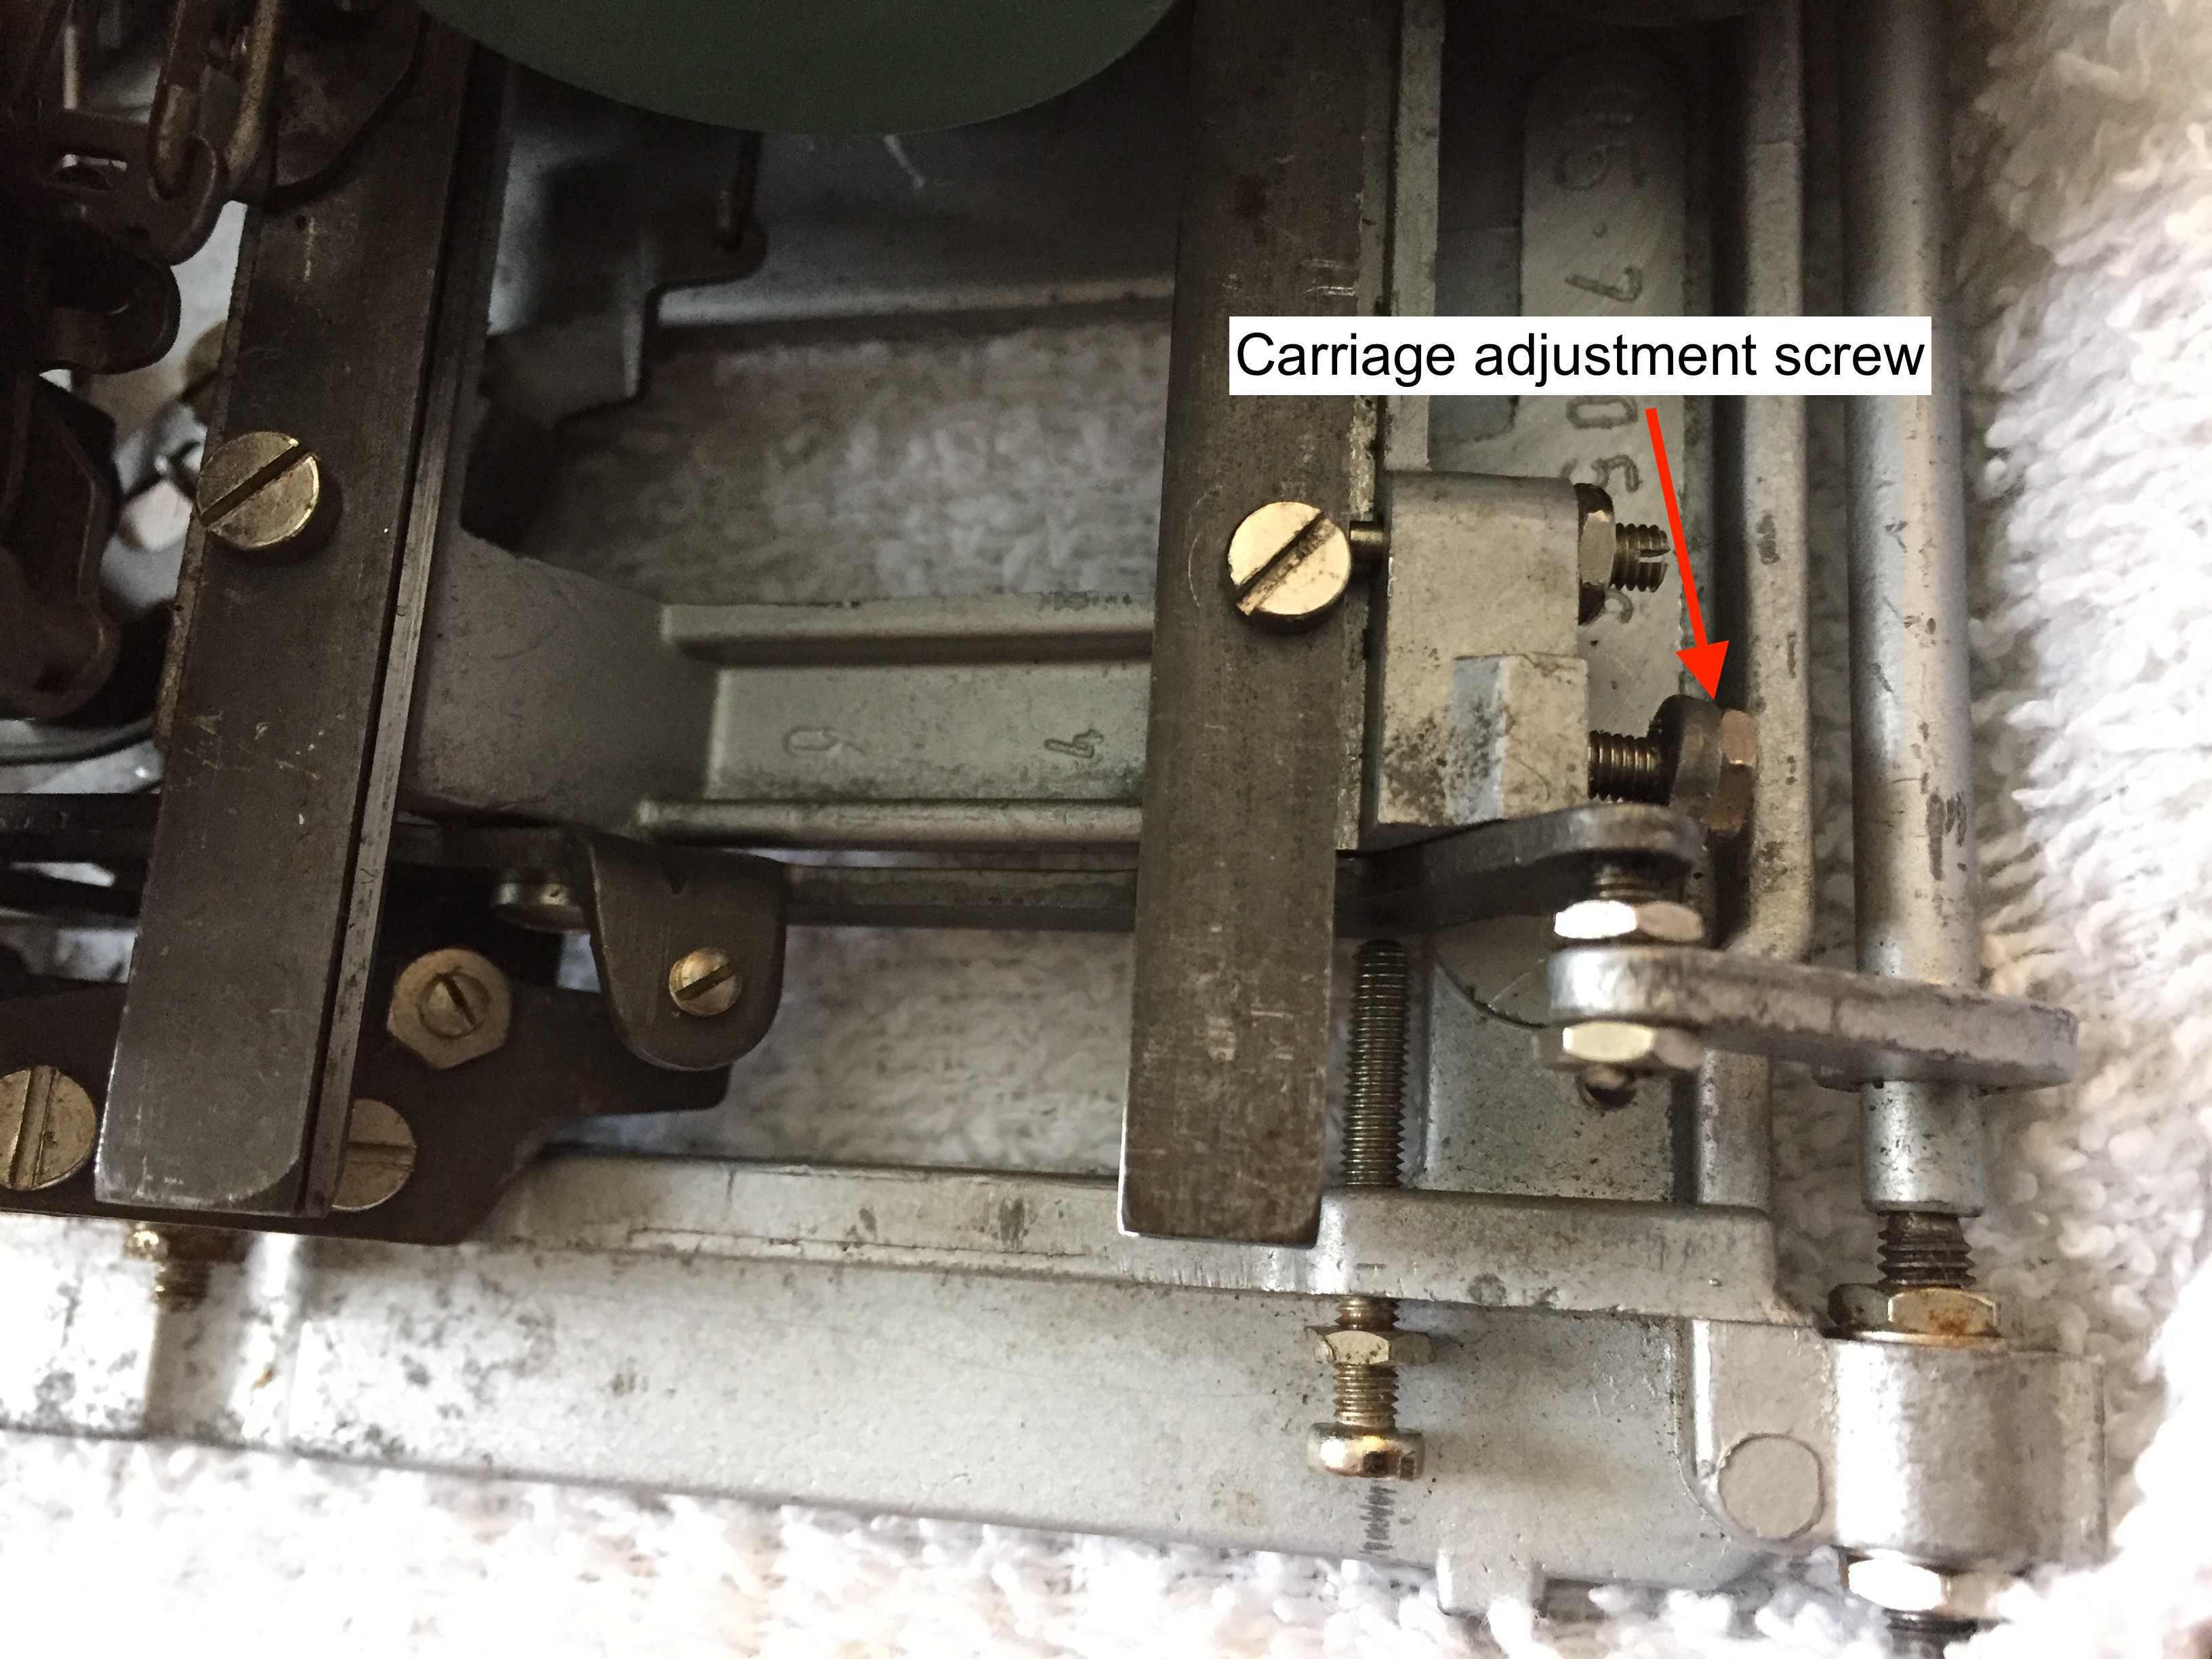
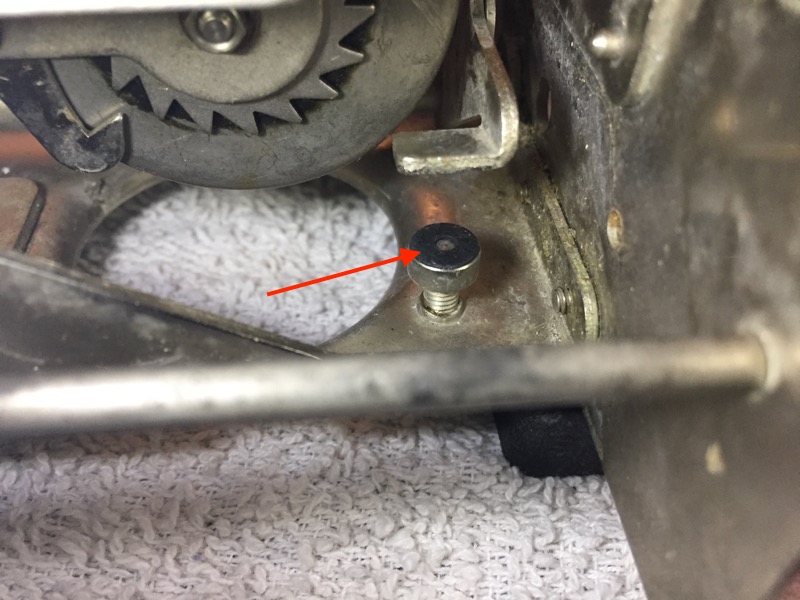
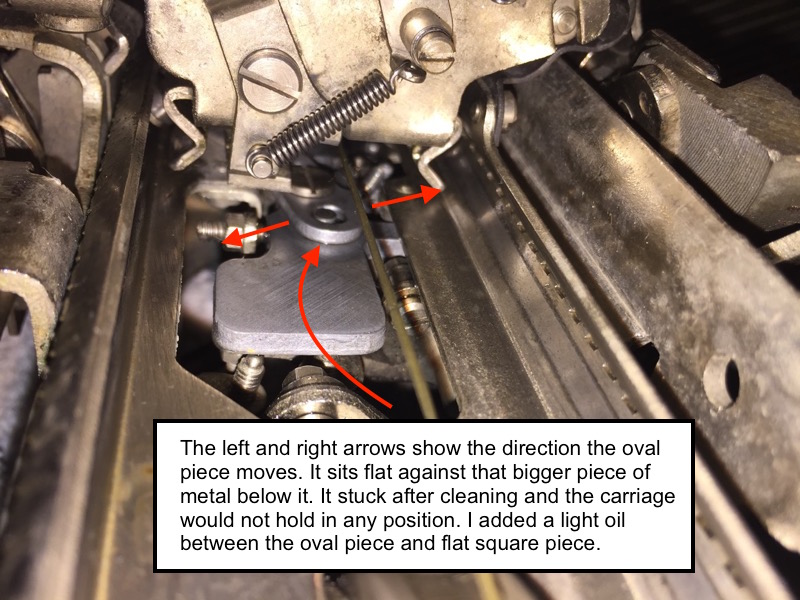
The last adjustment I needed to make is sometimes called ring and cylinder. It moves the platen closer or further from the typebars. I think the rubber on the platen over time dried and shrunk a bit. I used this adjustment to move the platen closer in order to get a better type imprint. (note: you have to loosen two screws on each side of the carriage [4 screws] in the next photo before making this adjustment.)

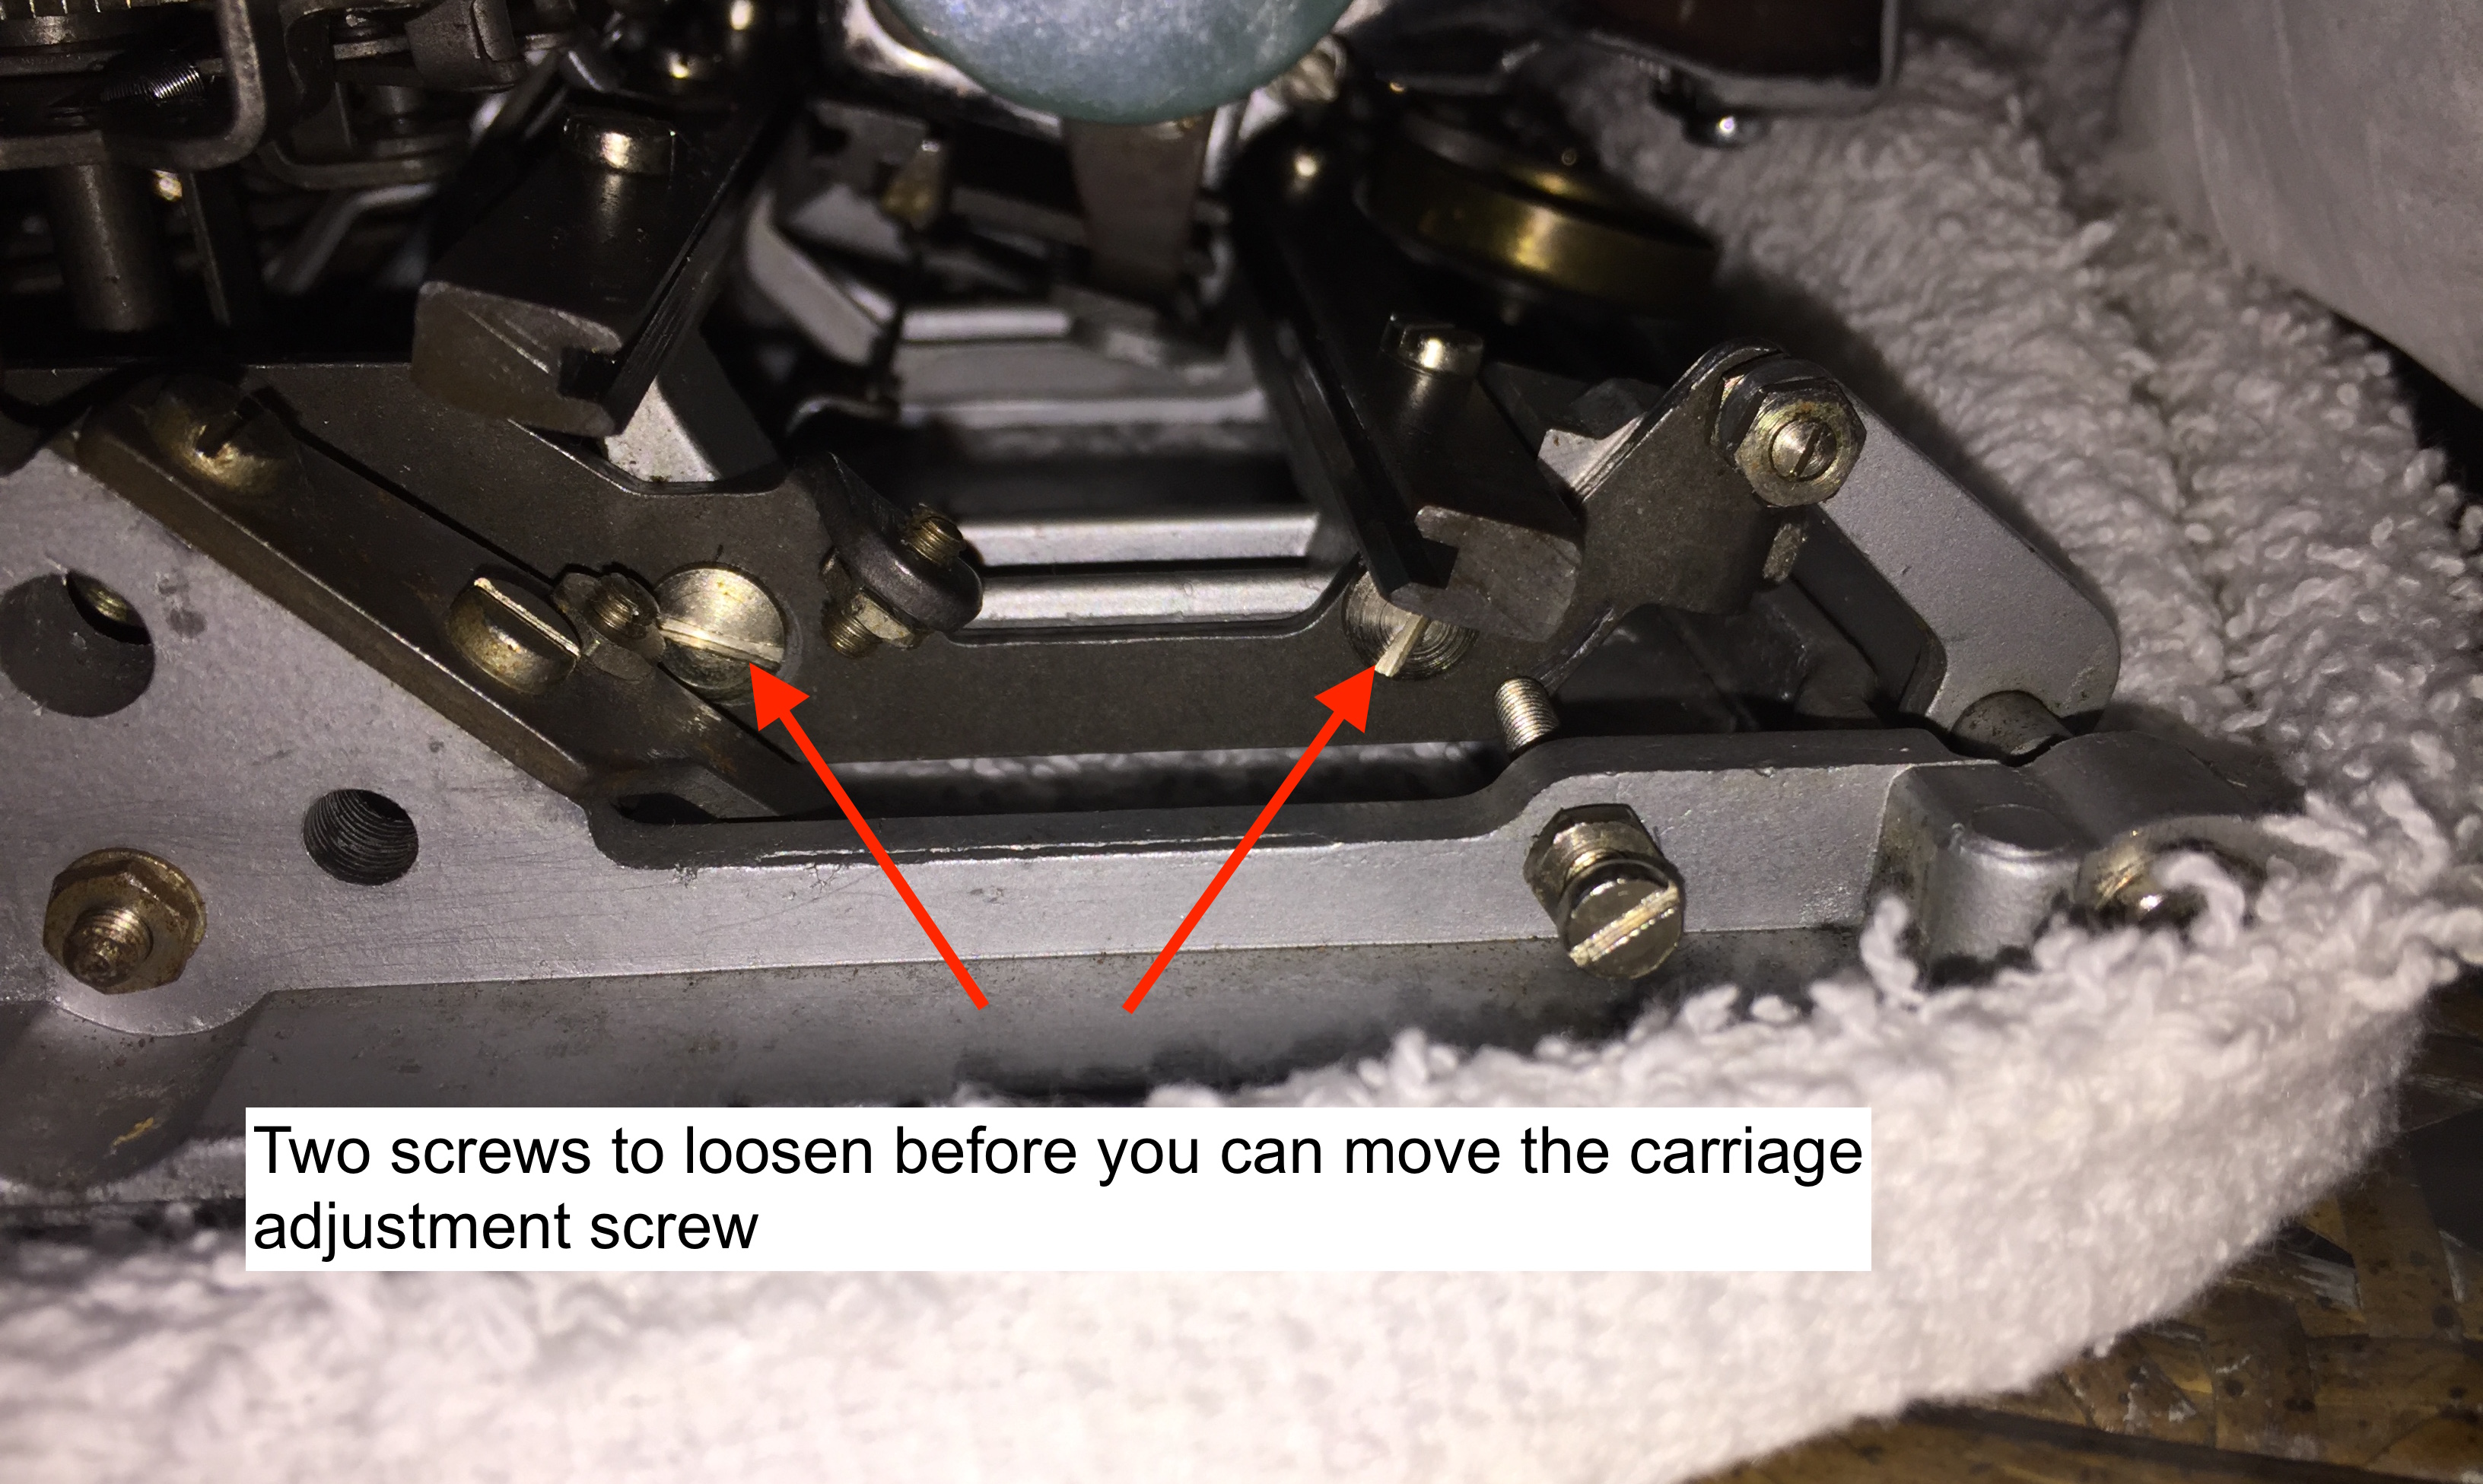
Loosen these two screws on each side of the carriage before adjusting the ring and cylinder adjustment in the previous photo. The screw on the bottom right maybe aligns the carriage left to right. Mine was too tight and it wouldn’t allow the carriage to completely drop back down after pressing shift.

I was soo careful to not loose the tension on the main spring, even when I took the carriage off. I didn’t want to have to rewind it and guess the correct tension. But when trying to re-attach the carriage I lost the tension on the main spring. Uggg… but it was a learning experience and now I know how to rewind a main spring and determine the proper tension. It’s a huge pain and easier if you have three or four hands.

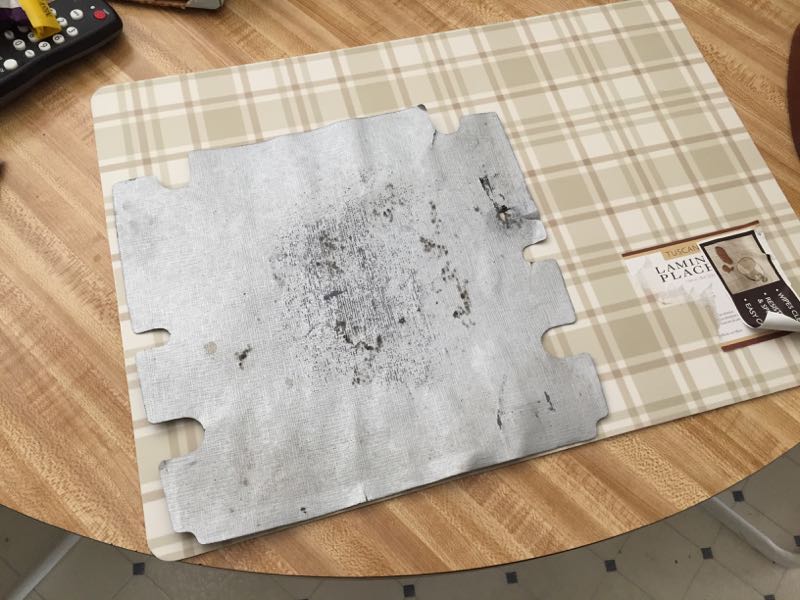
The weird shaped silver thing is mat that’s on the inside bottom of the typewriter. Mine was a mess, I found a placemat at Bed Bath, I traced around the old one to make a template

Here’s the new mat. I cleaned up the glue you see around the holes.

Here it is under the keys.

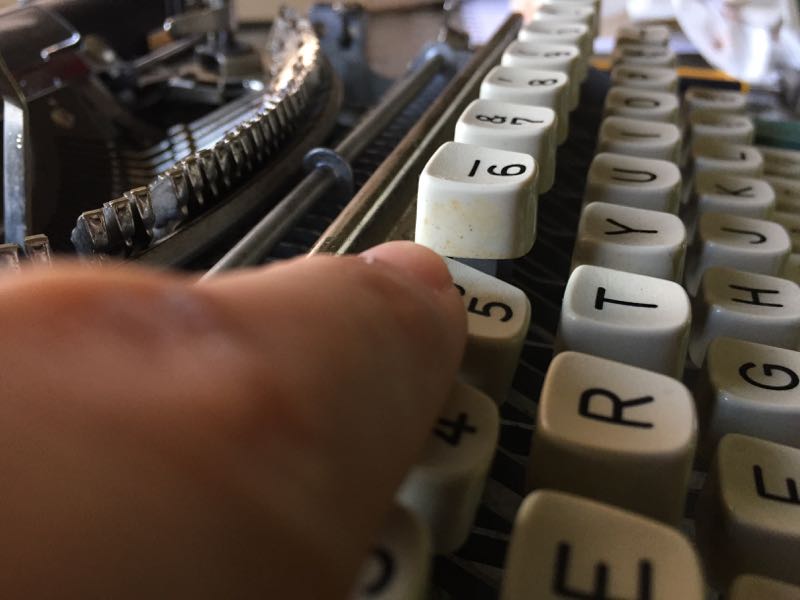
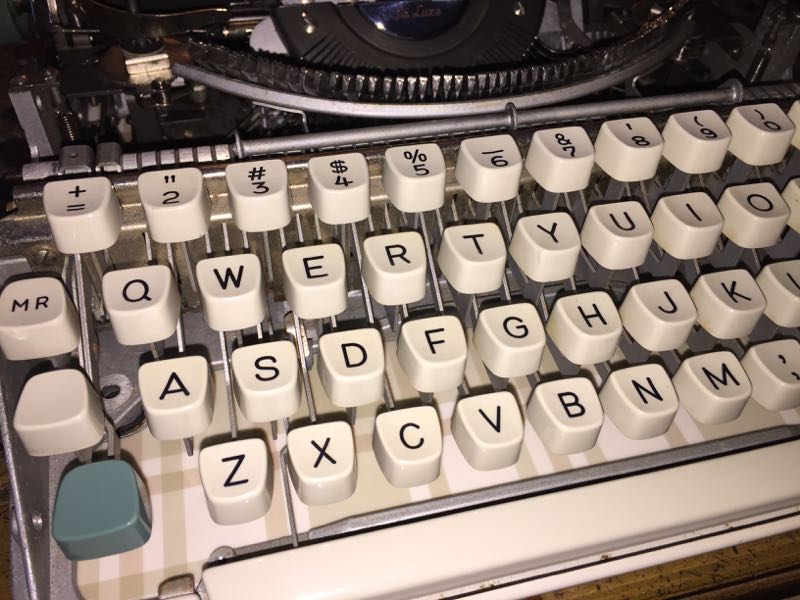
Speaking of the keys, they had crap all around them. I used a slightly damp towel and Turtle wax rubbing compound. A light rubbing removed the dirt.

Here is the key after cleaning.

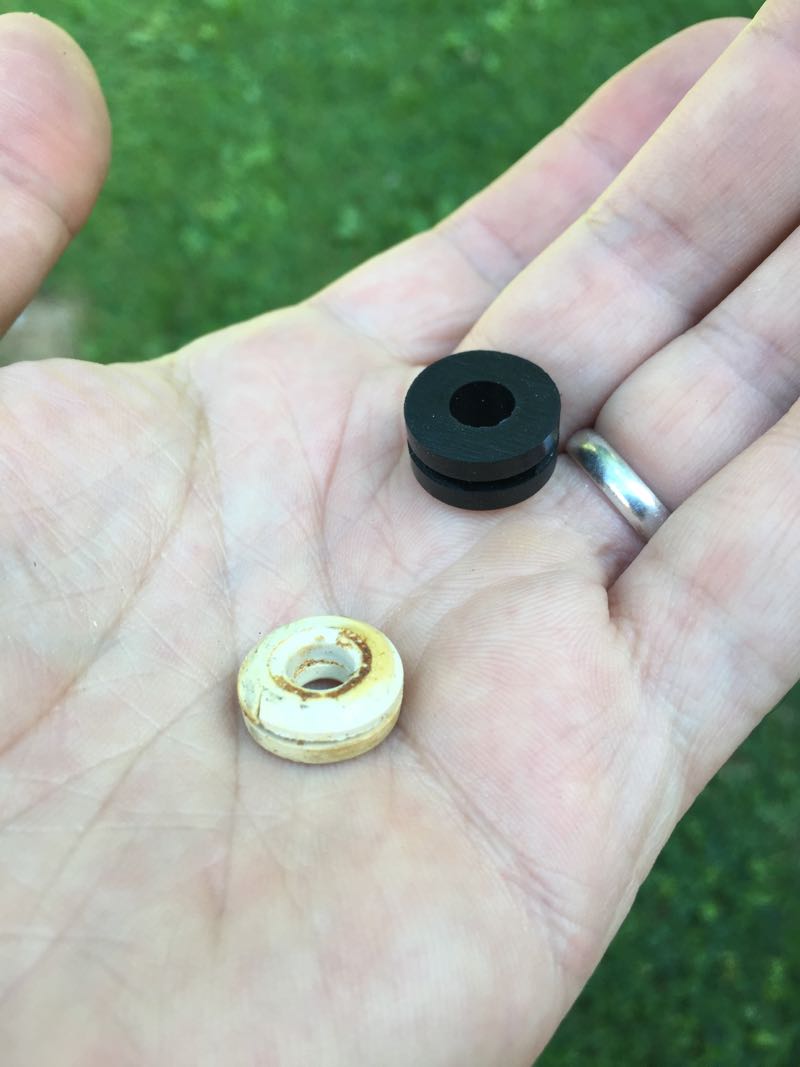
The same white grommets are used to hold the top cover on and act as the feet for the machine. I replaced them with the black ones from Hillman I found at Lowe’s.

This is the package for the grommets that fit this machine. They fit the top cover and the feet.

I put new felt inside the body. You can see the top side panel has the felt inside.

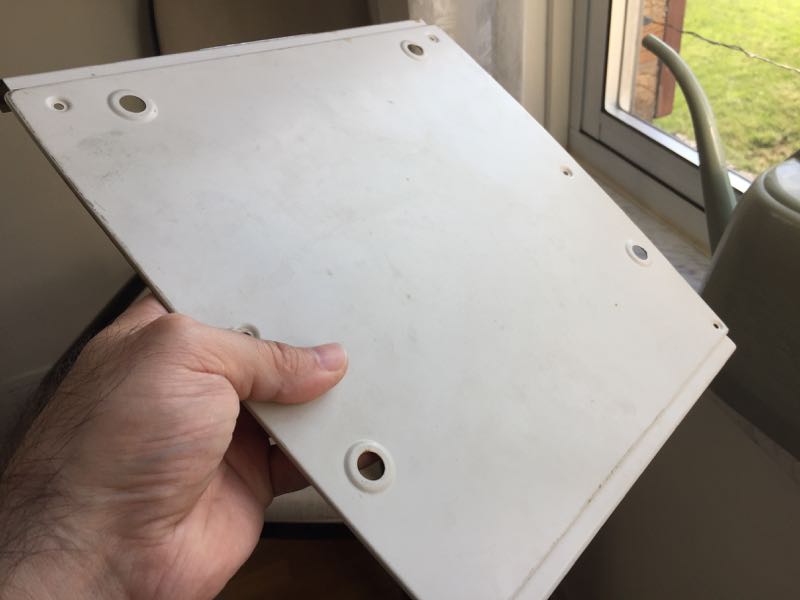
Bottom panel before cleaning. The entire body looked like this.
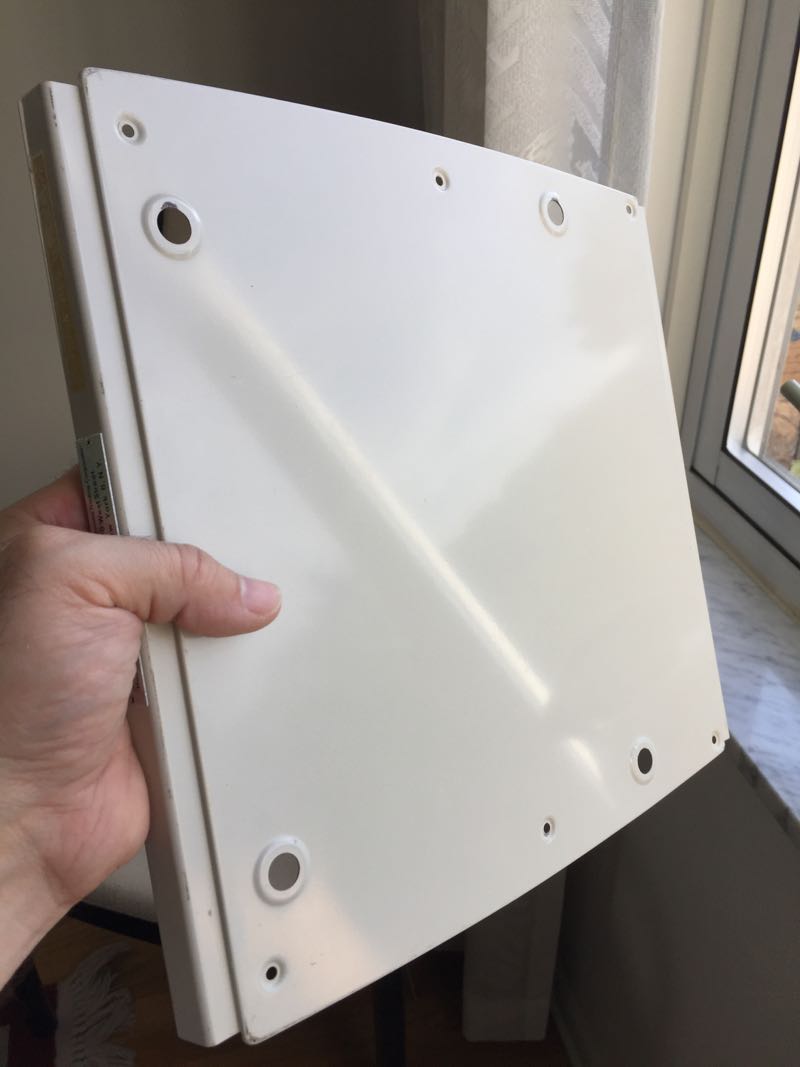
After cleaning

The paint on the body was a mess. I used automotive liquid rubbing compound, then use the polish to finish. I can’t describe how bad the paint looked before cleaning.

Review

Overall the Olympia SF is a great machine. SF stands for Super Flat. It’s very small and easily portable. It’s definitely a great typer. The line spacing adjustments are excellent. On some of my other machines (Underwood & Remington) the distance between the lines of text is larger. You can fit much more type on a page with the Olympia. I think the larger machines have a better typing feel. There is more space inside of them to leverage the key presses for optimal feel.

This is an ultra portable typewriter. Fingers and hands bump into the body when turning knobs, and returning the carriage. This however  is easy to get use to, but coming from a bigger machine it’s immediately noticeable. For some reason this machine feeds the paper very well and very straight. It has a very convenient spring loaded pop up paper rest. For it’s size I’d still say this is a heavy duty, serious typing machine. The engineering is superb. Even after all the years of abuse (I’m pretty sure it was dropped once) and neglect it still types great.


Repairing a 1957 Remington Quiet-Riter typewriter

A visual tale of repair. This is what I started with, it was a Craigslist ad.  You can click on any photo to enlarge. I’ve never worked on or taken apart a typewriter before. I was lucky to have picked a model that had the full service manual online. I’ll link at the end of this post.

A lot was wrong. Most of the keys stuck, the basket shift stuck. It was out of adjustment and quite dirty.

The logo was broken and had been glued on several times

Dirt under the platen

Dirt in the carriage assembly

First I removed the platen and this spacer washer fell out. I wasn’t sure where it went at first. I contacted a youtube person Typewriter Minutes. He had the same machine and he told me where it went. Soon after I found the manual.

The basket shift stuck and I checked everything to try an free it. I finally had to completely remove it. I was able to remove it without taking off all the typebars! Later, I found out all the typebars have to be removed to get it back into the machine.

Here it is striped of it’s platen, basket shift segment and ribbon holders.

One of the first thing I noticed was the rubber on this foot was sticking. This is the resting spot for the basket shift. Moving it up or down will adjust where the lower case letters strike the platen. I removed the old sticky rubber. There are two adjustments here, you can’t see the other one, but it’s looks the same. One is for lower case letters the other is for upper case. This is called the “on feet” adjustment. If you ever have the top of an upper case letter not imprinting or not level with the lower case letters, look at this adjustment. A good way to tell is to type HhHh, and see if the bottoms of the letters line up.

I had to remove the typebars before attaching it back into the machine. It was a lot harder to put them in than take them out, but I got a chance to examine and clean the segment thoroughly.

Here’s a photo of me inserting all the typebars after the segment was installed. I was able to make sure the basket moved freely before proceeding. There are two adjust screws that hold the basket on either side. I made sure they were not too tight or too loose, and that the basket was centered.

After I cleaned and degreased the entire machine with Mineral Spirits and Carb and choke cleaner it started acting weird. First the carriage would not hold in any position. It would always slide to the very end. This was a bit hard to track down, but the photo below describes what I did to fix the problem.

Next thing that happened was the carriage would not advance on a keystroke. I believe this is called the escapement. I image that’s because the carriage escapes from the current position and moves the the next. Well, it wasn’t budging. On opposite side there is a piece of metal that moves up and down & slides past this spot on this cog. It’s actually the view from the previous photo. It was metal to metal and it was sticking. I added a touch of light oil and that allowed it to move freely.

Once I finished that, I adjust when the escapement triggers. It’s a little screw with a washer that holds the adjustment in place. Be careful. I adjusted this many times before I got it right. I got lazy and started putting too much force on the screw and broke off the edge of the screw that’s on either side of the tiny trough. I could still adjust it after, but had to use needle nose pliers. It was a pain, but it’s a small amount of turns, so it wasn’t too bad.

Everything is mostly together at this point and I needed to start adjusting the ribbon vibrator. Here is where it connects. It’s detached in this photo and you can see the tiny hole where the screw grabs the rod is missing. Adjusting the ribbon vibrator wasn’t easy at all. First you have to get it attached at the right spot on the rod it has over 100 degrees of movement. Second you have to make sure the rod is far enough in before you tighten down the screw.

I used blue painters tape to mark the height of the ribbon vibrator, than I could move it up or down relative to that point. It’s a tough adjustment because it moves around as soon as you loosen the screw. The tape gave me a reference point to come back to. There is a entire procedure when adjust the ribbon vibrator. The underscore needs to hit something like a 1/16″ from the bottom of the black part of the ribbon. Once you get this right it sets a baseline to make all the other adjustments for uppercase, lowercase and letters on the red part of the ribbon. You can see the HhHh that I used to test the on feet adjustment.

At one point the ribbon was over throwing which means it was jumping up too high and causing letters to be part black and part red. This one tripped me up for a bit. The eccentric wasn’t contacting the finger on the right. I need to “form” or bend the finger towards the camera to make it contact the washer. Now that I think about it, I could have moved the rod out that the ribbon vibrator was attached to. Hindsight!. However if I had done that it would have messed up my baseline adjustment for the ribbon vibrator.

There is a comb shaped thing below all of the keys. When you strike a key it moves this piece an it determines how high the ribbon vibrator goes. Again, this is a color mixing issue on the type. Several of the fingers on my comb were bent down. The manual says this is a last resort adjustment. I was having bi-color typing and part of the solution was to straighten out this comb.

You can see here the comb is aligned now. I adjusted two or three of the fingers every so slightly, I think for the number 8 and the 4. One other I can remember. You can barely see the adjustment. Before many of these fingers were bent down a good 1/8 of an inch.

Here is the type after I cleaned it with a very soft brass brush and Mineral spirits. Soft brass is important. I didn’t want to damage the type.

Here is the body after I removed the disgusting, hardened, saturated felt. I would guess this typewriter was not kept in an air conditioned house. The damp saturated felt, caused surface rust on the inside of the panels. I scraped off the old glue and rust with a chisel.

Okay teaching moment here, don’t do what I did and get impatient and spray oven cleaner on the paint to try to get it clean. You can see how clean it got, but it removed too much paint. I really wanted to get scrubbing bubble cleaner which is recommended in the typewriter revolution book. However, I think I found something better, Borax. The powdered cleaner, it’s called Borax 20 mule team. It comes in a box. I wet the paint, sprinkled the borax on the surface and went to town with that little brush in the photo. It’s a good cleaner because this typewriter had wrinkle or crinkle paint, and it didn’t damage the structure of the wrinkles in the paint. I later spot sprayed rubbing alcohol for spot cleaning. However be careful, the alcohol will wear down the wrinkles in the paint.

Here is the cleaned body, you can see the small end pieces have not been cleaned and the color difference.

After everything was clean I attached a thin foam to the inside of the body. However it was thinner than the original felt, and it didn’t deaden the sound much. You can see the foam under the felt on the edge of the right most piece top edge, it’s a lighter black color. After a lot of consideration I decided to add felt again. I chose the thicker felt from the craft store and attached it with Amazing Goop. I love this stuff. It holds really well and stays a bit flexible. It wasn’t easy, I put dozens thin lines of the goop on the back of the felt than carefully attached it.

Here is the felt before I cut it, I kept the old felt and use it as a pattern drawing around it with a silver sharpie. Sharpie side was attached to the body.

It was really hard not to damage the logo further, there was a lot of glue attached to it. I cleaned it and put a brushed finish with sand paper. This also removed whatever was going on what that letter R.

What to look for when adjusting the ribbon

Maybe some people find it easy to adjust the type so black letters are black and red are red. I found it very challenging. Below are some of the issues I fixed.

The photo above you can see the t and i are bi colored. Ribbon was not going up high enough. You can see the HhHh on feet here.

You can see the bottom of red letters q, r, f, j are partially black. This is the ribbon jumping too high and ink left on the type would imprint black on the bottom of letters.

This was the most upsetting part for me after everything was adjusted correctly I noticed the bottom of capital Q’s were in red. This was because the ribbon vibrator was over throwing, going to high again. The image above where I bend the finger out towards the camera fixed this issue.

Ooooh those 8’s and 4’s gave me trouble. You can also see the dot above the i’s are black. This was because the ribbon vibrator was not going up high enough.

I’m including this image because I thought it was funny. During the adjusting process I did a lot of test typing. For some reason, typing the word Advil in all caps caused the carriage to not advance. I describe how I fixed this issue in one of the photos above. You can see the L in locks is over top of the o. Carriage didn’t advance.

Finished photos

I removed the platen and scrubbed it with the scrubby side of a sponge and Bar Keepers Friend. Soft Scrub would work too. It came out rather clean. The platen still has a bit of give, but it’s not as soft as it was when it was new.

Sadly I couldn’t save the Quiet-Riter on the front. Here’s the reattached Remington logo. I also painted the little color circles for the ribbon selector.

Nice and clean gears

Cleaned inside photo


Finished.

Type specimen

Not perfect, but not too bad. The half black and half red capital Q is because I forgot to switch the ribbon color selector.

Final thoughts

This was more of a project than I expected. I spend probably 40 hours fixing this and the Advil was for my back. I didn’t expect it would be all this work. I learned a lot and again, having the full service manual was a huge help. Every problem that came up, (and many did) seemed impossible to fix and overwhelming until I actually fixed them.  Also I think I typed, “the quick brown fox jumps over the lazy dog” over 100 times. So much so that I had to find a new pangram. I liked, “Pack my box with five dozen liquor jugs”, it’s one of the shortest, and my favorite, “Six big devils from Japan quickly forgot how to waltz”

Oil I used was Hoppe’s No. 9 Lubricating Oil, 14.9 ml Precision Bottle. The tip is very fine, it delivers micro amounts of oil. The machine was left mostly dry, however a few parts needed to be lubricated as indicated above.

Here are the instructions for a 1953 model Remington, there are not many differences that I found