Category Archives: Reviews

Red Rock Gear Rover Sling Pack ( review and alteration)

Recently I found one of the best designed packs. The bag below is made by Red Rock, Here is the Amazon link. It’s extremely well built has a ton of pockets and webbing inside of the pockets. The webbing is nice because you can secure each item inside the bag. The benefit is that you know exactly where your stuff is and it won’t shift around as you move. This makes finding things extremely easy.

There is only one problem with this bag. It’s not comfortable to wear. They designed a flair at the end of the strap that cuts into my neck. The ONLY way to wear this bag without it cutting into my neck is to were it extremely tight so the flared area sits on your chest. There are several problems with this, it’s hard to get on and off, and it’s not comfortable when wearing a jacket, and it’s not comfortable in general when worn that tight.

I wanted to get the bag altered, so I spoke to a seamstress and a shoe repair shop to see if they could remove the flared area of the strap. Neither wanted to touch it. The seamstress did comment that it was a shame because the material was nice and it was stitched so well.

I bought thread a thing to protect my finger, a stitch remover and a few needles. I also needed a pliers occasionally to push and pull the needle. Here’s the process below.

This is the before photo

Pulled out the stitching, exposed the foam inside and marked the line I wanted to cut

Cut the foam to size

Sewed the front and back material around the foam

Stitched the edging back on. I was able to restitch the edging without cutting it. Finished.


Snow Peak Hozuki LED Lantern review (full size)

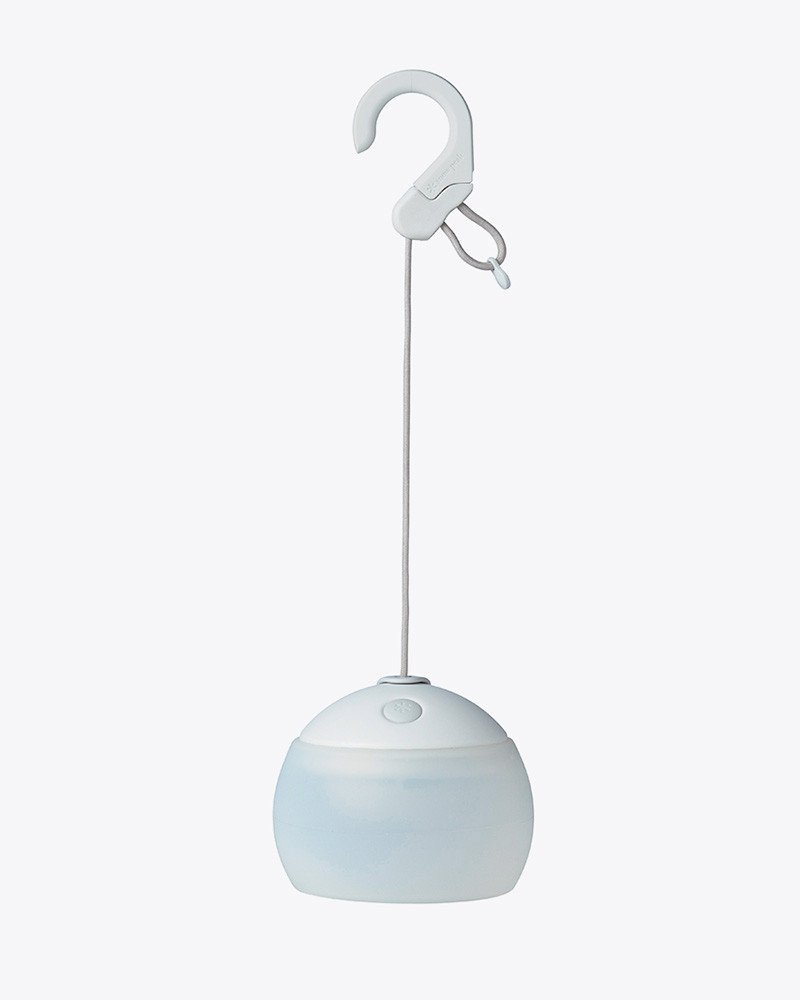
I added (full size) because there is a mini size of this light. Here is a link to the website for this “full size” lantern.
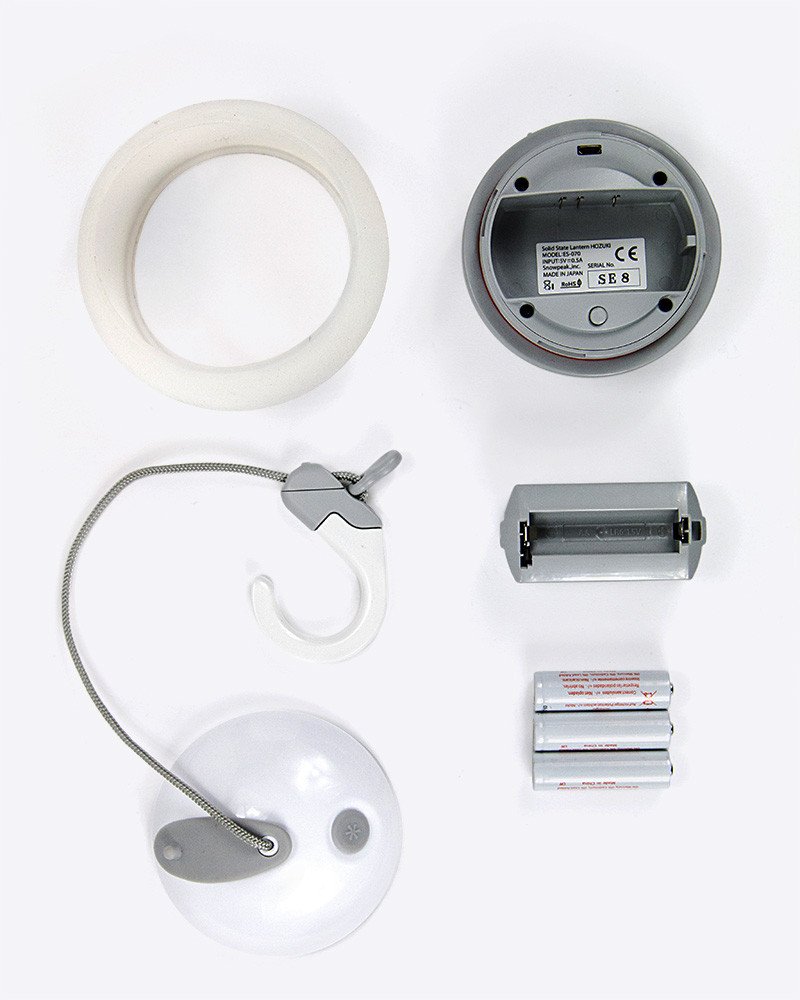
es-070wh_snow_1024x1024

Batteries: (3) AA
SKU: ES-070(WH, GR, BR)
Runtime: High 8 hrs / Mid 20 hrs / Low 80 hrs
Price: $100 USD
Modes: Normal Mode with Dimming, Candle Mode, *Sleep Mode
*light does not shut off in sleep mode (we’ll call it nap mode)

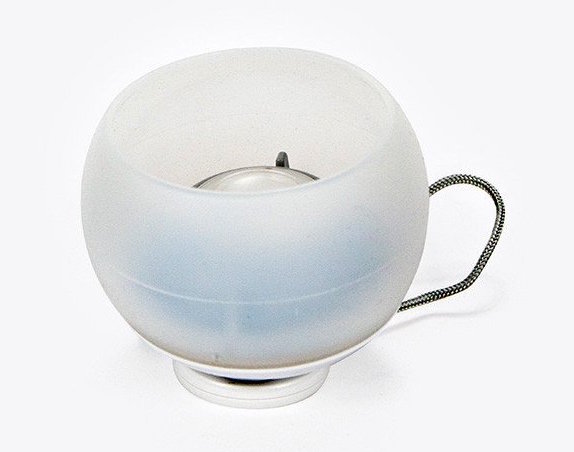
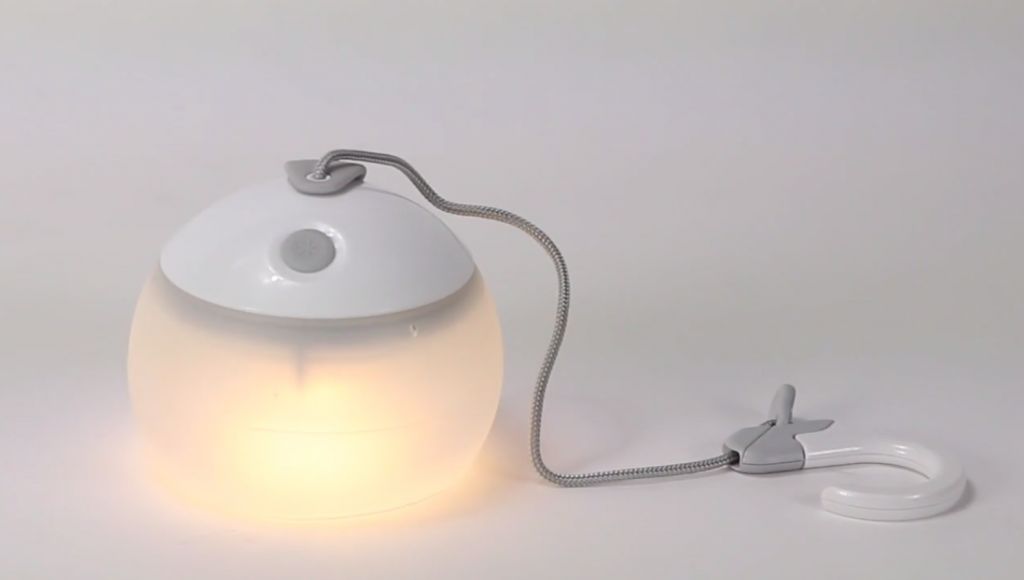
This is upside down resting on the hook

es-070_detail1_on_hook

Details photo

es-071_color_7_exploded

My wife bought me the original version of this light years ago for my birthday. It was orange and white, and had two modes, standard and candle.

The length of the string is adjustable, and you can set it easily. The hook acts like a stand or cradle. Turn it upside down and rest the light on the hook to use it on a table. Snow Peak also makes a rechargeable battery pack (I think) for around $40. There is a USB plug in the body to recharge the battery pack. That’s a bit much for me. I use rechargeable eneloops.

The frosted circular part is made out of silicone. It’s firm enough for the light to stand on, but it’s also soft, squishable and just plain cool.

Light Modes

Normal mode: Clicking the button will turn the light on. Pressing and holding the button after its on will dim it to the desired level.

Sleep mode: Hold the button until the light flashes slowly and let go. Press and hold the button to dim. In this mode it will slowly dim as sound in the room decreases.  This works okay, but this light is like my grandfather, hard of hearing so, it will dim down pretty quickly.

Candle mode: Hold the button down for a bit until the light flashes quickly then release. Press and hold the button to dim the light. In this mode the light will react to sound and wind. This will cause the light to flicker like a candle. This light needs hearing aids though, because it needs a lot of sound or wind to make it flicker.

hozuki_lit

Difference between versions

Compared to the old version, the new version has three modes including candle feature, but it doesn’t flicker on it’s own like in the original version. It only flickers if there is wind or noise. With the newer version it takes a lot of noise to make the lantern flicker or go out. To make this one flicker you would need a loud discussion, the light sitting on a speaker, or a wind storm. I don’t have it anymore, but I preferred the older models candle mode. I’m looking to buy the older version that was produced around 2014.

Modifications and anatomy

I was curious, so I took this guy apart. I wanted to see if I could make it more sensitive to sound. Let’s look inside.

labeled-board_web

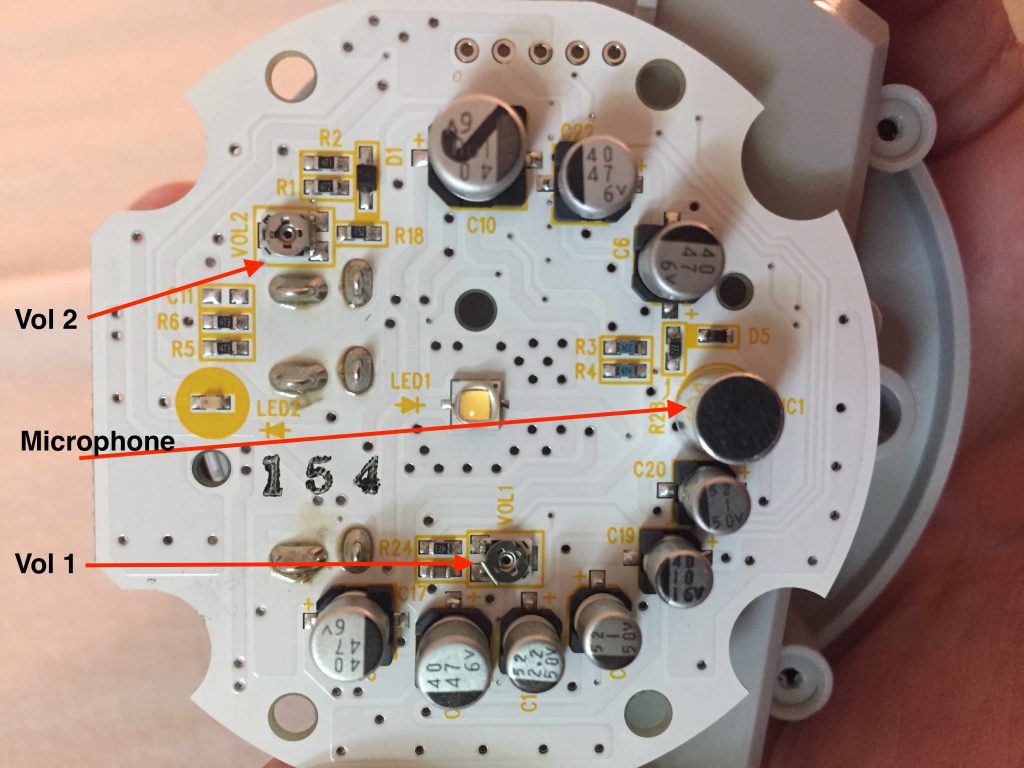
I point out Volume 1 and Volume 2 as if I know what they do. I have no idea. I’m not even sure they are volume. They rotate and I adjusted both, but didn’t see any difference. My theory is that one adjusts the sleep mode sensitivity and the other adjusts the candle mode sensitivity. I put them back to the original positions. I did however find the microphone. When the light is apart it’s very sensitive to sound. A polite conversation will make the light flicker and blowing on it will make the light go out. So, with some adjustments you can essentially have a lantern that will flicker with light sounds and can turn off by blowing on it.

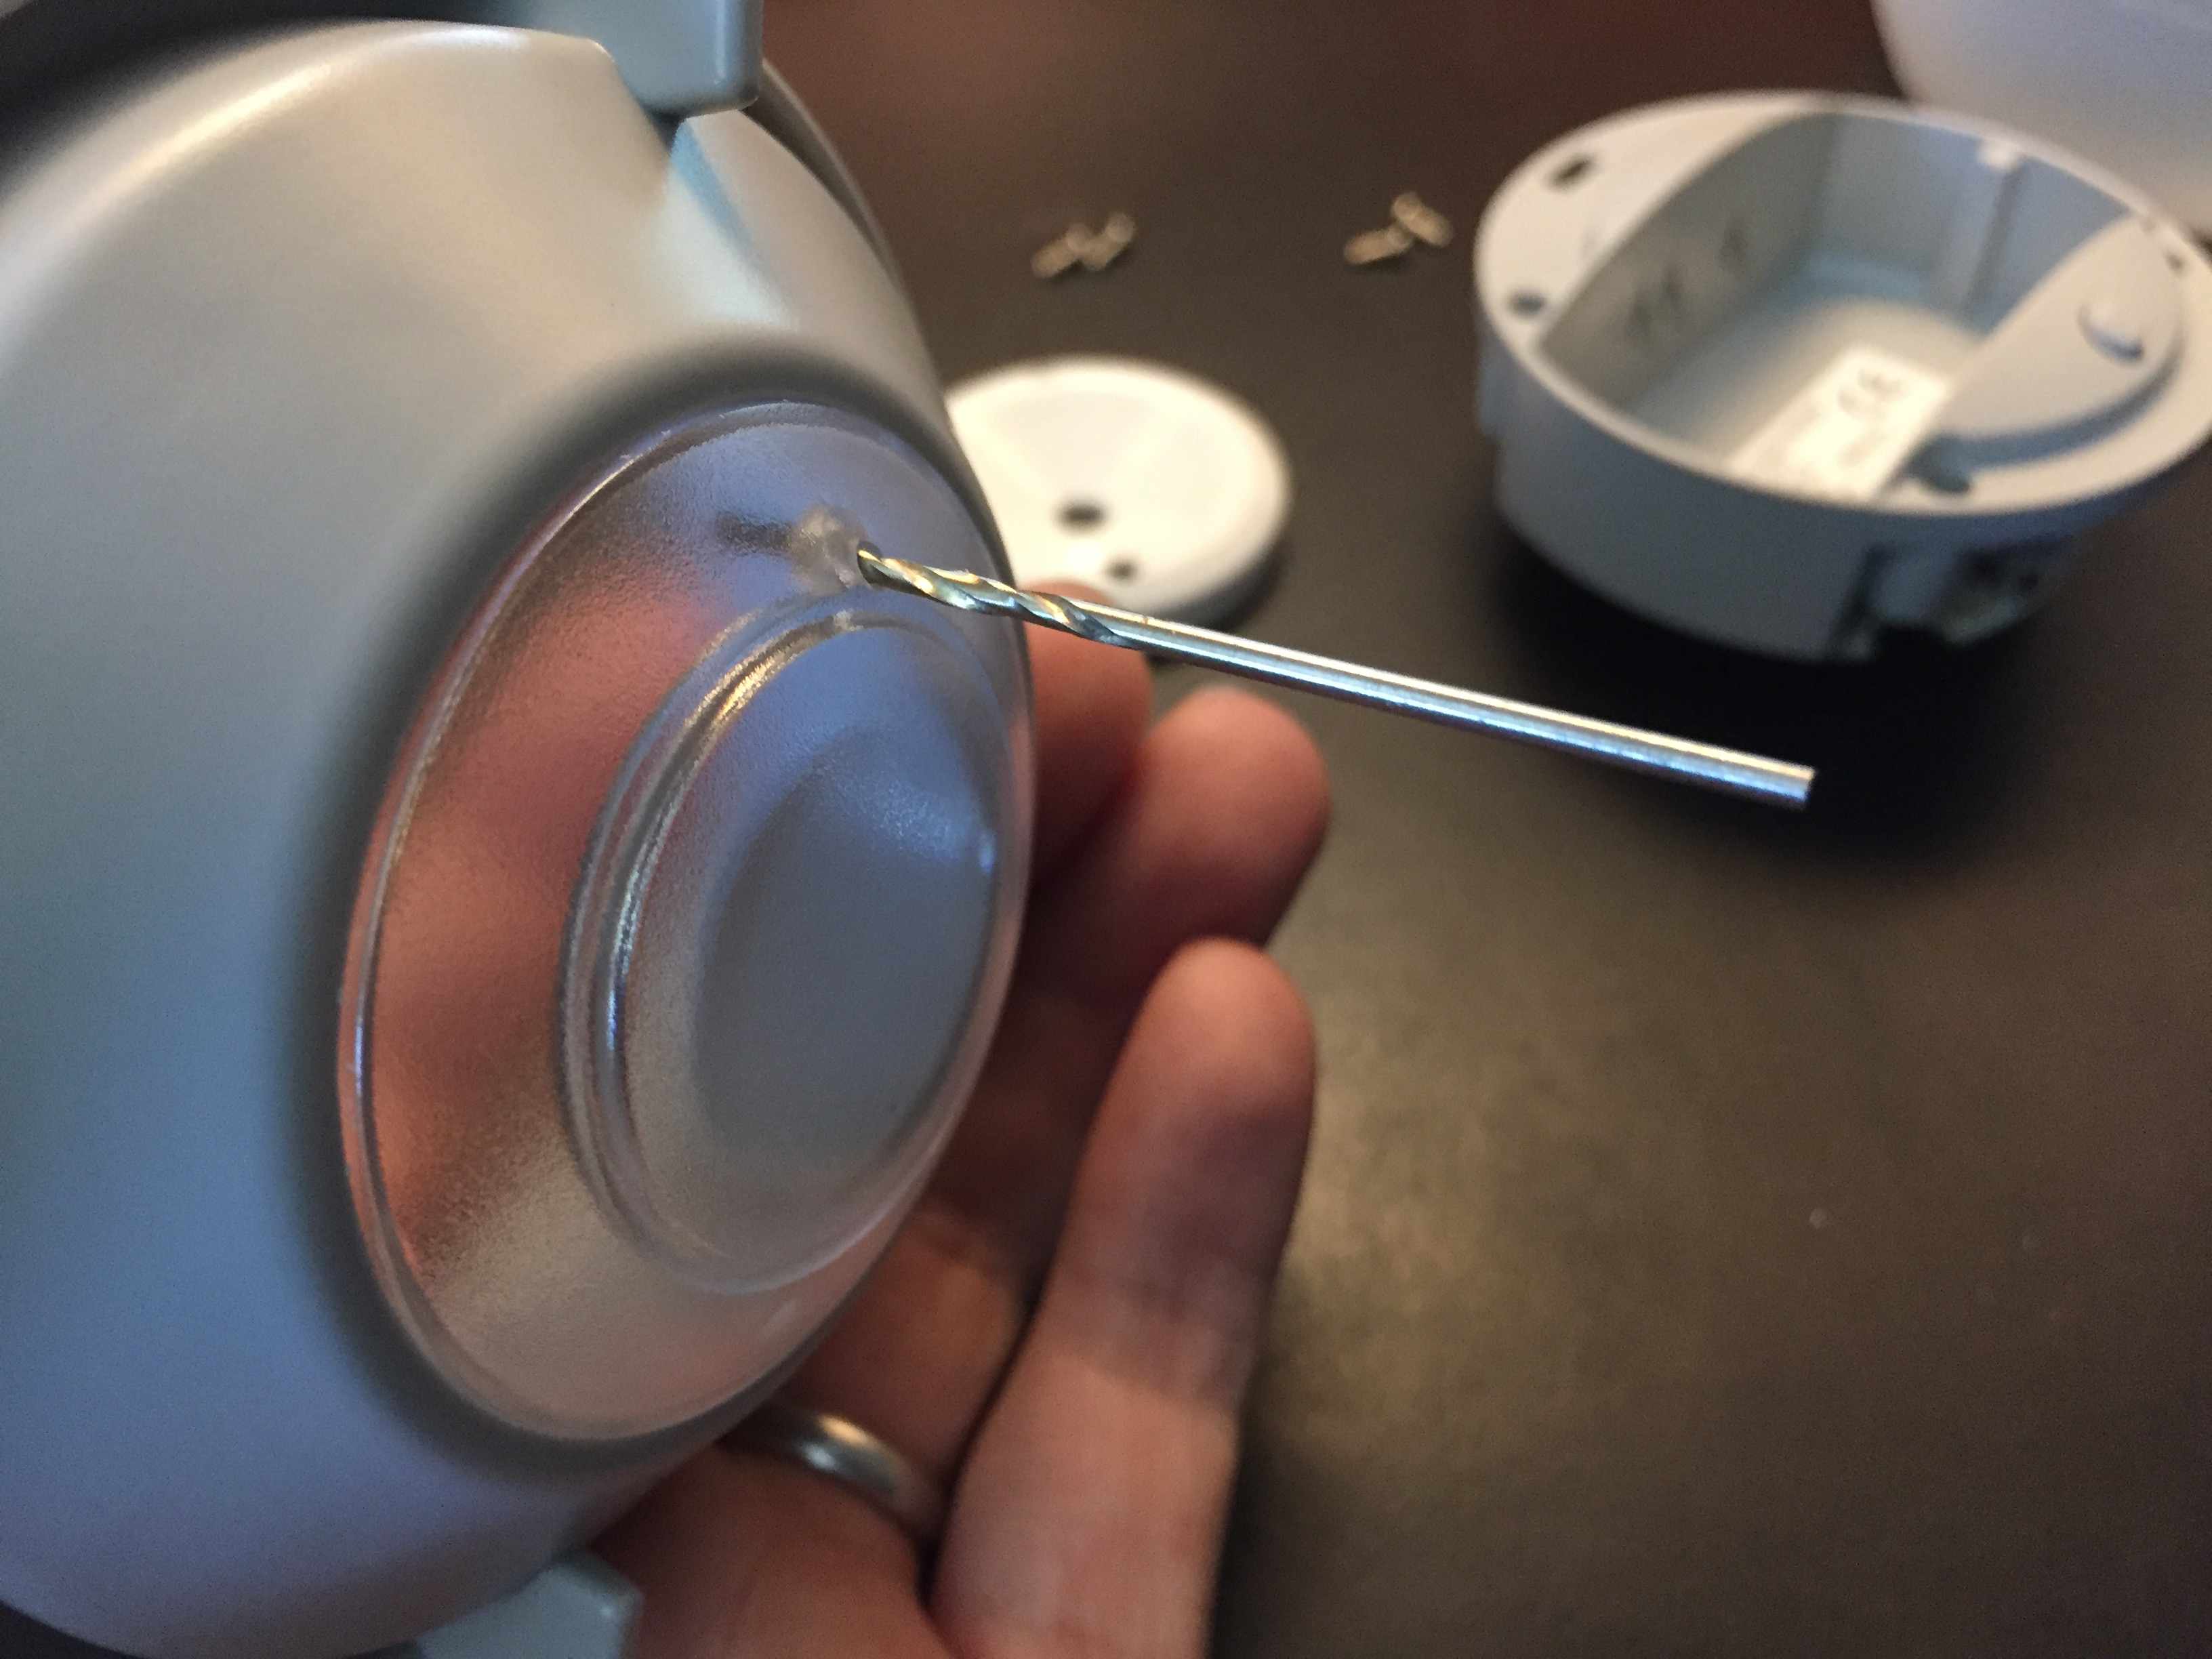
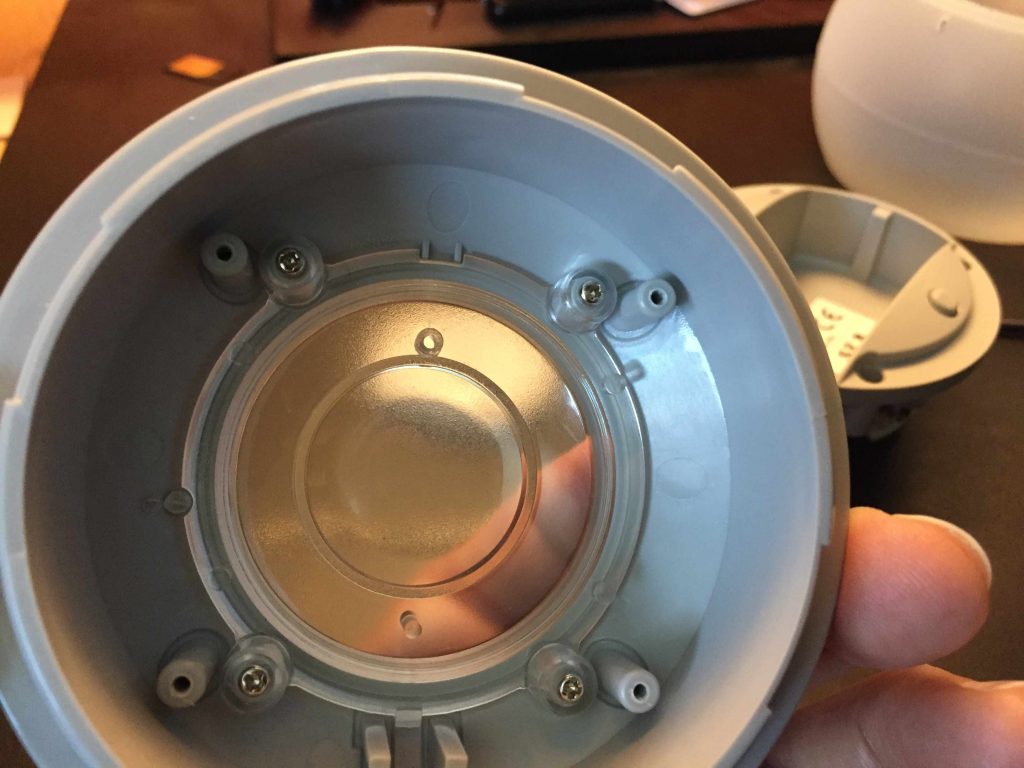
I modified the casing to make it more sensitive to sound. The speaker sits behind clear plastic that has a hole adjacent to the microphone. The hole goes part of the way through, but not all the way through the plastic. I figured drilling the hole out all the way would do the trick. I know it won’t be waterproof or water resistant any longer, but I don’t go camping or use it on rainy days.

where_to_drill_web

The hole on the front is already there and goes part of the way through, so I drilled it through the rest of the way. I guess I could have just drilled it thought more, but not all the way to keep it sealed. But, hindsight…

underside_web

After putting it back together it still works. It reacts quite a lot to sound, and I can blow it out. I suppose I could always add some clear epoxy if I wanted to seal it up again. Or I could put some sort of material behind it to block the sound in order to adjust the sensitivity or even make it waterproof using a thin membrane of some sort.

Impressions and thoughts

I think this light is very well made and incredibly charming. I really like the uncommon shape. If I were to make any design changes, I would have a 4th mode that acts like a candle without needing to be activated by sound, but would also have sound sensitivity as a bonus, just like the original version.

How to fit your Tilley hat (sorta)

My wife bought me a Tilley hat last year while we were at REI.  I read the sizing instructions that come on a small pamphlet inside of the hat many times before choosing the size. My wife said several times that it seemed big. I kept saying that based on the sizing instructions it was correct. After a few weeks I started to get comments and realize that I might be wearing the wrong size. It turns out my dad has been wearing a Tilley hat for over 25 years and was kind of an expert on how to fit these hats, but I’ll get back to this later. In my opinion the sizing instructions describe a very different fit then what the sizing chart specifies. Here are the sizing instructions:

The Tilley Hat fits more comfortably than other hats. It’s designed to be worn low on your head and slightly loose. It should be held on by gravity, not by painful pressure on your forehead! For the proper fit, you should be able to easily insert two fingers, flat, between the middle of your forehead and the front of the Hat. The Hat should be loose enough that you can rotate it to the left and right, and lift it up and down, without friction on your forehead. When it’s windy, use the cord! I think you’ll be pleased with the way it fits and feels – especially on hot, muggy days.

To me these instructions describe much different fit then what the chart specifies. Shown below:

sizeChart

Sizing instructions vs the sizing chart

The sizing instructions says it should, 1. Be held on by gravity, not painful pressure. 2. That you should be able to easily insert two fingers between the middle of your forehead and the front of the Hat. It also says, 3.The Hat should be loose enough that you can rotate it to the left and right, and lift it up and down, without friction on your forehead. Based on these instructions I picked at hat that sat low on my head, I could easily put two fingers between the hat and my forehead (without pulling the hat forward to create space), and one that I could rotate left and right. Basically a bucket type of fit.

When I started to suspect that I purchased the wrong size I called Tilley to ask about the fit. The woman told me to measure my head, then gave me my hat size. When I told her the size I purchased and she laughed, and said something to the effect it was several sizes too big. My head measured 22″, and I had purchased the 7 3/8″ It sat low as described, and matched all of the other characteristics of the sizing instructions. The hat actually became uncomfortable because it would either curl my ears over or they would go under the brim. Neither was comfortable.

Back to my dad. I went to Florida to visit my parents recently and one of the first things they said to me was my hat was too big. My dad let me wear his hat the entire time I was there, it was 7 1/8″, he said it was a much better fit and that my actual fit should be just a bit smaller. He was so right! I won’t mention that he may be the best Tilley hat salesman on the east coast. I noticed several people in his housing area with Tilley hats and he later told me it was because of him.

The way my proper hat size fits is not at all like the sizing instructions. It’s snug!, It’s not strangling my head, but I would call it snug. I have not tested this but, I think if I hung upside down it would not fall off. I can fit two fingers between the front of the hat and my forehead but, I have to pull the hat forward by the brim with a bit of force to create the space. I can rotate the hat left and right on my head but there is friction. Done fast enough I’m sure I could create a fire. The nice thing about wearing the proper size is that it no longer fell over my ears (which caused irritation). And, I could comfortably wear the hat with sunglasses and it did not interfere with the arms of sunglasses.

Below are the images of the hat on Tilley’s website:

LTM6_Image4LTM6_Image7LTM6_Image1LTM6_Image8

In all of the above photos the hat sits above the top of ears which does not coincide with  the sizing instructions. There is one photo below that show a fit more in line with the sizing instructions. In the above photos the hat sits down to about the middle of the forehead.

LTM6_Image10

This photo above seems more like the bucket style fit that the sizing instructions describe. We cannot see her ears, but I suspect it’s over or touching them. The hat sits down to the bottom of her forehead.

I believe there is a great great disparity between what the sizing instructions describe and what the sizing chart specifies. Which happens to be the LTM6.

I know somewhere deep within the Tilley headquarters sits one of my dads old hats on display demonstrating the durably, quality and longevity of this hat and the company behind it.