This article is over a year in the making. I’ll describe how I stream to Twitch using a MacBook Pro 15″ 2015 El Capitan 10.11.6. My wife streams with her Macbook 13″ Pro 2015 Sierra 10.12.6. If you have a newer Mac you probably won’t have any USB 2.0 or 3.0 ports only USB-C. You’ll need some dongles ( dang Apple!)
Warning!! Don’t use this. When I first started streaming I use an Elgato HD60. Since they don’t write drivers for the Mac you have to use their propriety software. It’s called Game Capture HD and it’s not very good. I’m not just saying that. I’ve tested this software for over a year and it has not gotten any better. Here is the article that describes the troubles you’ll have if you by a Elgato and Game Capture HD. I won’t go into the details, but there are video and audio problem.
Goals
Get the Mac laptop or desktop to stream our games to Twitch.tv using OBS
Hardware you’ll need
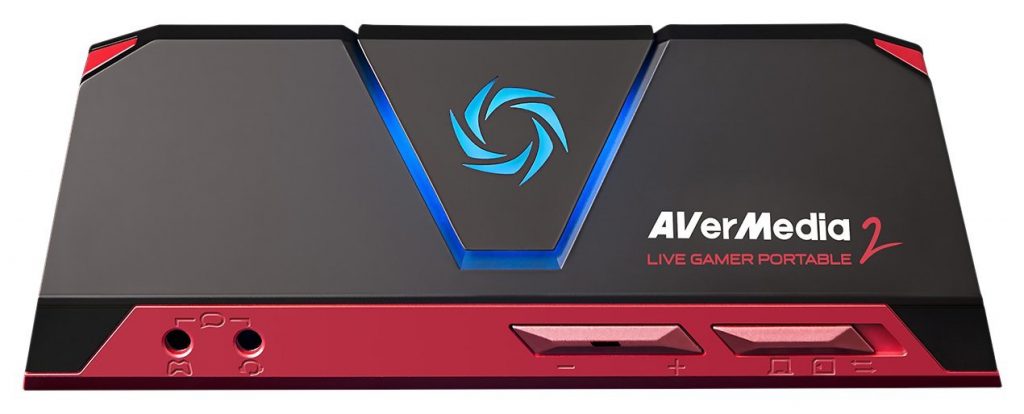
AVerMedia Live Gamer Portable 2. This is plug and play. The drivers are built into the kernel. There is nothing to configure. You literally plug it in and it works. You may need to update the firmware on the Avermedia. For this you’ll need a micro SD card. This is a great unit, only thing that I don’t like about it is the main light blinks enough when it’s idle to give you seizure.
Software you’ll need
OBS – Main streaming software
Soundflower – Software to stream audio from the Mac (optional)
X-Chat Aqua – Software to get audio notifications for chat messages (optional)
OBS settings
You can find info for how to setup OBS. Here is a good article that shows how to set your encoding for Twitch streaming (bitrate, framerates, resolution, etc.) Primarily I stream from a Nintendo Switch. I’m not going to get into the details for how to setup OBS for streaming because it’s the same for Mac and PC and there are plenty of articles online that describe in detail how to do this. Here is an article on Lifewire, and Here is an article on Windows Central. I’d rather not watch video instruction, but here is an article on OBS Project that has multiple videos. You can choose your article or find another online.
How to get audio from the Mac into the stream
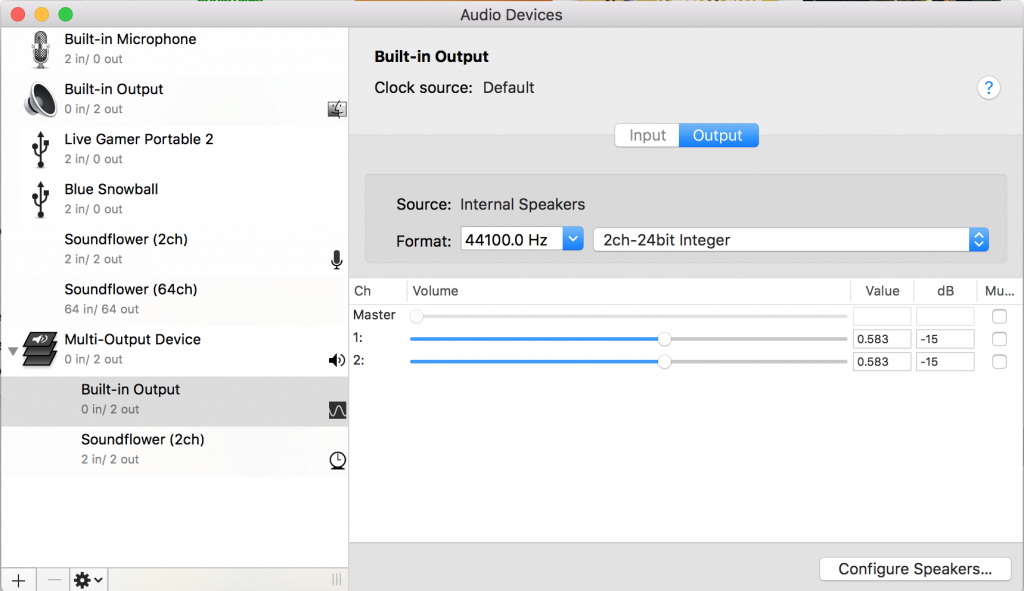
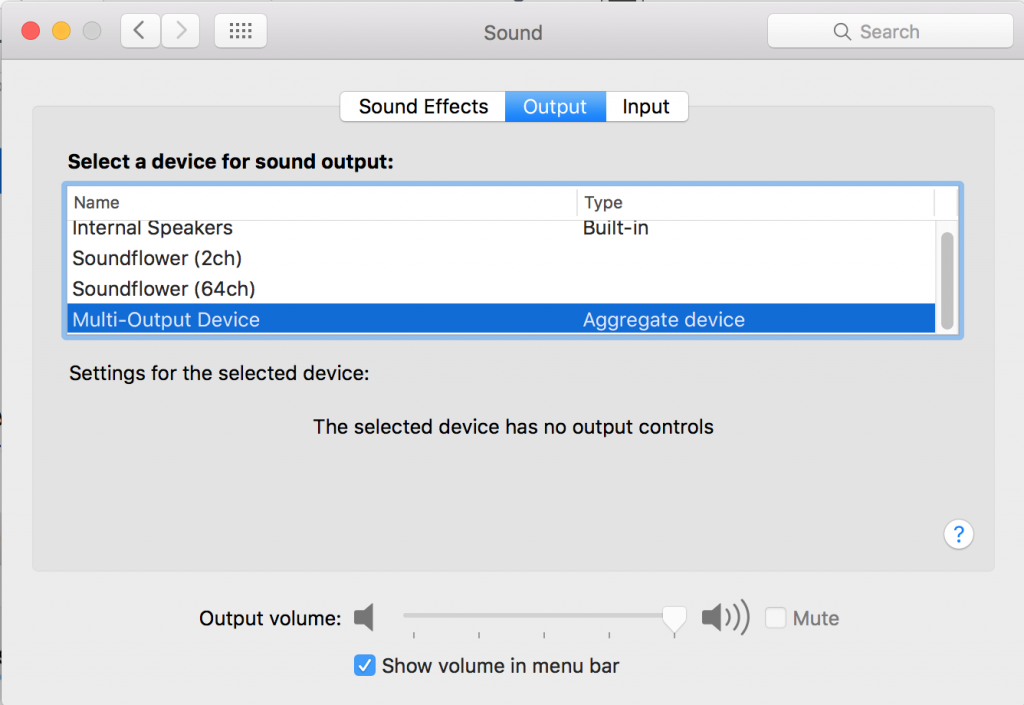
By default you’ll only hear audio from the Avermedia and the microphone. If you play a song on your Mac you will not hear it in the stream. This is where SoundFlower comes in. You’ll need the SoundFlower software here is this download link and info you should read before installing SoundFlower. It doesn’t install a program you can find or see on your computer, so don’t bother looking for it. It gives you the ability to bridge audio from multiple sources. Once soundflower is installed, Here is a link that explains how to setup SoundFlower to add a Multi-Output device. Once you set the audio to the Multi-Output device, you won’t be able to control the volume in the convention way. See image below.
To adjust the volume that you hear, use two volume control in the Midi settings Audio devices for Built-in Output.
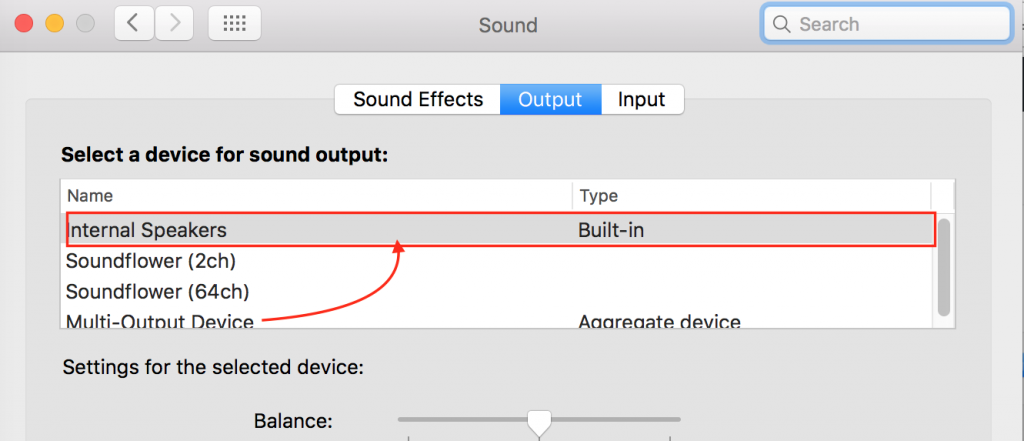
Another trick you can use to adjust the audio after it’s set to Multi-output. I learned this from my wife. Instead of going to MIDI settings and adjusting the two sliders in Built-in Output, go to settings and sound. Temporarily change it from multi-output to internal speakers, or headphones. Adjust the sound like you normally would and then change it back to multi-output. Image below.
Adding desktop or laptop audio into your stream
When you’re ready to stream and you want to have your audio from your laptop as part of the stream. For example, if you want music from iTunes, Spotify or Discord to play in your stream. (See additional Discord instructions below)
In the earlier step we created the Multi-Output device. Now go into the Sound settings in System Preference and set the Output to to Multi-Output device. See image below. Note: You don’t need to do this if you only want the audio from the game and your microphone in the stream.
Getting desktop audio into OBS
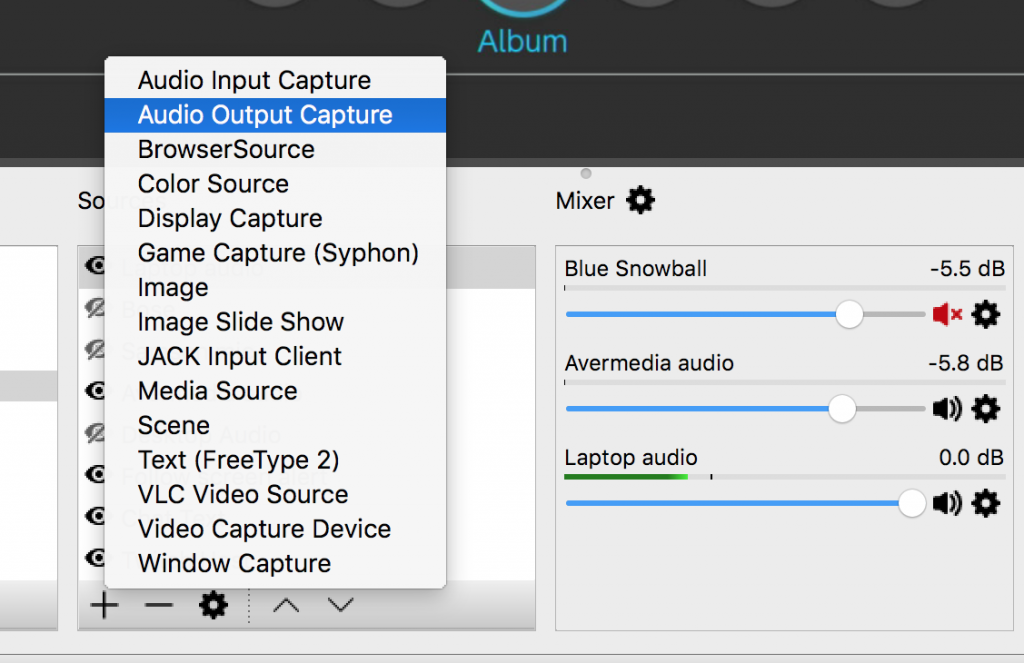
In OBS click the plus (+) and add “Audio Output Capture” (image below) Name it something like “Laptop Audio”
Next select in the drop down under device, (SoundFlower 2ch). Click OK and now you will have an audio source that says “Laptop audio” this will be the audio from anything that plays sounds on your laptop, iTunes music, Discord, etc.
Increasing desktop audio volume beyond the maximum
I found that after I added the audio source to OBS even with the volume slider all the way up the volume was not loud enough. Here is how to increase the max volume. This will work for any audio in OBS.
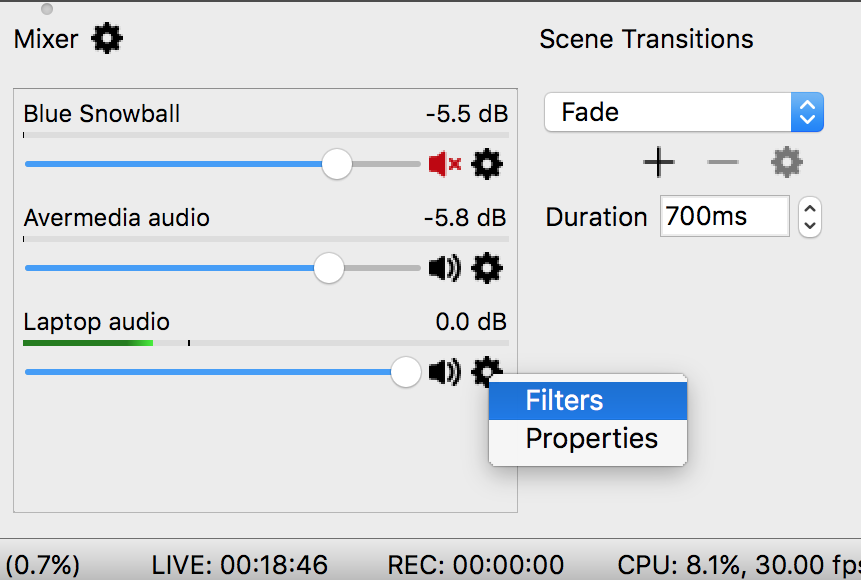
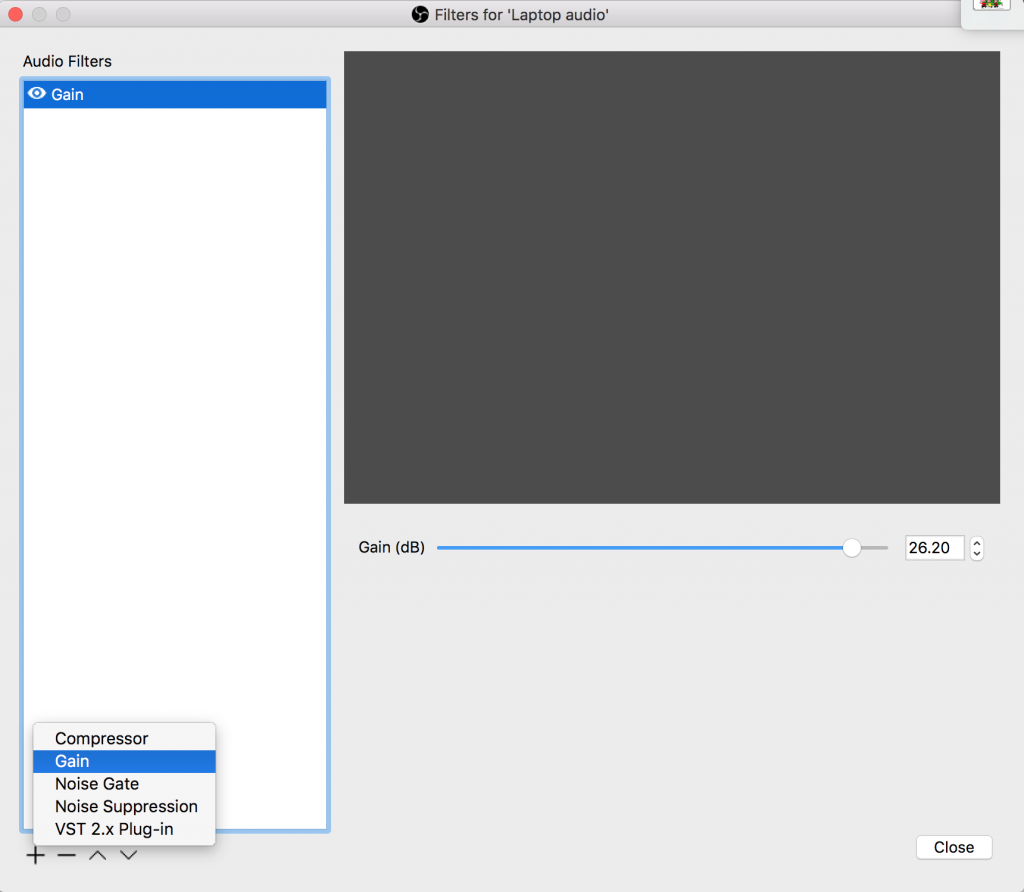
Click on the cog next to the audio source. My source is labeled as Laptop audio. Click on filters.
In the filters area click the Plus (+) and add Gain. Than slide the gain control up, as you see in the above image.
Adding Discord audio into your stream
Similar to what we did in the above steps we’ll set the output in Discord to multi-output. In Discord go to user settings -> Voice and Video. Set the output device to Multi-Output Device. That’s it, make sure in OBS under sources you have an audio source set to Soundflower (2ch). As described above. 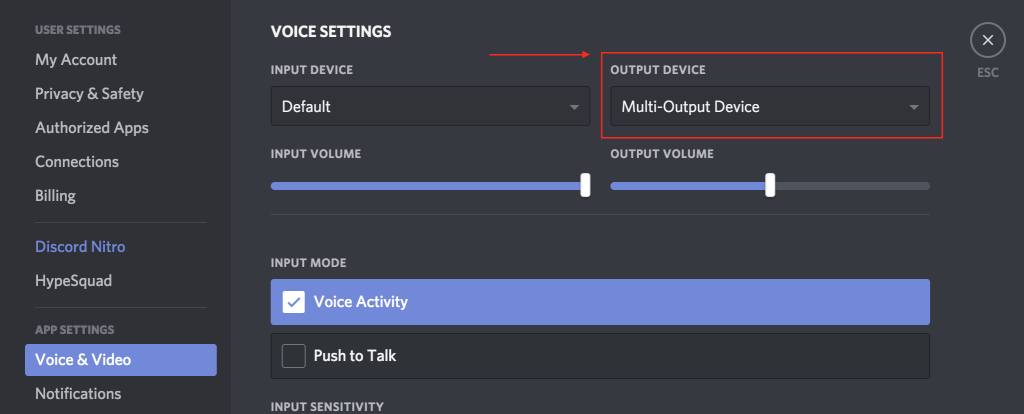
Issues and options: Audio out of sync
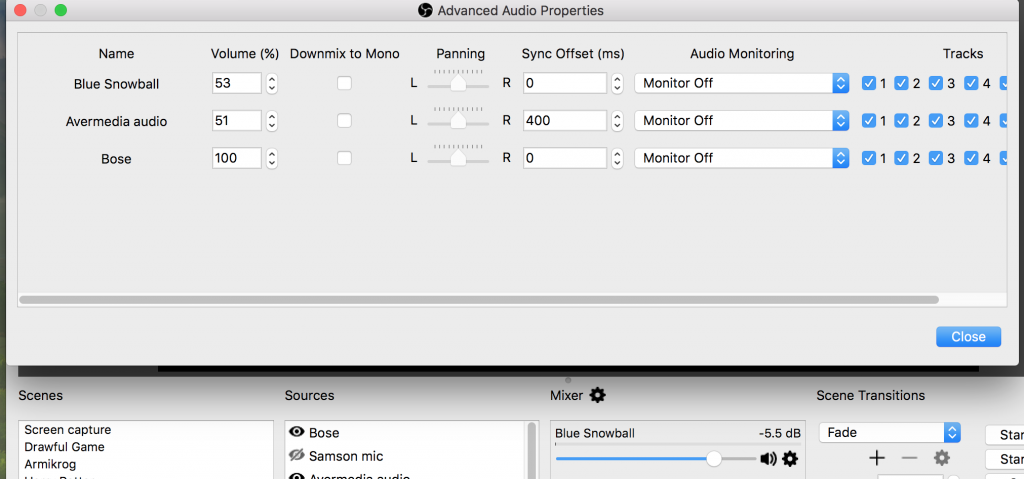
I think it’s common for the audio to be out of sync. My voice audio was ahead of the stream so I added a delay to the Avermedia in OBS mixer settings. You can access mixer settings right from the front of the OBS screen, click on the small cog next to the word mixer. Note, this cog is not in later versions of OBS, the mixer settings are located somewhere else in the OBS program.
Above you can see I added a 400ms (millisecond) delay to the Avermedia which brings it in sync with my microphone audio.
Also note the Monitor off setting. If you turn this on the game audio will come through the speakers or headphones of your Mac. Problem is, there is a delay that you can’t fix with a setting. It’s not a big delay, but it’s enough to be noticeable. There is a solution and I’ll discuss this. Note, it may not be an issue if you are streaming a game from the Mac directly.
How to hear game audio without a delay
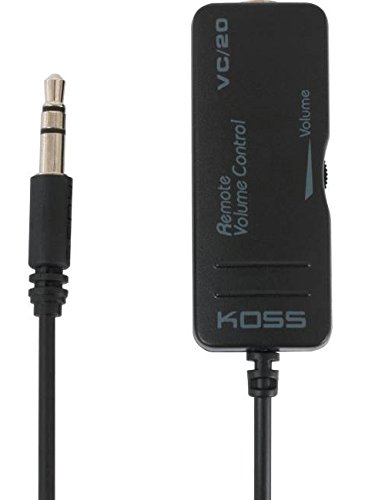
You have two options for hearing the game play. Either plug the headphones into your Avermedia or plug them into your Switch, Xbox, or PlayStation. I plug them into my switch using a Aux jack. Problem is there is not volume control and it’s likely that that volume will be too loud. There is a volume control on the Avermedia, but it doesn’t adjust the volume on the headphones. It only adjusts the microphone volume if you were using a Mic through the Avermedia, which is something I don’t do. The solution is a small device made by Koss.
You plug this Koss VC/20 inline with your headphones, it has a volume control wheel which enables you to set your volume control.
Listening for the Twitch chat (optional)
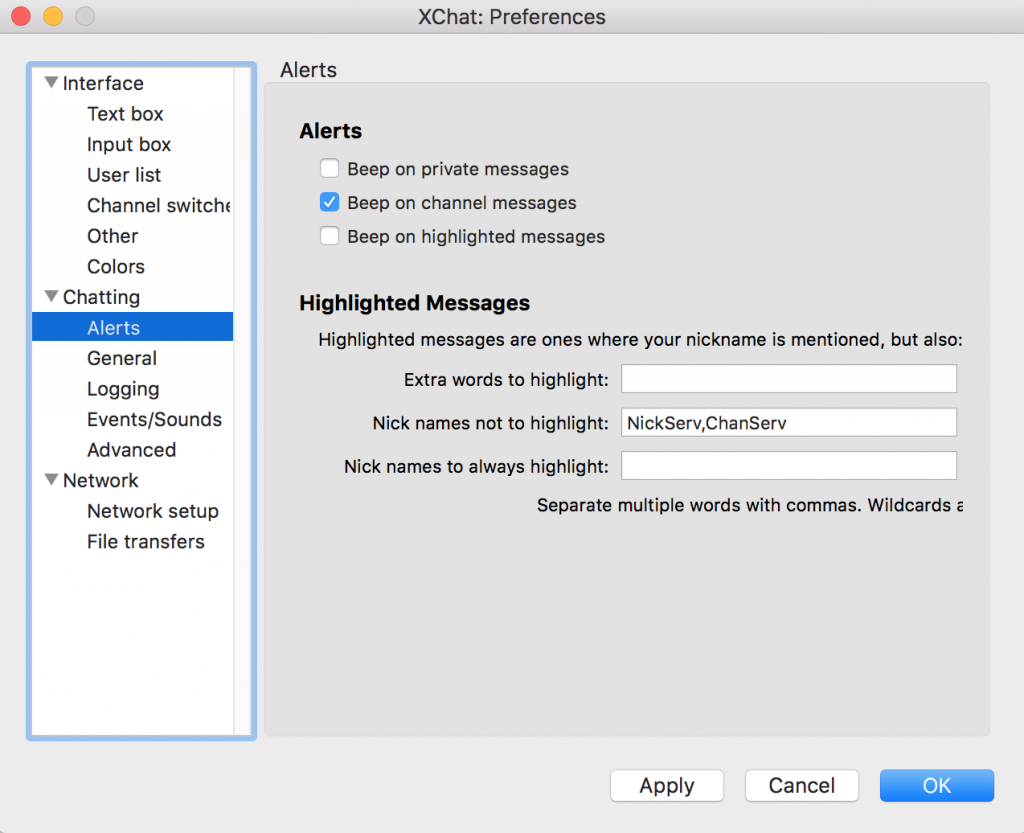
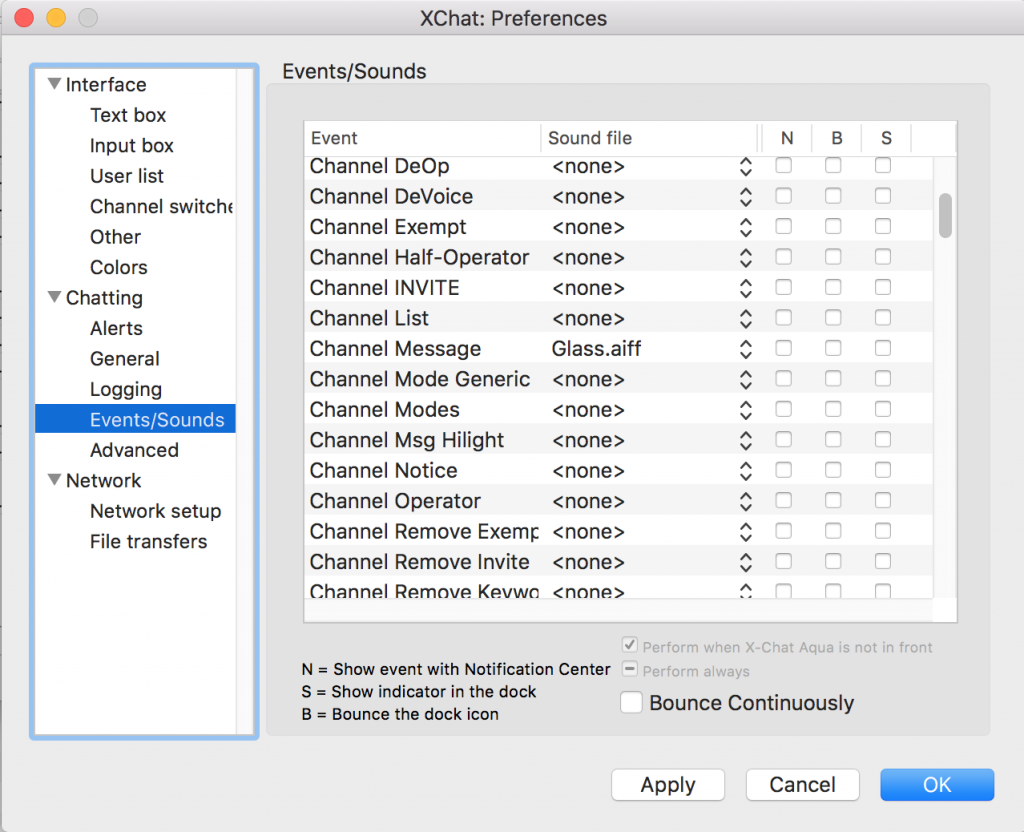
If you’re busy playing a game it’s easy to miss the chat come in. I use X-Chat Aqua to connect to Twich chat via IRC protocol. When a chat comes in, I set it to play an audible tone so I can quickly respond to chat. Once you get X-Chat Aqua installed here is a link that describes how to configure it to connect to Twitch chat. This is completely option.
Above image, set it to Beep on channel message
Above image, set the channel Message to the sound you want. I have mine set to Glass.aiff. It sound like the ping of a wine glass when I get a chat message.
In addition I use the Logitech c922 webcam and stream to Twitch https://twitch.tv/mr_finley_

Have you tried using the Local RTMP server to connect the Elgato HD60 to OBS?
Just asking cuz I got a cheap Elgato HD60 (Older version) and I have a Mac.
Was wanting to record videos from PS4 Pro to HD60 to Mac.
No, but you shouldn’t need to setup a RTMP (real time streaming service) to save game play locally. Elgato’s always done well even on a Mac with Game Capture HD recording video locally. The problems always occurred when streaming from the Elgato. I think it’s a function of how it encodes data to be sent over the network. It’s an interesting idea to setup a local RTMP server and for that to be captured by OBS for the purposes of streaming, but I have not tried it. I don’t know for sure, but I think the same issues would occur since Game Capture HD would still be the encoding software. Another issue might be CPU usage. Game Capture HD and OBS are processor intensive, so having both open would overwork a laptop.
are you saying that by switching to the AVerMedia Live Gamer Portable 2 the device will be found in the source of obs on MacBook Pro?
Yes. It’s interesting that I didn’t add an image for that or describe how to add it. I think the reason is because it works right out of the box the way all other articles describe how to add a source. I may add it into this article later as a reference and for completion purposes.
I would like to use my MacBook Pro Running Sierra to stream from my desktop to my twitch channel. I’ve reviewed the article but I really hesitant to download the software and try because ultimately Twitch seems to want to authenticate using a text to a cell phone. Will twitch allow authentication for broadcasting by sending the code to email the way they authenticate users logging in? Because that would be the only way I could even get started. If they don’t allow authentication via email then there is zero point in trying to set up all the software and audio options, right?
Hello, It’s not related, but for non partnered or non affiliates they don’t require 2FA (authentication via text message). If you do need it, you could try an IP phone service like Google Voice and the text message can go to an email.
Hi, first off– thank you for this in depth article! Secondly– For some reason, the LGP2+ doesn’t show up as an option in OBS when I go to add a new video capture device. Any idea why that would happen? I plugged into my macbook pro (all the cables are correct) and OBS doesn’t even register it. Thoughts? Suggestions? I’m happy to try anything! Thank you so much!
Based on this page it’s compatible. https://www.avermedia.com/product-detail/GC513 Check out this video, https://www.youtube.com/watch?v=M8h_zp1Xl0Y and at 4m:50s it does describe a solution to the issue.
Hi,
first of all, thank you for your very detailed article.
I just have a basic question. I would like to start streaming from my PS4on Twitch via my MacBook Air (2017). Do you think the MacBook Air is good enough for streaming? Because I don’t have a PC. And if yes, which streaming softwares would you recommend? The same as in this article for the MacBook Pro?
Thanks for your help!
Enno
Thank, that’s much appreciated. You can stream directly from a PS4 to Twitch. Here’s an article about that. https://www.businessinsider.com/how-to-stream-on-ps4 Yes, I’d recommend OBS, I don’t think there is better software out there for a mac. Our other computer is a MacBook Pro (2015) 13, with 2.7 ghz processor and 8gb RAM running Catalina. It’s barely enough to run a Twitch stream. I have to close everything except OBS, a browser, optimized OBS settings to be easy on the processor, and even then the stream still lags. If your hardware is = or less to this, expect issues.