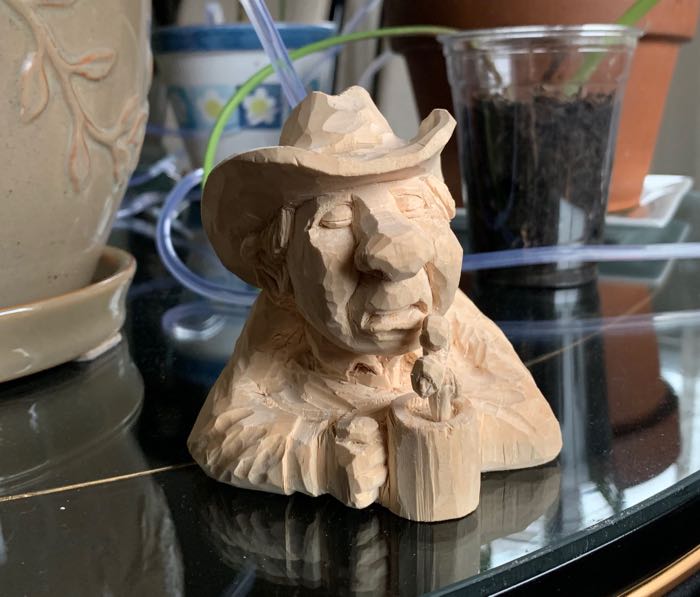
This article will explain how to get started in wood carving (figure carving or whittling) it’s also sometimes referred to as carving in the round. I’ve been carving for 4 years and this is what I’ve found helpful to me. I’m a new enough carver to know what new carvers want, but experienced enough to speak to what’s available. A big thanks to my teacher Dale who has been carving for over 40 years.
Recommended tools
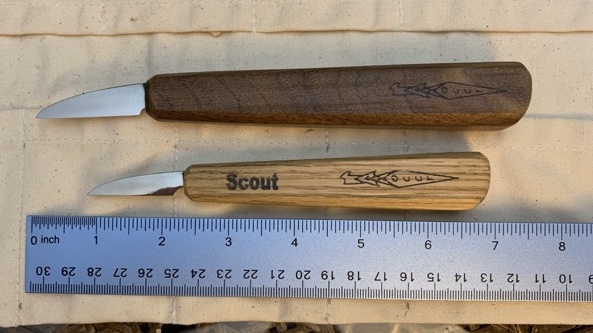
First you’ll need a carving knife. There are many brands to choose from. When I first started I used a recommendation by Gene Messer. He has many youtube videos and in one, he said all you need to get started is a knife with a 1.25″ – 1.5″ blade. The Scout is what I started with and I still think it’s a good knife. Don’t worry about what additional sizes to purchase at first. After you do a bit of carving you’ll know what you want to get next to suit your style of carving. The top knife has a 1.5″ blade and the bottom a 1.25″ blade. Either will work as a starter knife.
Higher quality carving knives
OCC Tools
Helvie Knives
Drake Knives
Deep Woods Ventures knives
Pfeil Swiss made
Lower priced knives
Flexcut Knives
Beavercraft knives
Specialty knives for flat plane figure carving
Pinewood Forge knives
Knives I don’t recommend
Sets like these (a single carving knife will serve you better)
Morakniv (From this Reddit post: Morakniv aren’t really designed for figure carving. They’re Slöjd knives – for green woodworking (in the Scandinavian tradition). They excel at this purpose. Moras are good for spoons, kuksa, that kind of thing.)
Carving gloves
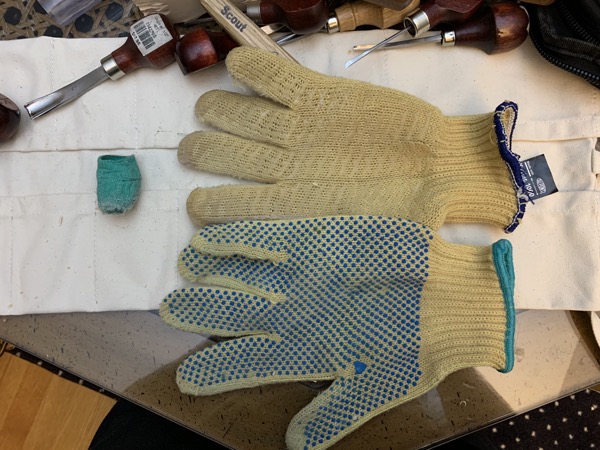
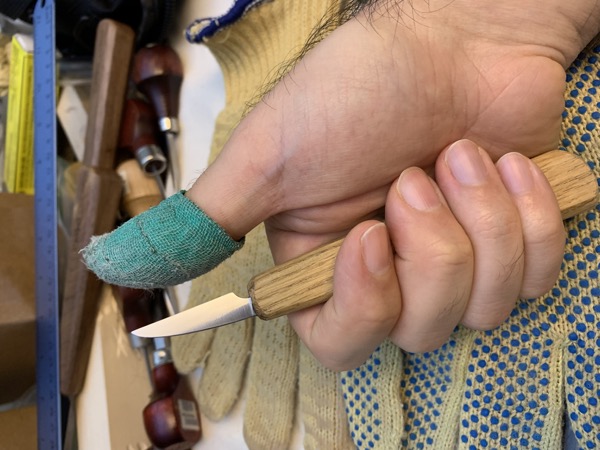
Next I recommend carving gloves. There are many brands out there to choose from. You’ll want to search for cut resistant gloves or woodcarving gloves. My only recommendation is that the fit is not too tight. I have a pair that’s too tight and it causes my hand to fatigue while holding the wood.
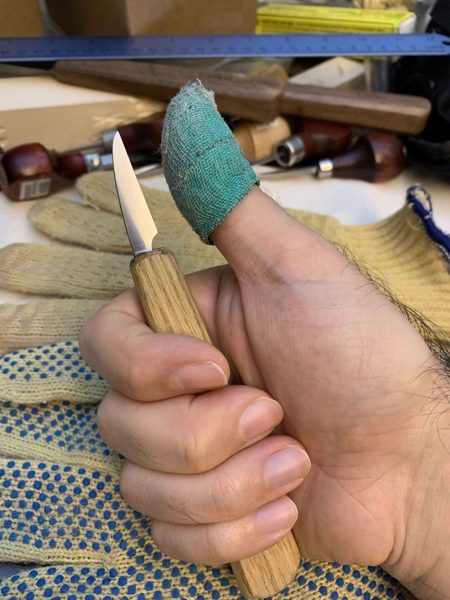
Some people use a glove on both hands like my instructor. I prefer to make a custom thumb guard with cut resistant tape. This wrap is called finger tape, it’s gauze coated with latex rubber. I wrapped this around my finger and created a form, it took several wraps to make this thumb protector. Once enough layers are built up it will keep it’s shape, and can be taken off and reused. Make sure it’s long enough to go below the main crease on the inside of your thumb.
Sharpening
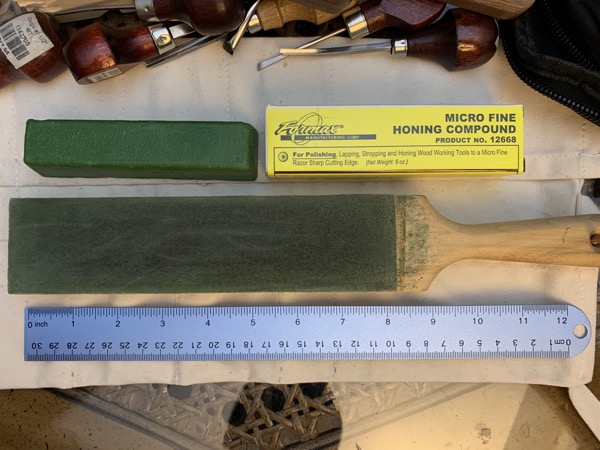
This is what I use to sharpen, a 8″ leather strop attached to a piece of wood. The leather is coated with honing compound. That’s the green bar. It contains abrasives, (chromium oxide and aluminum oxide). You can also use aluminum oxide powder and sprinkle it on the strop. The bar is easier and less messy than the powder since the abrasives are bound in a waxy matrix. I just rub it over the leather like a crayon. Only a light coating is needed.
No, you don’t need to buy a sharpening stone
I’ve been carving for years and have not had to sharpen my knives on a stone. You don’t need to buy a stone at first. Sharpening on a stone is a precise skill and without a good deal of practice you’ll probably dull or create and uneven edge. That’s not a say it can’t be learned, but you can probably carve for a few years or more without ever needing to sharpen on a stone. Harely Refsal has said that in some cases he’s never sharpened some knives on a stone, only stropping.
Sharpening: How to strop a knife
Here is a good video by Harley Refasl that shows how to strop. Notice when he rolls the knife to the each side he rolls it over the heel, the back side of the knife, not the cutting edge. Here is a post that describes how to set the angle and pressure when stropping.
Wood
The wood most carvers use for figure carving is Basswood, in Europe it’s called Linden. This is because it’s softer than many other woods, but is hard enough to hold a great deal of detail.
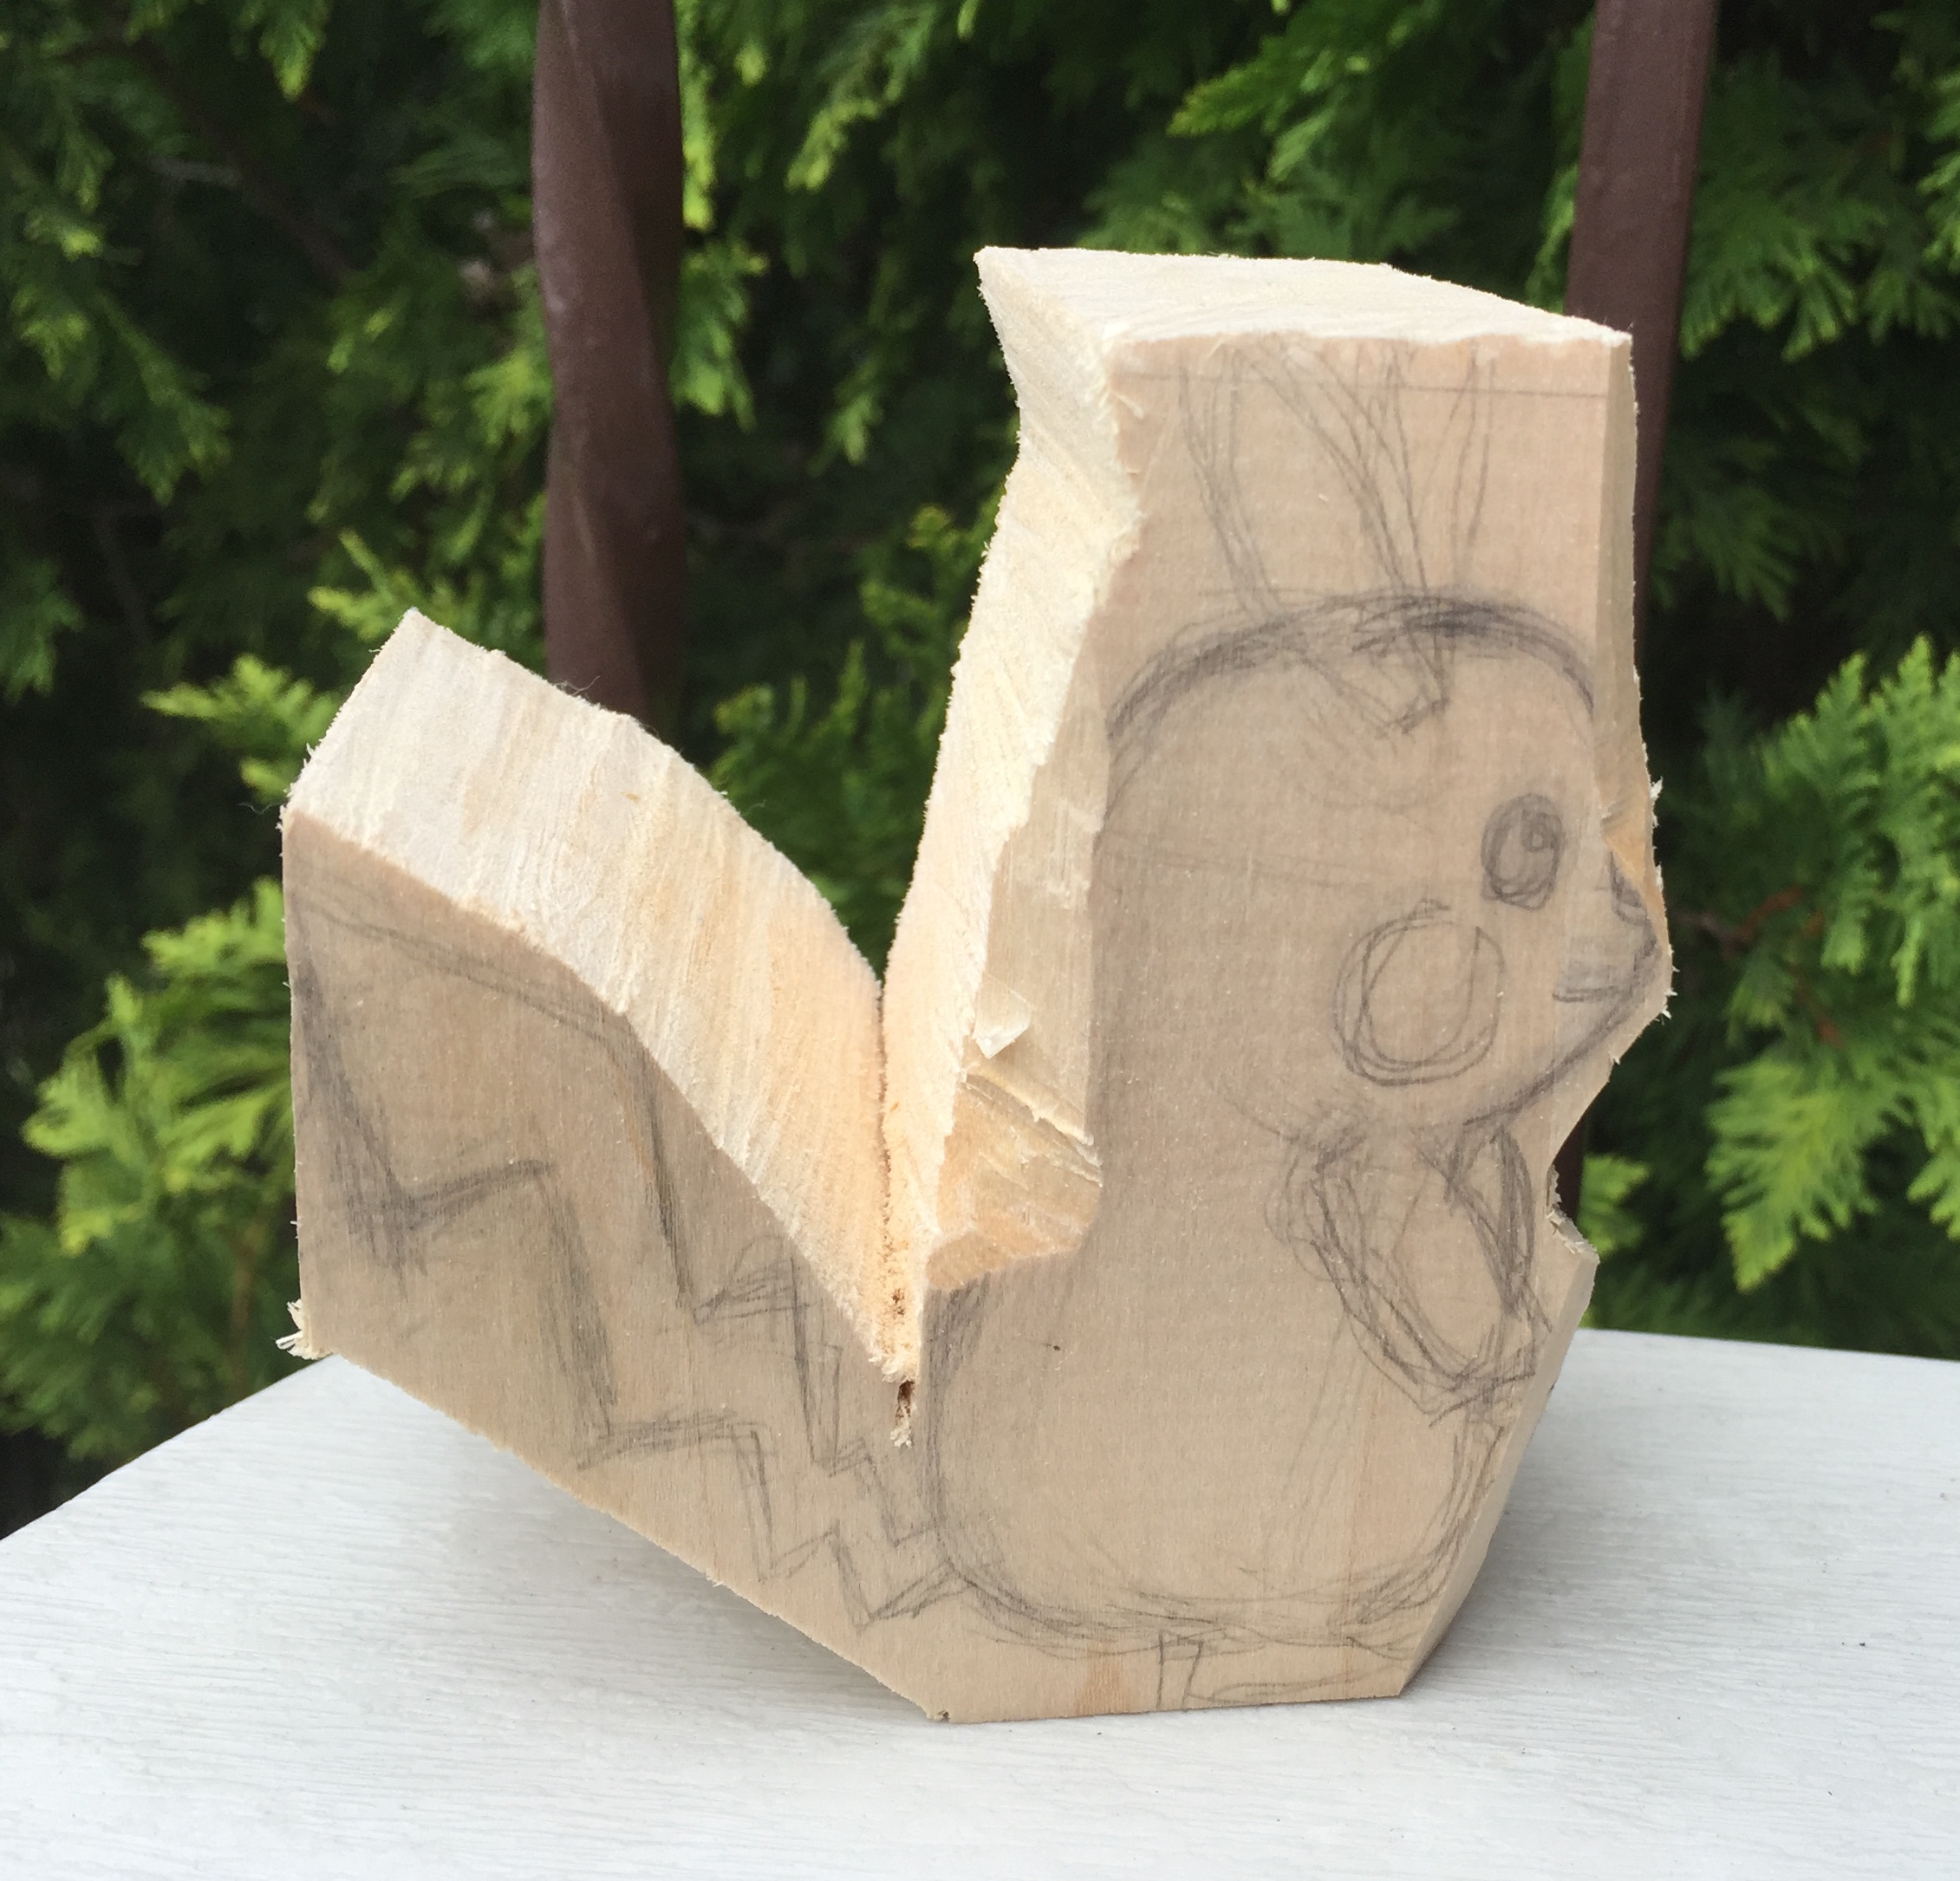
Roughing out

Roughing out is the process of carving a block of wood down to the general shape of what you want to make. After the rough out smaller cuts are made to refine the shape and then smaller details are added. A block of wood can be roughed out using a knife which can be hard if you have to remove a lot of wood. The easiest way is with a bandsaw. If you don’t have a bandsaw you can use a coping saw. Below is a photo of a coping saw.
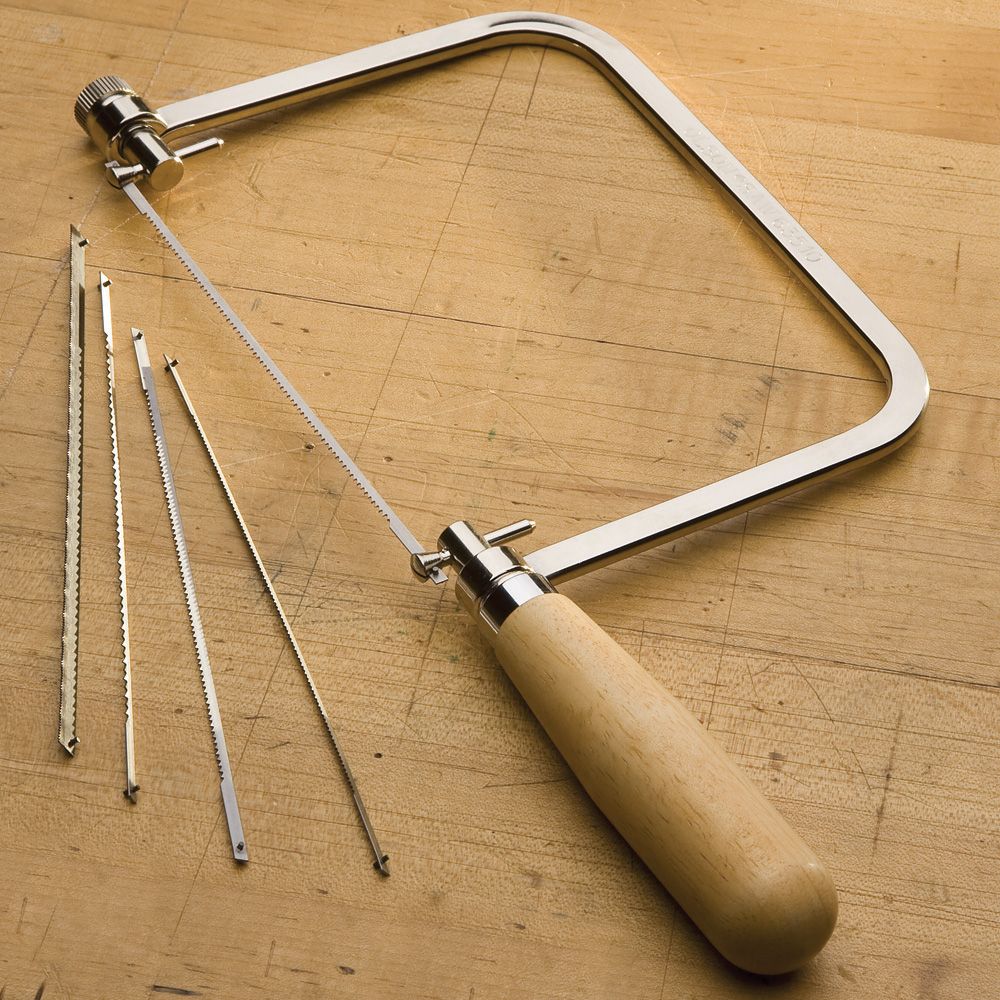
When I first started I used a coping saw, but found out quickly it doesn’t work well unless you can clamp the wood to something while you saw it. So consider the need to also clamp your wood to a firm surface when using this or any saw. A bench clamp or a couple ratcheting bar clamps would work if you have a sturdy table to clamp it to.
How to tell if your knife is sharp
The best way to tell if your knife is sharp is to cut end grain and see if your knife leaves a smooth clean cut. I believe this is better than testing on your nail, or shaving hair. My teacher tells me you’re not carving hair or nails.
Here is a video of carving end grain with a sharp knife. You can see that I get a clean and smooth cut.
Videos that teach how to carve
To start carving you’ll want to master the four basic cuts. Here is a video by Sharon My Art that explains how to make these cuts. I’d also recommend checking out her other videos. Here is a three part video by Grandpa’s Hands that I’ve referred to many times, he makes a person from start to finish.
Articles
I’ve written a series of articles of my woodcarving journey.