I’ve been working on this project for a while now and I wanted to share my experience with the different security camera software and hardware that I researched. There are a lot of different terms out there for these system, some are:
Network camera software, IP camera system
Security camera system, Video surveillance
CCTV and NVR
I’ve tested several kinds of software to manage the camera systems:
WebcamXP
Blue Iris
Netcam Studio (beta)
Sighthound
Milestone* (I didn’t actually try this, but I did research it)
iVMS-4500 (this is the software for the Hikvision camera)
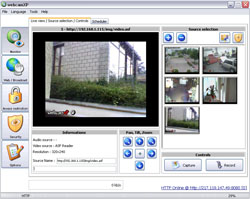
WebcamXP
My current system employes Sighthound, but the first software I used before that was WebcamXP, I used it for a bit over a year. It has a lot of features, and a nice interface. I recommend it, but I think in time they will be moving away from it in favor of Netcam Studio which is currently in beta, it’s been rewritten. I’ve tried the beta version on a Windows XP machine. It worked with an Hikvision camera, but it was not completely stable, however I think in time it will be.
Blue Iris
I was curious about Blue Iris and installed the trial version. It also has a friendly interface and I was able to somewhat quickly wrap my mind around how it worked. I setup a few rules to catch movement. I had to modify, I think the buffer so that it would pickup recording a few seconds before the movement started. There was a warning about how if the buffer was changed it would affect performance. I didn’t see much of a difference and the further I pushed the buffer, the further it “pre-recorded”. I may not be using the right term, but I think you get the point. I think it was actually called frame buffer size.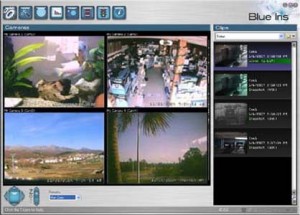
iVMS-4200 Client
This is the software that comes with the Hikvision camera. It’s very similar to the web interface, but I found it slow, confusing and limited.
Milestone
This apparently is the “benchmark” software for video surveillance systems. It required .NET 4.0 and would technically run on my old Windows XP machine. However, I didn’t install it because I was pretty sure it would have killed it. This software is resource heavy and according to their website requires a more modern system. Some of the requirements for their higher end versions was a Xeon processor. Until you get into the higher end versions you don’t have the ability to set rules for motion capture events. The download for the essentials was around 900mb in size. There is a free version called XProtect Go.
Sighthound
I decided to go with Sighthound for my NVR system, and so happy that I did. The software is modern, as is the interface. I use the system to watch for and record movement in specific areas. Since my 3mp camera creates very large clips I wanted to only record movement. I set the camera to record at the highest resolution and lowered the fps (frames per second) to 12. It goes up to 20, but 12 was enough, and lowered my storage requirement. I set the video to be stored on an external USB drive. It seems to be fast enough but, one problem I had was the drive went to sleep after a period of inactivity. I fixed this problem by install KeepAliveHD, there is also NoSleepHD. Both programs update a simple text file after X number of minutes on the USB drive which keeps the drive from dozing off.
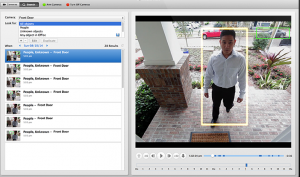
I can’t say enough nice things about Sighthound. I love the rules editor. You can make some really cool rules. I have one that records any movement on my property, and one that records “people” that are walking on my street. I had no idea that my driveway and steps was a freeway for the neighborhood cats. The system can also determine what a person is and only record that. I live in an urban area and it was a real treat to see this.

This image (below) was captured with the IR night vision on. You can see the Infrared light up the reflectors on the bicycle wheels.

I have another rule set so that if someone walks in a certain area it will send my phone a text message with a photo of the event.
A quick overview of the rules editor (how rules work)
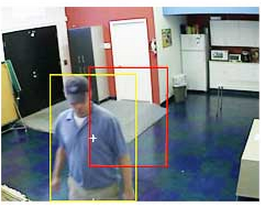
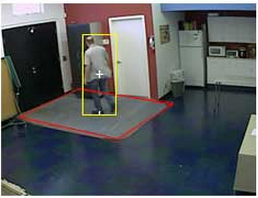
The red box is a region that you set and can make any size or shape for an area that you want to monitor. The yellow box is the person and the + is the center of that person or “object”. Sighthound can perform actions based on these rules. Say for example you want to record when an object is inside the region then based on that it will start recording when the + is inside the red box like in the (left) image. The right image show a person “on top” of a region, this is defined when the center point of the bottom line of and object is inside the red outlined box. The center point (right image) is the small vertical line at the bottom of the yellow box or “person”. The reason this is so cool, is because you can watch the results of your rules and see why a person or object triggered a video and make adjustments based on that. Here is the complete list of the rules you can create. What’s even more cool is when a video even is triggered it starts recording several seconds, before the triggered event! Here is some of the science behind how it all works.
Sighthound iPhone App
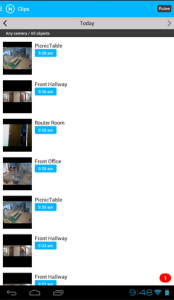
I like this app, again it’s simple, clean, stable and well designed. It shows you a tiny photo of the event (right image) and you can click on them to watch, typically a short video. Problem is that even small videos can be between 16mb and 49mb using a 3mp camera. They take several long seconds before they start playing. This is faster if you are on a WiFi connection and have a lower resolution camera. This is par for the course.
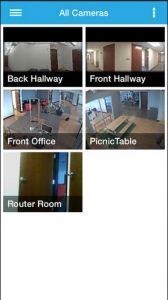
Hikvision iPhone app
This app is called iVMS-4500, I think it’s great, but I did find one issue that drove me crazy. (I’ll explain below) I use this app to get a live view of the camera, it defaults to the sub video feed, so it’s fast and the clarity is good. You could use the Sighthound app, but it’s the full video resolution and it takes a bit to load before you can start viewing. IVMS-4500 is pretty instant.
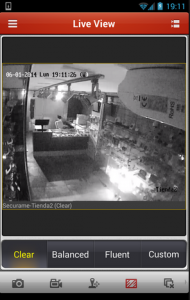
At the bottom if you touch the square with the diagonal lines it will give you four options, clear, balanced, fluent, and custom. Don’t touch any of them, for some reason they change the main feed that Sighthound uses to record video. I think balanced is the sub feed (the lower resolution lower bandwidth feed). The clear is the main feed, and I don’t remember what Fluent did. Custom you can use to set a custom resolution. When I open the app it defaults to Balanced and I don’t change it anymore.
My Computer Hardware
The machine I’m using is about 4.5 – 5 years old. It’s a Pentium Dual Core 2.4 with 4gb of RAM and 160gb drive internal drive and an external 160gb drive. It runs Windows XP Professional. It’s just enough horsepower to run the camera, when I add a second USB cam the CPU usage goes up to around 90%.
My Security camera software
I decided to go with Sighthound. It has a 15 day trial which I took advantage of before purchasing. I am very impressed with Sighthound, firstly I noticed it was stable software with a very easy to use interface.
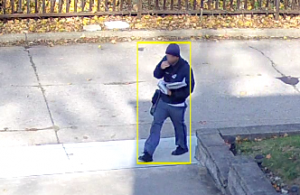
The above image was captured during the day, the object is in a yellow box and is considered to be “people”. I pulled this image from the web interface. I forgot that Sighthound in addition to an app has a great web interface you can use to view your surveillance footage.
My IP camera
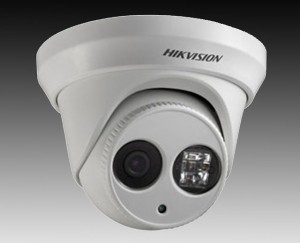
I researched many different brands of IP cameras and decided to go with the Hikvision DS-2CD3332-I this is a 3mp PoE IP camera. Note: you will see this camera advertised as the model number DS-2CD2332-I. I believe the 2332 version is the overseas version and the 3332 is the US version. I purchased it from Wrightwood Surveillance. They were kind enough to install the newest firmware on it before shipping it to me. One issue I had right off the bat was the recorded video was un-viewable, it was a mess, static and lines and mostly blank. Problem was the camera was set for 50hz instead of 60hz. One is Pal and one is NTSC. These are Europe and US systems. I changed it to 60hz using the web interface and that fixed the video problem. One thing I don’t like about this camera is that it runs IIS, Windows version of webserver. Its actually been working very well and is very stable, I just feel that typically Windows implementations are bloated and slow and I think Linux is a better solution when it comes to imbedded devices.
Camera Mounting
I’m going to describe how I mounted the camera to a brick wall and had the wires come out of the side of the camera. Typically with this model you have to drill a big hole in the center to put the wires through with the harness, but thats not practical in brick.
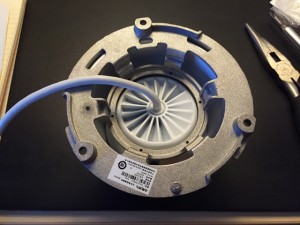
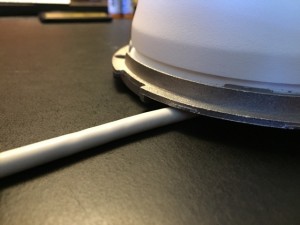 This is the back of the mounting bracket, on the (left) you can see where I ran the wire. The frame holds the mounting bracket just enough away from the wall for the wire to fit under. See (right) image.
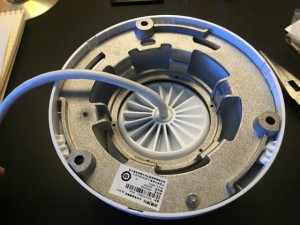
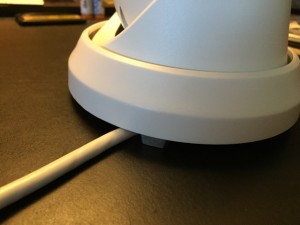 The above (left) and (right) image illustrates the problem with mounting it this way. There is no place for the wire when the plastic cap is placed over the mounting bracket.
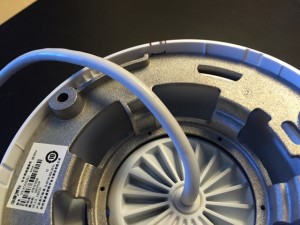
The above image shows where I marked it with a marker in order to notch it out. Note, make sure your wire ends up to the right of the raised metal flange, otherwise there won’t be enough room for you wire.
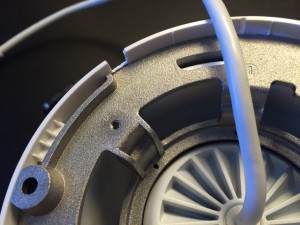
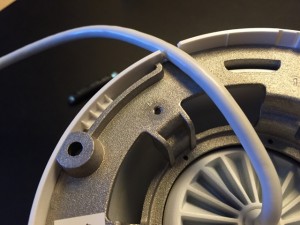 I’ve notched the above and you can see the wire fits nicely.
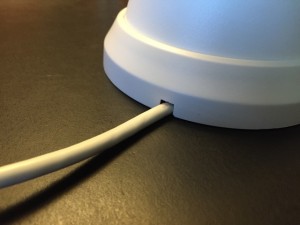
The above photo shows the wire sitting flush.
For a detailed review of this camera and the web interface settings check out Network Camera Critic’s review here.
Other IP cameras I researched
Dahua IPC-HFW4300S 3MP Eco-Savvy, this seemed like a very good camera and got good reviews. I decided against it because in the end I didn’t want a bullet style camera.
